How To Create And Use Comments In Scrivener
Scrivener Comments
Scrivener has different commenting functions to annotate your draft.
This might be useful for yourself, when you have certain text areas that you want to find easily or mark up to get back to later.
Or, maybe someone else who is also using Scrivener gives you comments about what you wrote.
Whatever the application, let’s look at how comments work in Scrivener.
Before we do that, just one note about the terminology here. Comments in Scrivener are what often is called “Notes” in other applications, because basically you are – in a way – adding notes to your document. But don’t get confused here!
Scrivener stores notes in the “Notes” section in the first section of the inspector. Your Scrivener notes are an extra document so to speak that is saved together with the document in the binder.
What we are talking about here, are comments. Just so you dont’ confuse the two.
Creating Comments
To get to the comments section, open your inspector by clicking on the “i” button in the toolbar, and then go to the last tab, the one most to the right that has that speech bubble as icon.
When you open that up you see that at the top it says “Comments & Footnotes”.
Don’t worry about the footnote part for now, we’re going to look at that another time. Right now, let’s just focus on comments.
To place comments in your draft, just select the part that you want to link to the comment, and then click on the speech bubble icon at the top of the “Comments & Footnotes” pane. Not the speech bubble way a the top, that one just selects this inspector section. The one a little bit underneath.
When you click that, Scrivener will automatically create a new comment and it also gives you time and date when this comment was created in case you want to include that.
Also, the comment field is already active and time and date are selected, so in case you don’t need those, just hit the backspace key and they’re gone. And now you can enter whatever comment you want to link to the selected text in your document.
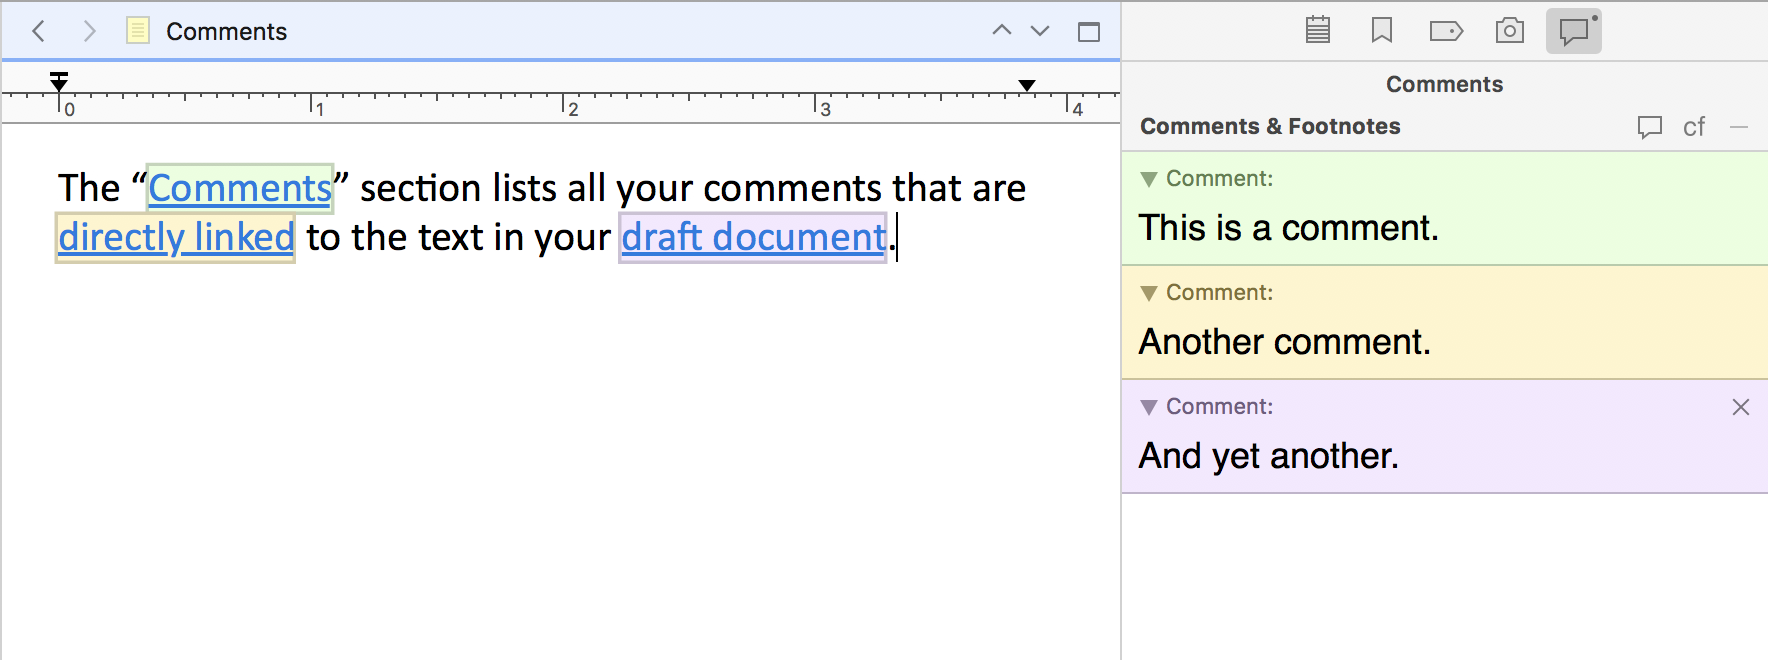
Accessing Comments
As you can see, the selected text now is underlined and the color changes. This is because Scrivener has now created a link to your comment.
 If you click on it, it will jump to the comments window and highlight the corresponding comment field there.
To delete a comment, just click on the “x” in the upper right corner and it’s gone.
Comment Colors
You can also change the color of your comments, just right-click in the comment field and select a color, or, if you prefer a custom one, go to “Show Colors” and create a new one.
Comment Font and Formatting
When your cursor is in one of the comment fields, you have most of your regular formatting tools available. The tools that don’t work inside the comments are greyed out. For example, you can’t create a list in a comment, but most of the formatting tools work.
If you want to return to regular formatting, just right-click on the comment in the inspector and choose “Convert To Default Formatting”.
If you don’t like the default formatting setting, you can change that in the preferences. When you go to the “Editing” tab and then click on “Formatting”, almost at the bottom you have the “Comments Font” setting that defines your default comment formatting.