How To Handle Revision Colors (Production Rewrites) In Movie Magic Screenwriter
Movie Magic Screenwriter Revision Colors (Production Rewrites)
In this article we’re going to go through the production cycel with Movie Magic Screenwriter in order to see how revisions, or “revised pages” work.
Let’s look at each of the steps.
If you don’t know how the production cycle works in general, please go and read the article about the production steps first, so you get a general idea of what the steps are and why. Then, you can come back to see how those steps are done in Movie Magic Screenwriter.
Issue the Shooting Script
First, we want to lock the pages and number the scenes. This can all be done in one step in Movie Magic Screenwriter if you go to “Production – Lock the Script…”.
A warning box opens that asks you basically if you’re sure you want to lock. If you are, just click on “Lock” again, and the “Lock the Script” window opens.
 Here you have a bunch of settings that let you set up how you want your locked script to appear and behave.
At the top you can turn on top scene continueds, bottom scene continueds, scene numbers left and right, and auto-revision marks. They are all checke by default but you can deselect them if you like.
Then, on the right side you can check the elements that you want to lock: scenen headings, page breaks, and all header text. Usually these are all checked and it makes sense to leave it that way.
Down below you have two text fields where it says, “Set Up Header Text”. The first line is usually pre-filled with some text. If you want to change that you can use the buttons where it says “Codes” and use them to define what kind of information you want in your header.
Just place the cursor inside the upper field, delete the pre-filled text if you want and click on the “Code” fields to have the program fill in the code fields for you.
The first text field is for header information on the left side, the second text field is for header information on the right side that will appear right under the page number.
Below the text fields you can check whether you want the header to be printed on every page. That means, if you check it, the header will also appear on the title page. If you uncheck it, it will not be on the title page but on all the other pages.
Then, you can check if and what revision color you want to go to once you lock the script. Keep in mind that only the pages that have changes jump to that revision color, if you don’t change anything on a certain page, that page will stay in the white revision until you have changes on that page, in which case it will go to the revision color you specify here.
If you uncheck this option the first revision that Screenwriter uses will the white and then it will go through the defined standard revision colors.
At the bottom you can check whether you want the program to delete all the revision marks you already have or not.
When you lock the script, the header will hold the information you defined before, and therefore there will be more text on the page. So, Movie Magic Screenwriter asks you whether you want page breaks to move to gain space for the additional header text, or if you want to cheat the elements in order to keep the page breaks. Cheating will move the elements a little closer together so you will have the same amount of information on each page as before.
Revision Draft Colors
In case you want to change the order of the revision colors, go to “Production – Set Revision Draft Color”. Here you can add colors, delete colors, or change the ones you have.
To change a color, just click on the color bar on the left side and a color chooser opens up.
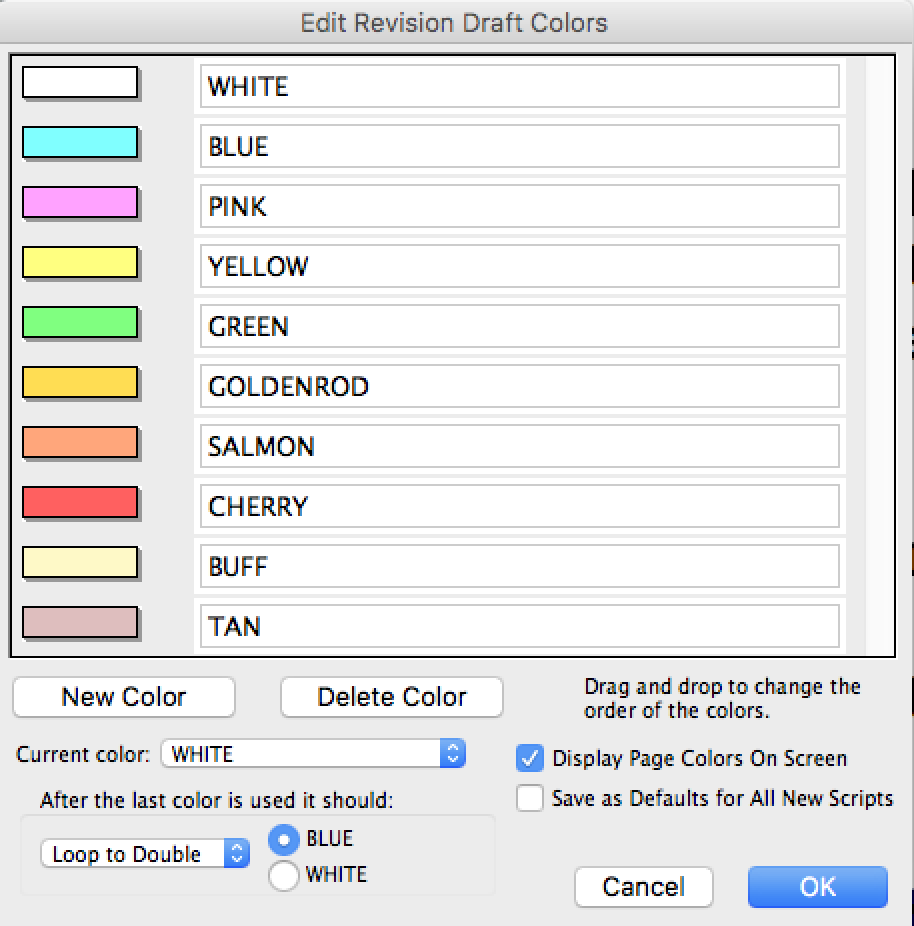 Just pick a new color and give it a new name in the entry field on the right.
Below you have the buttons for adding and deleting colors.
To change the order, just drag them around and put them in any order you like. To drag them go with your mouse in between the color bar and the text field and you see that the mouse pointer changes to a hand. Now you can take that color and drag it to another place.
You can also choose which of the colors the current revision color is and on the right side you can choose whether you want the page colors displayed on screen and whether you want to save these settings as default for all new scripts, in case you changed something.
Finally, at the bottom you can choose how you want the program to handle a situation where you’ve already gone through all the colors once. You can choose between “Don’t Loop Colors”, “Loop to Double”, “Loop to Second”, and “Loop to 2nd” with “2nd” being displayed as a number.
The only difference between those that loop is how the revisions are called. It’s just a matter of taste if a revision is called “Double Blue” or “Second Blue” revision.
Issue Revised Pages
In order to print or export revised pages, go to “File – Print” and select the “Revision” radio button and then from the dropdown next to it you can choose from which revision you want to print the revised pages.
Going to next Revision
After you have exported the revised pages, you can go to the next revision.
In order to do that, just go to “Production – Start Next Revision”.
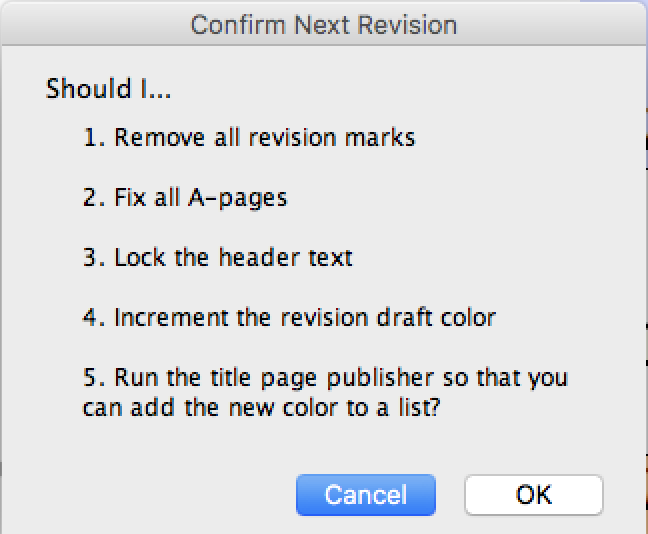 A window pops up that asks you whether Screenwriter should do a couple of things by going to the next revision. Those things are:
- Remove all revision marks
- Fix all A-pages
- Lock the header text
- Increment the revision draft color
- Run the title page publisher so that you can add the color to a list
And if you click OK, Screenwriter does all these things for you. If will inform you that it goes to the next revision, and that it will open the title page publisher, and if you click OK, that’s exactly what happens.
Now on the title page publisher you can put the new name of the revision and the date.
Hit “OK”, and that’s it. You’re in the new revision.
Manual Revision Marks
There is one more feature I want to show you in connection with revisions, and that is manually adding or removing revision marks.
You might run into a situation where you want to manually set a revision mark for an element, independently of whether it has been changed or not.
In order to do that, place your cursor inside the element that you want to set or remove the revision mark from, and then go to “Production – Apply Revision Mark” or “Remove Revision Mark”.
Alright, now you should have a pretty good understanding of how you can go through the production process with Movie Magic Screenwriter and where all the settings are.
If you’re using this function for the first time, it makes sense to just go through the steps once in rehearsal mode so to speak and simulate certain situations before you do it in a real production environment, just so you can be sure what to expect from the software each step of the way.