Outlining Your Screenplay With Movie Magic Screenwriter’s NaviDoc Features
Movie Magic Screenwriter’s NaviDoc Outlining Features
Something that distinguishes Movie Magic Screenwriter from a lot of other Screenwriting software packages out there is its ability to have outline elements directly on your script page. And not only that, you have a lot of flexibility in how to set them up so they really help you staying on track when you’re writing, but you can get them out of your way when you don’t need them.
What is outlining?
Just before we start a quick explanation about what outlining is, in case you are new to the concept. Oftentimes it can be useful to create the structure of your script before you start writing, so the moment you do start writing your scenes and dialogue, you already know what’s happening.
There are several advantages to this and there is a whole debate going on among writers if and to what extent outlining is necessary or even essential. But this article is not about debating the topic of outlining.
This is just going to explain how you can use outline elements in Movie Magic Screenwriter so in case you do want to outline your script, here is how you can do it.
Outline Elements
Let me show you an example so you see what an outline element looks like.
I place my cursor in en empty line at some point in my script and then I go to the Outline panel in the NaviDoc and where it says, “Add Outline Element” I click on the dropdown and choose “Scene Comment”. I could choose any other of these, so for the purpose of demonstration it doesn’t matter.
In case you can’t see the NaviDoc, click the button on the lower left side to open it up, or go to “View – NaviDoc”.
 You see that the program now has placed a box here right on the script page and I can start typing in some text.
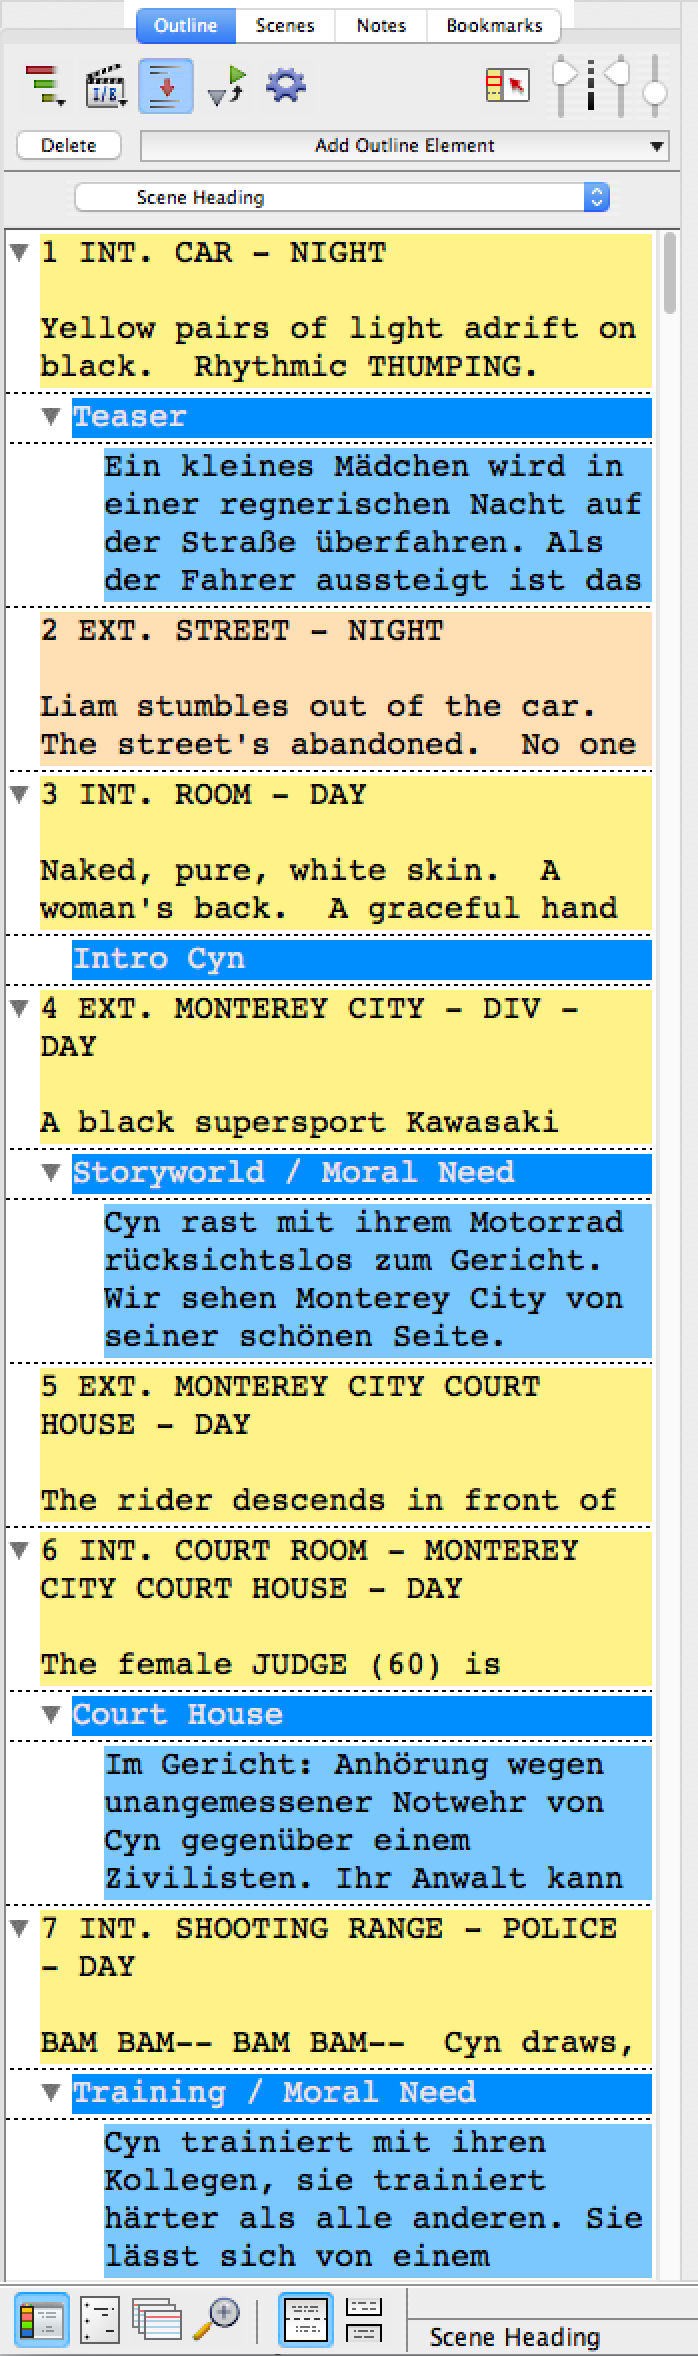
 You also see that I’ve created a whole bunch of these before. By the say, some of these are in German, but that shouldn’t worry you.
The important thing is that you have this little arrow on the left side of the script page that lets you show or hide that outline element, so when you need it, you show it, when it’s in your way, you just click that arrow and it’s gone.
You also see that these outline elements that I already have here show up in the NaviDoc, and they seem to have some kind of hierarchy.
In order to understand better what Movie Magic Screenwriter does here exactly, and how we can make it do what we want, let’s go to the outline element styles setup.
Default Outline Styles
To get to the outline styles setup, you can either click on the dropdown menu up top in the NaviDoc, where it says “Add Outline Element” and then go to “Create / Edit Outline Styles”, or you can go to “NaviDoc – Create / Edit Outline Styles”, or you can go to an empty line in your script, hit “Enter”, then press “O” to create an outline element, and then press “C” to get to the outline element setup.
 The “Element Styles” window opens up and in this window you can set up all the formatting styles for the various screenplay element that the program uses, not just the outline elements.
Note that on the right side you have these buttons to access the formatting settings of the different formatting elements, and right now we are in the “Outline” section here.
If you take a look now to the lower left part of the window you see a pretty colorful pre-definded hierarchy of outline elements.
You see act, sequence, scene, scene heading, and so on and so forth. If you scroll down a little bit you also see the “Scene Comment” element that we used earlier.
So, what does all this mean?
This is the hierarchy tree that Movie Magic Screenwriter uses for all the default outline elements. That means the highest outline element is an act, and the lowest is a script note.
You can think of it like a folder structure in the file browser of your computer. The act “folder” so to speak, can hold all the types of outline elements from below, whereas a “Sequence” cannot hold “Act” elements because “Act” is the parent of a “Sequence”, or to put it the other way, the “Sequence” is the child element of the “Act”.
Sometimes you see that some elements are on the same hierarchy, then they’re all siblings to the same parent element.
The program gives you this pre-defined structure of outline elements because this is the most likely way you’re going to use them. And act will hold sequences, and they will hold a bunch of scenes each, and every scene holds elements like a scene heading, and also maybe a couple of beats and notes and so on and so forth.
Makes sense?
Alright. But, we can change this hierarchy to some degree.
But before we have a look at that, let’s just go through the rest of the information that is presented here in this window so you know what it all means.
On the left side we see the style name, obviously. Act, sequence, scene, and so on and so forth.
Next, there is the “Print” column where we can choose whether we want this outline element to appear in a print out.
Then, we have a “Frame” menu. This defines whether this outline element has a box around it and what it looks like. You see that the “Scene Comment” elements, for example, have a dotted box.
On the right side you have two color choices, the first one is for the text color of that element, the second one for the background.
So, these styling options make it easier for you to distinguish between all the different outlining elements that you can put in your script. Because they are there to help you, not to confuse you, right?
Create and edit Outline Styles
Okay, so, how do we edit those?
If you click on one of the present outline elements, you see those arrow buttons at the bottom of the window activate. And with those you can move the elements around if you want them to be in another place in the hierarchy.
If you double click on the name you can also rename them. And you can of course change the print and color settings as well.
The plus and minus buttons let you add and remove certain elements.
One caution though, there are some standard element settings that you cannot change, for example you can not deactivate printing scene headings because they’re an essential element in the script.
But most of this is editable, so you can adjust it to the way you want this outlining hierarchy to look like.
Also, as soon as you click on one of the elements you see all the formatting settings like fonts and margins appear at the top of the window.
At the bottom you can choose if you want to allow words that have five or more letters to extend one or two letters over the margin before they break to the next line.
And, on the right side you can select if you want to save these settings as default settings for all new documents from this point on.
Select and deselect Standard Elements
One more thing about these outline elements.
If you take a look at above the hierarchy window, you see a bunch of elements that you can select or deselect to be included or excluded from the outline.
By default, act breaks and scene labels are excluded. I suppose this is because they are special elements that are only used in certain kinds of script, mainly television.
If you want to include those, just select them here and they will appear in the outline.
By the way, if you ask yourself what the difference between “Act” and “Act Break” is: “Act” is a note element that can be filled with information about the act, in a sense that you put your information about what is going to happen in that act in there.
“Act Break” on the other hand only refers to the line in the screenplay itself that indicates an act break, for example “End of Act #” and “Act #” on the following page.
Working with Outline Elements
OK, now that we have a clearer picture of what these outline elements are and how we can style them, let’s go back to the NaviDoc and see what we can do with them there.
First of all, every time you select an outline element in the NaviDoc, the screenplay will jump to that element and point you to it with a red arrow.
You also see that Movie Magic Screenwriter shows you the name of the element in the NaviDoc and also in the screenplay element menu at the top in the toolbar.
In either one of those you can now change the element to a different one.
The difference is that in the NaviDoc you see the whole element hierarchy, whereas in the element chooser up top in the toolbar you only see a bunch of them and they’re all in a list. You have no reference as to where this element is in the whole outline hierarchy.
So, this is one possibility to change one element to another.
You can also use the “Promote” and “Demote” buttons in the toolbar.
Every time you click on one of them, the corresponding element will go up or down one hierarchy level. This can be useful when for example you just want to change the element to the next hierarchy and doing so with one “Promote” or “Demote” click is easier than going to the dropdown menu every time and choosing the element that is directly above or below.
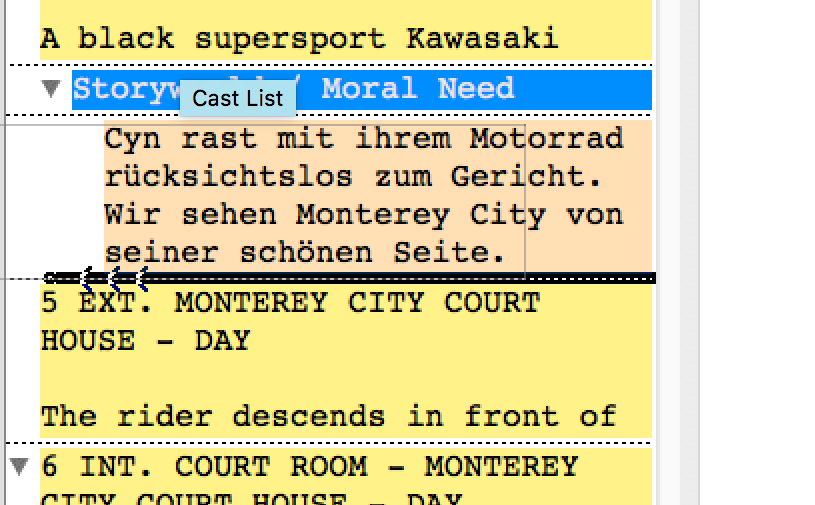
Another possibility to promote or demote outline elements is to click-grab them with the mouse, hold down the mouse key and then push them left and right. Every time the element get promoted or demoted one level, an arrow appears at the border of the element. When you pushed it where you want to have it in the hierarchy, just let go.
 Changing the Order of Outline Elements
You can also use the mouse to change the order of the outline elements in the NaviDoc. But, if you drag them to another place in the outline, these changes will be reflected in the script. So, for example, if you take a scene and move it to another place, the scenes in the script will also have switched.
The same for the levels above or below scenes.
While this is something to be cautious about, it is also a great way of moving your elements around if you decide to change things.
Deleting Outline Elements
In case you want to delete an outline element, just click this “Delete” button at the top of the NaviDoc and it’s gone.
NaviDoc Outline Controls
Let’s have a look now at the top of the NaviDoc and let’s go through all of these controls because they can really make your writing life easier if you use them well.
Essentially, what they do is, they define if and in what way all this outline information is presented in the NaviDoc so you have all the information you need but don’t get overwhelmed by it.
The button all the way to the left let’s you set filters for the outline element, defining which of those you want to have displayed in the NaviDoc.
Selecting or deselecting elements here doesn’t delete them. They’re just not shown in the NaviDoc, that’s all.
The next button with this clapperboard icon lets you choose which elements of the scene headings you want to see. You can choose if you want to hide or see the scene number, the location and/or time of day.
Again, this doesn’t delete information from your scene headings, it’s just a view setting.
The third button from the left with these two paragraphs on it and a red arrow in between lets you show or hide a space between the scene heading and the scene content preview in the scene heading element.
In case you click that button and there’s nothing happening maybe you haven’t activated showing preview content in your scene heading elements with the slider on the right side up top in the NaviDoc.
We’ll look at those in a second.
The fourth button from the left, with this grey and green triangle arrow on it lets you quickly contract or expand all the outline items so you don’t need to go through all of them and click them open or shut.
You can also, if you just want to open one of the elements with all the children elements underneath, hold down the “Alt” or “Option” key, and then click on the arrow of said element. This expands this item and all the items that are children also.
Then, the gear icon brings you directly to the NaviDoc settings, but we’ll look at them in another article.
On the right side of the top bar in the NaviDoc you have the view controls. They are pretty much the same in each of the NaviDoc tabs.
You can choose whether you want the NaviDoc to scroll with the script, so if you go to another page, it will also show the scene headings from that part.
And with the two sliders on the right you can adjust how many lines of the scenes you want to see in the preview area, if any, and, with how big you want the text to be displayed.