Using The NaviDoc Scenes Panel In Movie Magic Screenwriter
Movie Magic Screenwriter Scenes Panel (NaviDoc)
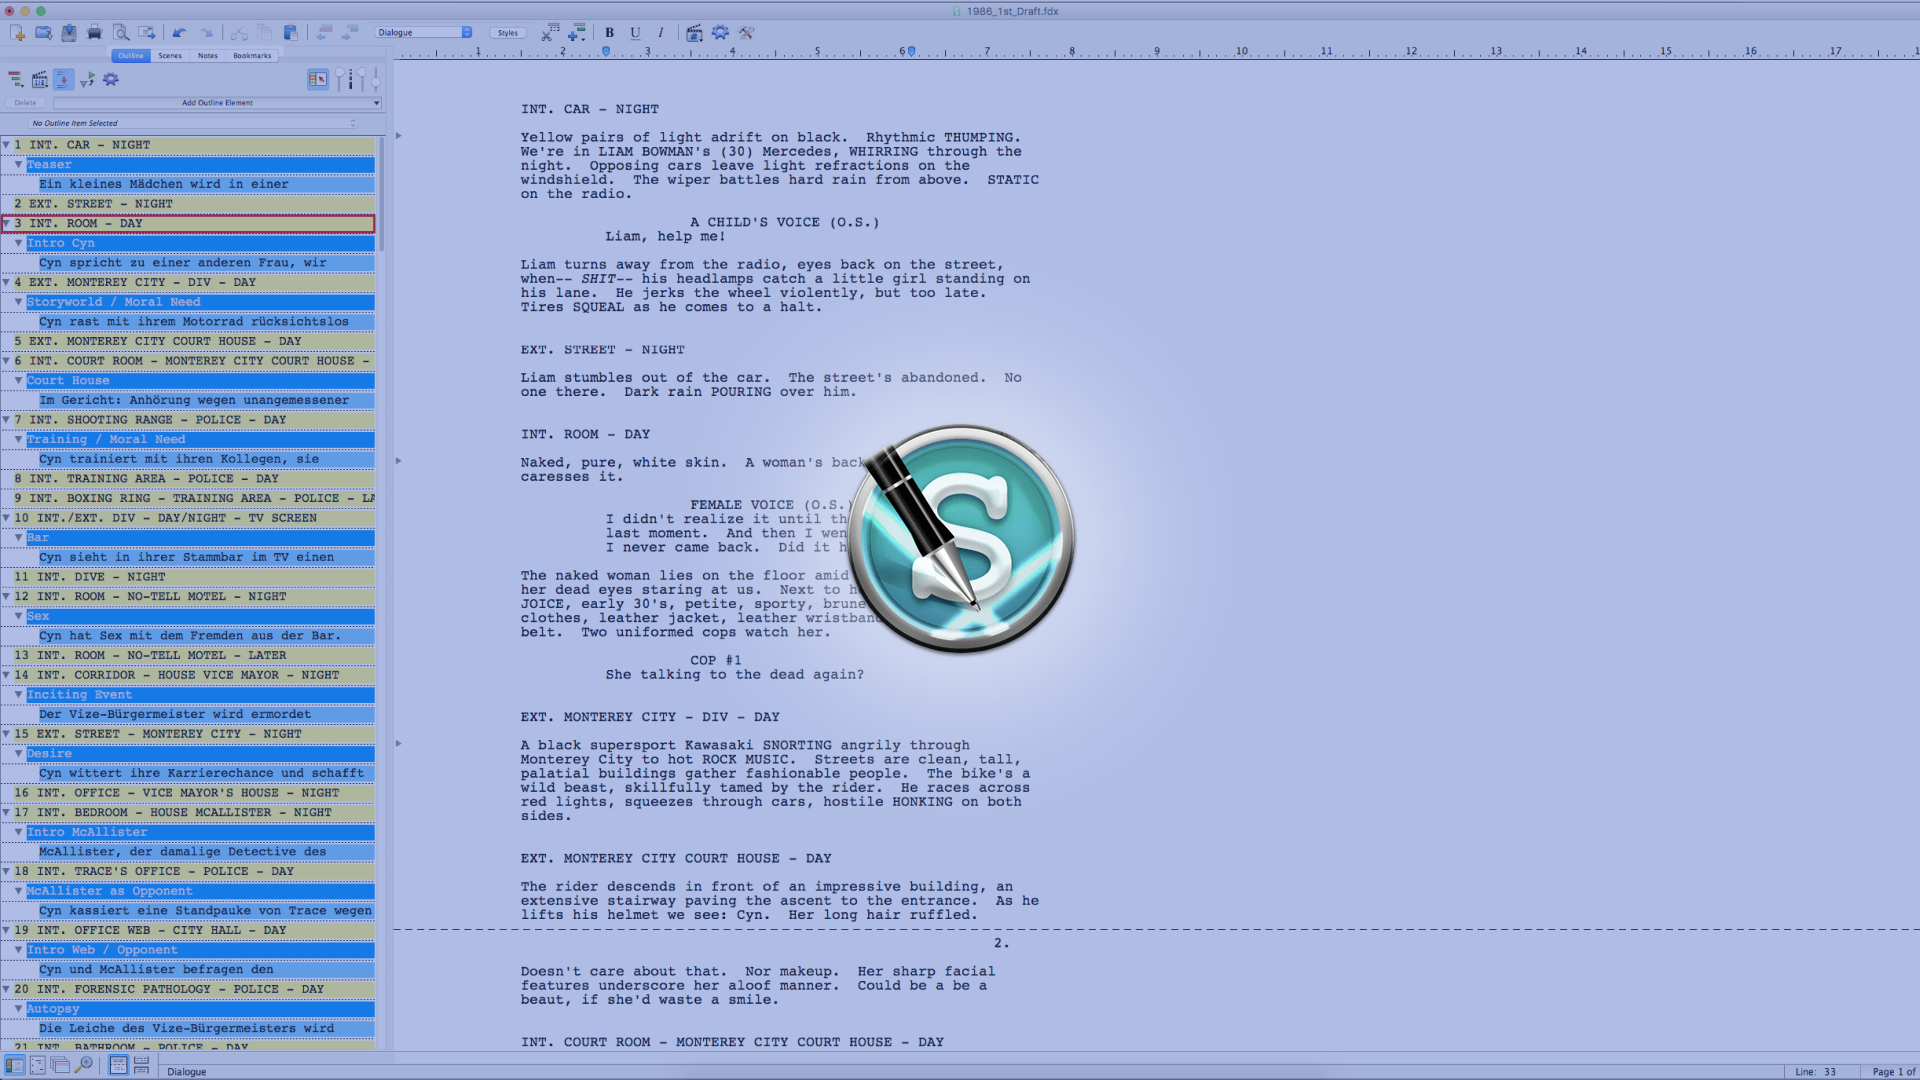
The “Scenes” panel in the NaviDoc gives you an overview of the scenes in your script.
To open it, make sure the NaviDoc is open by clicking on the bottom left button and then go to the “scenes” section.
(Pic NaviDoc scenes)
This section makes it easier for you to keep track of all the scenes in your script and jump to different places.
So, every time you create a new scene in your script, Movie Magic Screenwriter will add a new entry in the scene list in the NaviDoc.
It is important to know that the order or the amount of information that is presented in the NaviDoc “scenes” section has nothing to do with the order or the amound of information that the scenes in your script hold.
Let’s see how you can adjust the NaviDoc so you it helps you best viewing and managing your scenes.
Scene Order
Going from the left to the right, the first button in the at the top of the NaviDoc “scenes” section lets you define by which element you want to order your scenes.
You can choose between:
- Scene number
- Interior / exterior
- Location
- Time of day
All the elements will be sorted alphabetically, except the numbers of course, which will be sorted in ascending order.
Display Scene Elements
The next button lets you choose which of the scene heading elements you want to see in the NaviDoc. Again, remember that this only changes the view in the NaviDoc, not in the script itself.
You can choose whether you want to see:
- Scene number
- Interior / exterior
- Loacation
Even if you choose, for example, to have your scene numbers hidden, you can still use the sort function to sort by scene numbers.
The information from your scene header that you show or hide has nothing to do with the order in which you put your scenes in the NaviDoc.
Show Spacing
The third button from the left lets you choose if you want Movie Magic Screenwriter to display a little gap between the scene heading in the NaviDoc and the preview of the scene content.
Just turn this on or off, depending on your taste.
The gear icon brings you to the general NaviDoc settings, but we will discuss them in another article.
NaviDoc View Controls
On the right side of the “scenes” section in the NaviDoc you have the view controls. They are pretty much the same in each of the NaviDoc tabs.
You can choose whether you want the NaviDoc to scroll with the script, so if you go to another page, it will also show the scene headings from that part.
And with the two sliders on the right you can adjust how many lines of the scenes you want to see in the preview area, if any, and, with how big you want the text to be displayed.
Jumping to Scenes
Like in all other NaviDoc tabs, you can click on any scene and the program will bring you directly to that corresponding scene and it will show you a red arrow, indication the exact point where the scene heading is that you just selected in the NaviDoc.
Alright, now you know how to navigate in your script and how to sort and adjust the scene view to your liking.