Syncing The NaviDoc With Your Document And Other Settings Like Fonts And Color In Movie Magic Screenwriter
NaviDoc Preferences In Movie Magic Screenwriter
In this article we’ll look at the NaviDoc Preferences.
If you don’t know what the NaviDoc is, this is the name of the area on the left side of the screen where you have a tab for Outline, Scenes, Notes and Bookmarks.
There are distinct articles on each of those areas and how to use them, so if you want to learn what they do, it’s best to check them out.
Right now, we’ll look at how you can adapt the NaviDoc with the settings in the preference window so you can use it the way it helps you most.
To get to the preferences, click the gear icon at the top of the NaviDoc or in the toolbar. Or you go to “Screenwriter – Preferences” on the Mac.
Once in the preferences window, navigate to the NaviDoc section.
 Syncing the NaviDoc
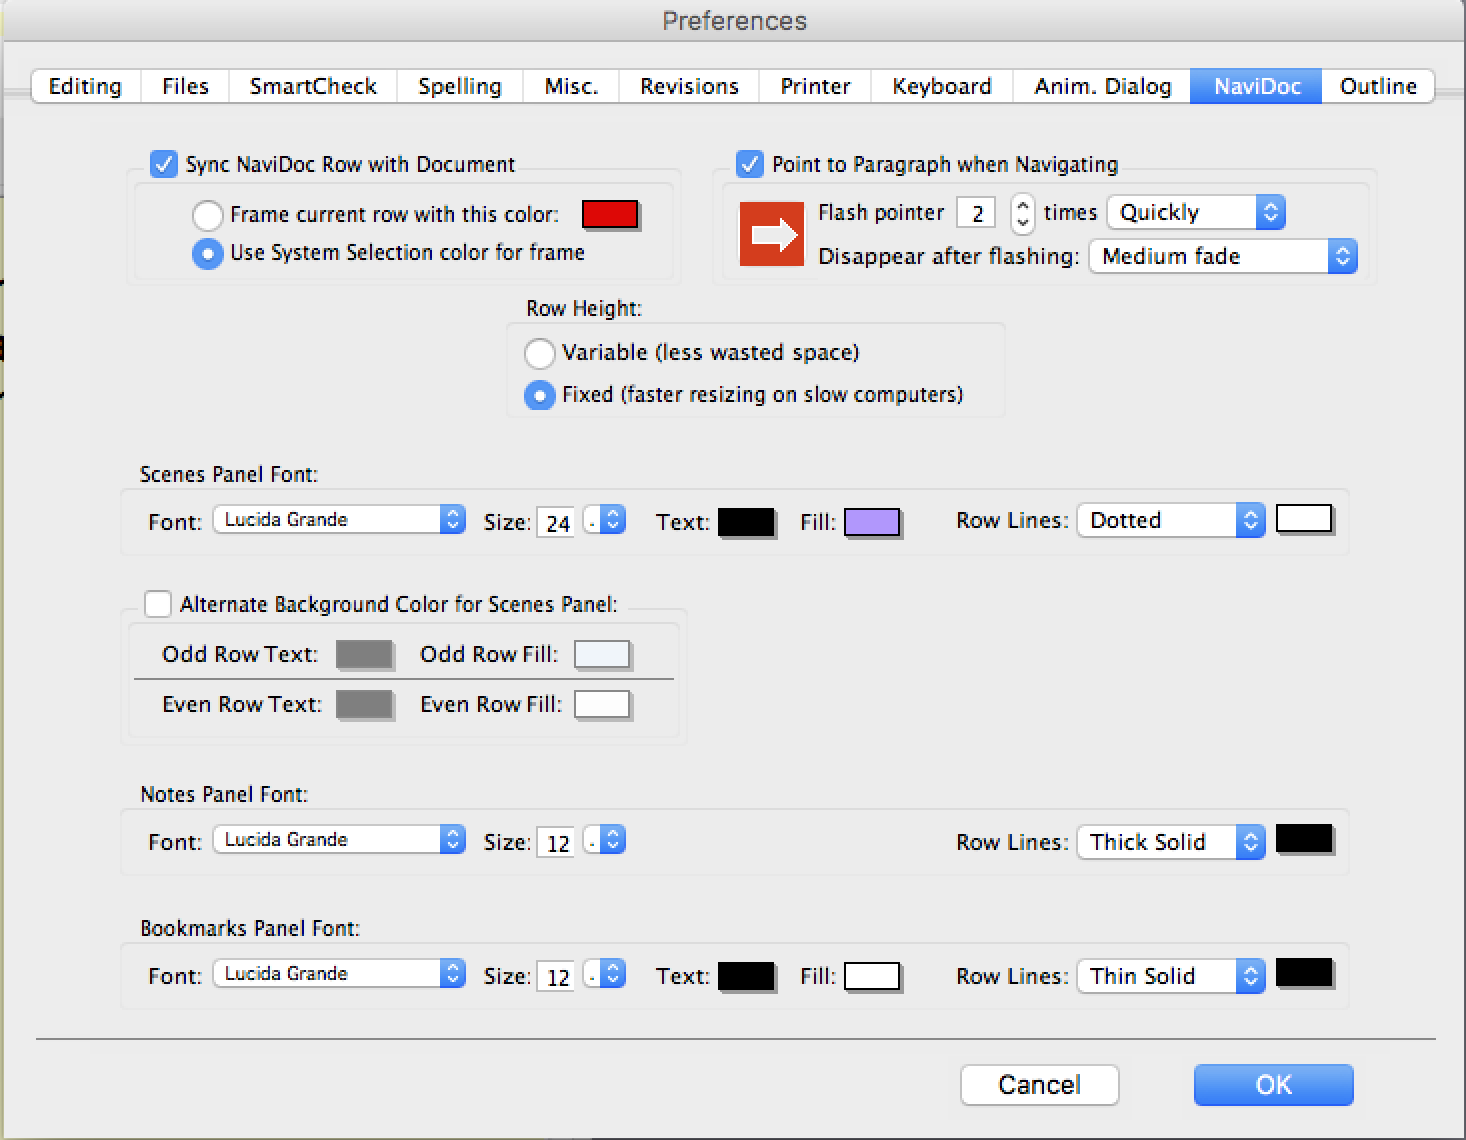
The first setting you see here in the top left is syncing the NaviDoc with your document. That means that if this is checked, and you scroll in your document and click in another area, the NaviDoc will jump to that place also, so you’ll always have your NaviDoc position synced with where you are in your document.
You can also control this setting with the button in the NaviDoc itself at the top right, the symbol with the red arrow.
Then, in the preferences you can also choose whether you want Screenwriter to draw the selection frame that indicates in which element the cursor is at that moment, in a specific color, or if you want it to use the selection color from the system settings.
Paragraph Pointer
Next, on the right side, you can activate or deactivate the paragraph pointer. That is the arrow that appears in your document when you click on a certain element in the NaviDoc in order to indicate where exactly the element is in your document that you just seleceted in the NaviDoc.
And there are also some settings to customize that arrow, for example how many times you want it to flash, and how you want it to disappear.
Row Height
A little bit below, you can select if you want the NaviDoc row height fixed or variable, apparently a variable row height needs more processing power, so if you have a slow computer Screenwriter suggests you keep this setting at fixed height.
Font
The rest of the NaviDoc preferences here refers to the fonts and style used in the Scenes, Notes, and Bookmarks panel. In case you’re wondering why the settings for the “Outline” section in the NaviDoc are missing here, that’s because they have their own section in the preference window where you can set that up.
So, what can you set up here? Font type, size, text and fill color, what the row between the different scenes looks like and what color it has.
One thing about the “fill” setting. If you activate “Alternate Background Color for Scenes Panel” down below, the fill setting will be overridden. So if you want to use the fill setting you need to deactivate alternate colors, which is activated by default so you it’s easier to distinguish between the different rows.
And then, below for Notes and Bookmarks you have almost the same setting, only that the text and fill color settings are missing here because you can set that up for each note category in the “Notes” section of the NaviDoc itself.
Also, Notes doesn’t have an alternate color setting because the note color depends on the note category, and why there is no alternate row color setting for bookmarks, to be honest, I have no idea, it’s just not there.
Okay, so, now you know how to set up the NaviDoc to your liking, I personally think the NaviDoc gives you a great deal of flexibility to work with, and now you know how to use its full potential.