How To Set Up Screenplay Element Styles In Movie Magic Screenwriter
Element Styles in Movie Magic Screenwriter
In this article we’re going to have a look at element styles. Element styles, as the name implies, define, how each of the script elements looks.
The settings per se are industry standard, but there are some preferences that you can adjust to your taste.
Let’s see how that works in Movie Magic Screenwriter.
To get to the element style setting, go to “Format – Element Styles”.
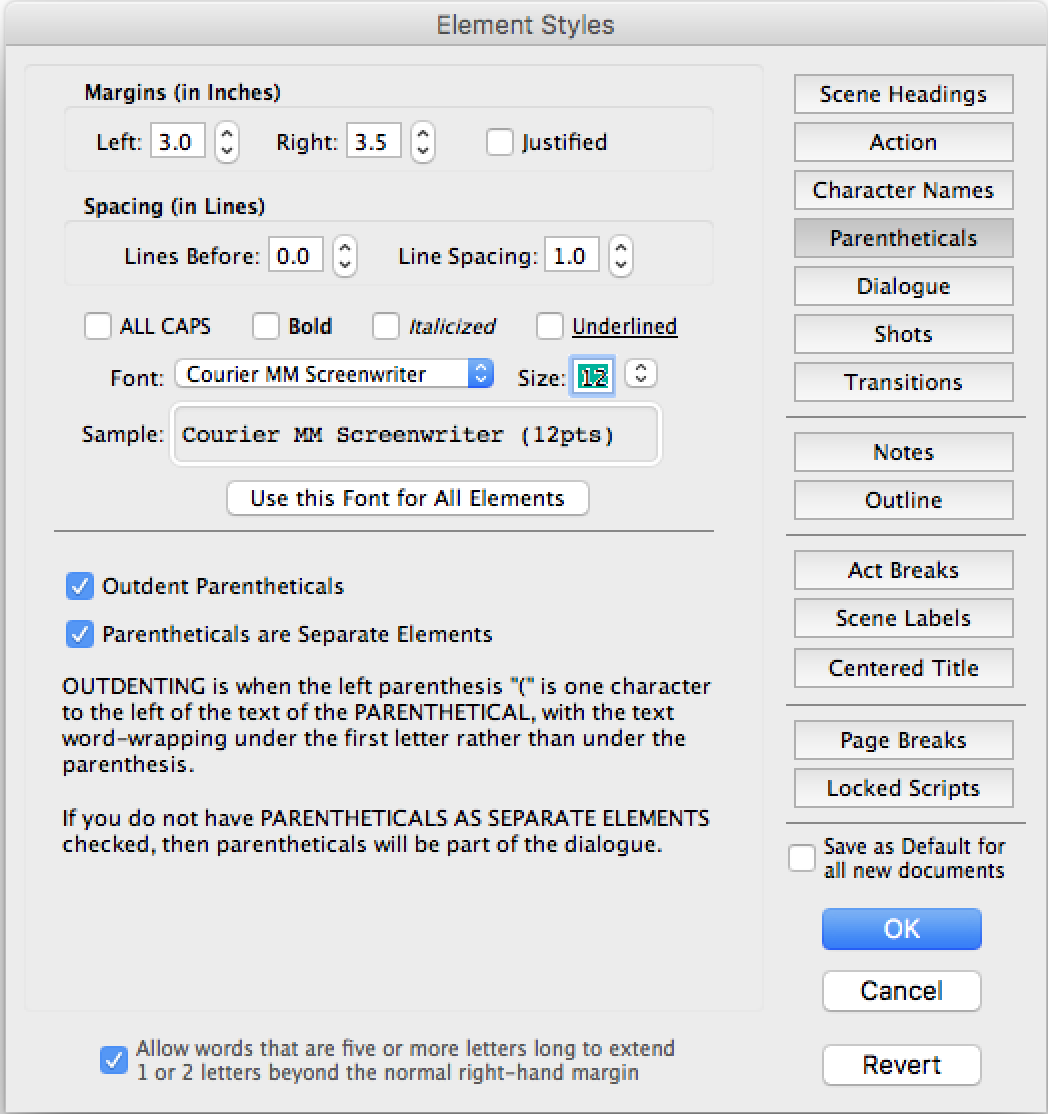 The element styles window opens up and you see that on the right side you have buttons for all the different elements that appear in your script. And not only that, you can also set the styles for other elements here such as note element, outline elements, and so on and so forth.
For now we will focus on this upper part, all the elements from “Scene Headings” down to “Transitions”. Those are the text elements that actually are used in your screenplay.
Font and Margin Settings
When you take a look at the left side of the window, where all the settings are, you see that there is a seperation line a little above the middle of the window.
All the settings above this line are the same kinds of settings for each of the script elements, namely font, margin and line spacing settings.
Whereas the settings below that separation line can be different for the specific elements.
So, what can you set up here?
For every element that you choose on the right side you can set up, which font you want to use, which size, if this element should be bold, italic, underlines, or all caps, what line spacing you want to use and how you want to set the margins.
Now, if you just want to write, and not think about these font settings, you’re going to be perfectly fine, because they should be set up to industry standard by default.
But if, for example you like to write with a different font, a different version of the courier font, which is the standard font for screenplays, you can change that here.
You could also, for example, design your scene headers a little differently if you prefer that, make them bold for example, so they stand out a little more, when you’re working on the screenplay.
Then, before you hand out your script, you can still go back to these settings and change them back to default.
Element specific Settings
Then, apart from the font, spacing and margin settings, each element has a set of settings that are specific to that element.
If you click through the elements with the buttons on the right side you see that these settings below the line change.
For example, for scene headings, you can define where you want Screenwriter to put your scene numbers, stuff like that.
Or, you could have the first line of an action line be indented a certain number of characters.
Just click through these elements and see which of those settings make sense to you. They are all pretty self explanatory or have a very good explanation from the program itself, for example if you go to “Parentheticals” you have an “outdent” setting and the program explains pretty well here what is meant by that.
So, there is no need to go through all the different settings now.
Just keep in mind that when you change some of these settings you may deviate from industry standard formatting, which is fine if that’s what you intend to do, for whatever reason.
If you’re unsure about whether you should change some of these settings or not, maybe it’s better to stick to the default settings, or download a couple of screenplays from the internet and see how they did it.
Alright, so that’s it for element styles, whenever you need to change the look or screenplay elements, this is the place to do it.