How To Add And Handle Custom Metadata In Scrivener
FREE LIVE WEBINAR (This Sunday!):
Write and develop your Script with Final Draft 12.
We go from idea to outline to draft. Click the button below for details and to sign up:
Scrivener Custom Metadata
Let’s look at metadata in Scrivener.
As you might be aware already, Scrivener saves a whole lot information with every document that you have in the binder apart from the content of the document itself.
These are things like the creation date, if that document will be included in the compile, what label and status it has, and many more things.
But you are not restricted to using only the pre-defined metadata information that Scrivener gives you. You can also define your own metadata fields if you want to store additional information that is directly connected to – or rather directly stores with – your document.
Let’s see how this works.
Go to the inspector and open the third tab, which is the metadata tab. It has a little tag icon at the top.
In case you can’t see the inspector it’s probably hidden. Then just click the “i” icon in the toolbar and it opens up.
General Metadata
In the metadata tab you see a section with “general metadata” at the top. Here, Scrivener shows you when you created the current document you’re in, and when you last modified it.
Then, below, you see if that document is included in the compile and what section type it is.
For now, you don’t need to worry about these two settings, they are important in the compile process.
Types of Custom Metadata
Then, if you go a little further down, you see the section that says “Custom Metadata”.
This is what we’re interested in.
To define custom metadata for this document, click the “gear” icon on the right side of this section.
This brings us to the “project settings” window.
 You can access the project settings also from the menu if you go to “Project – Project Settings”.
On the left side you see different project setting sections, and if you access this window from the metadata tab in the inspector, the metadata section will already be selected.
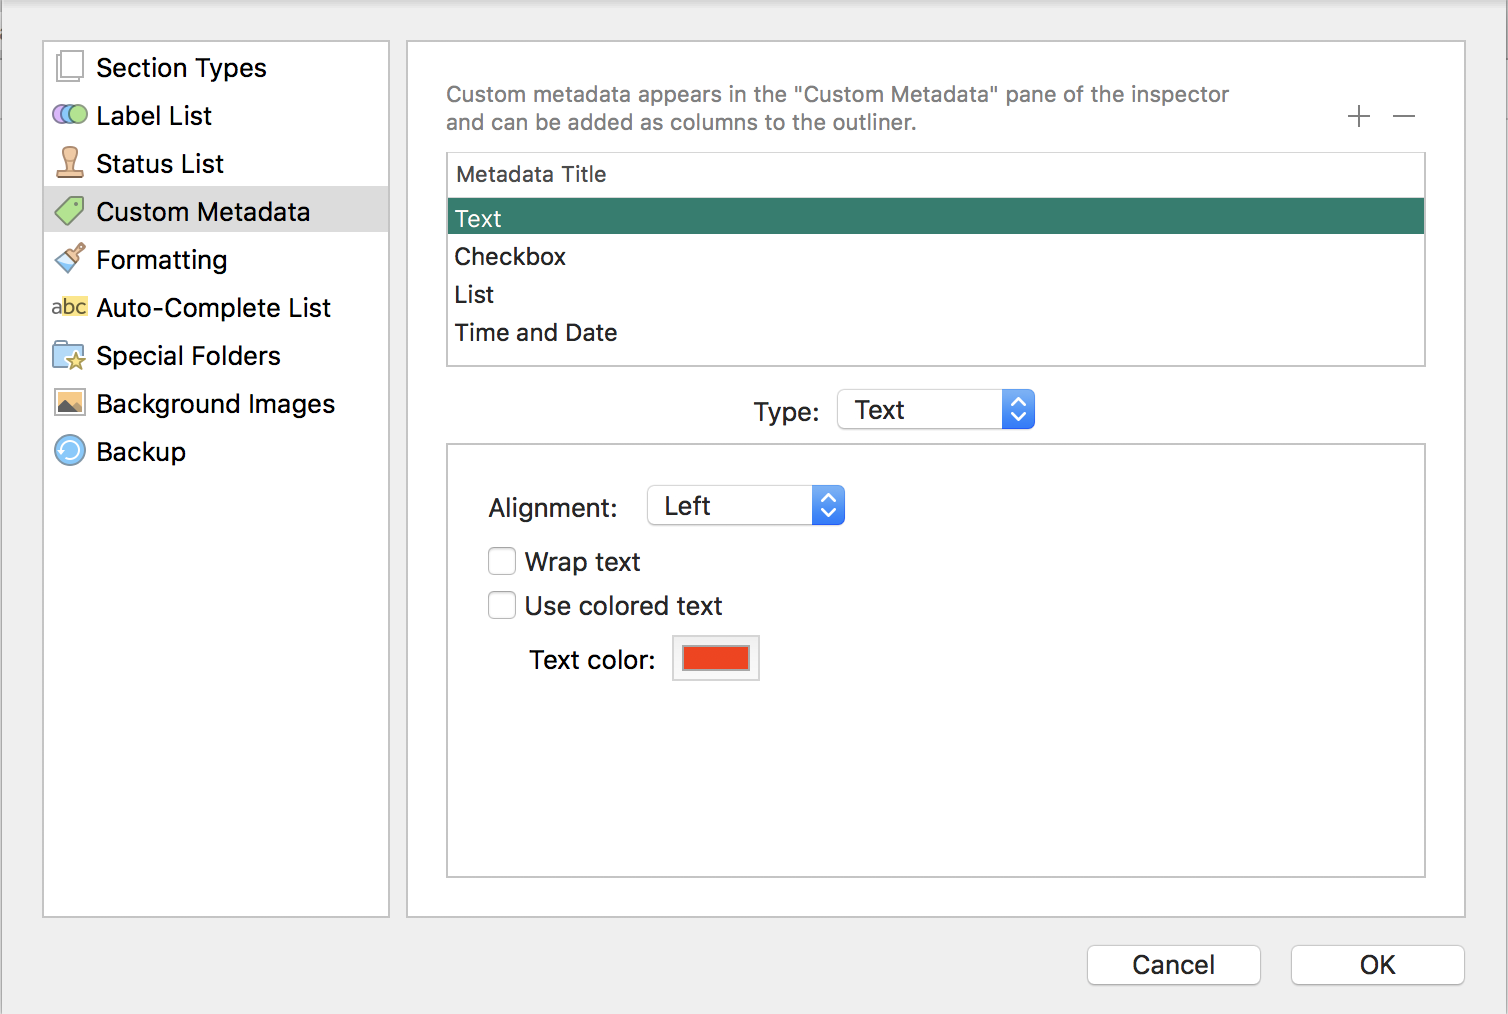
Now, in this section, at the top, we can define and delete metadata fields with the “+” and “-” buttons at the top.
You also see here that Scrivener says that you can add custom metadata as columns in the outliner. We’ll have a look at that later on.
For now, let’s click the “+” button to create a new metadata field, and then a new text entry field apperas in this top area where is says “Metadata Title”. So, let’s give this field a title.
And below the title field you see that there is a dropdown selection that let’s you choose what type of metadata field you want this to be.
You can choose between:
- Text
- Checkbox
- List
- Date
Let’s create one of each, and see what they do.
I’m just filling this with example metadata in order to show you how they look like and what you can do with them.
If, after having created new custom metadata fields in the project settings, you click “OK”, you see that these custom fields that we just created, now show up in the metadata section of the inspector.
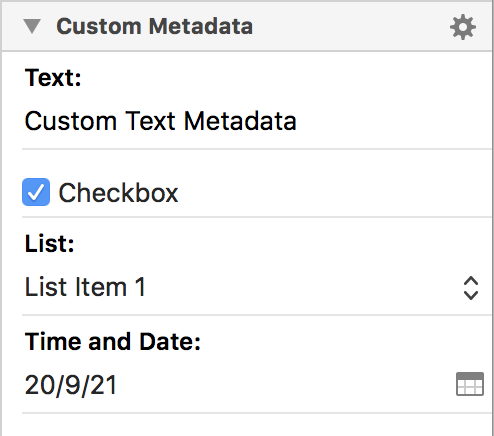 Now, you can add different kinds of information here, depending on what kinds of fields you added.
The text field gives you a text entry box, obviously, the checkbox let’s you check or uncheck an item, the list give you a selection of custom defined list entries, and the date let’s you choose day and time from a calendar.
Using Custom Metadata
But this is not the only place where you have access to your custom metadata. As we saw before in the project settings window, Scrivener also let’s you display this information as columns in the outliner.
So let’s do that.
Go to the outliner, and if you click on the little arrow at the right side of the column titles, you see the list of metadata information that you can add.
 And now you also see our custom metadata that we just created, and not only the standard metadata information that comes with the project by default.
So, you just check these custom metadata fields and then you have them as columns here in the outliner.
If you let the outliner display a list of various documents now, you can access those custom fields for every document that you see here and you get a good overview of which of your documents has which metadata information.
 Or, you can change them here, if you like. Just go through your documents here in the outliner and fill in all those fields with information that you want to track throughout your project.
This could be character, objects, story points, commentaries, … basically whatever you want.
If you need another column with more information, just go back to the project settings and create more custom metadata fields.
Searching Custom Metadata
One more things, you can also search by these custom metadata fields.
If you click on the magnifying glass icon in the toolbar, the search box opens, and in the search bar you have another little magnifying glass on thte left side. If you click that, you get a menu where you can choose in which type of content or metadata you want to search.
You also find your custom metadata fields there, so if you want to search your documents for information that you have stored in one of them, just select that here in the search, and enter the information you want to search for in the search bar.
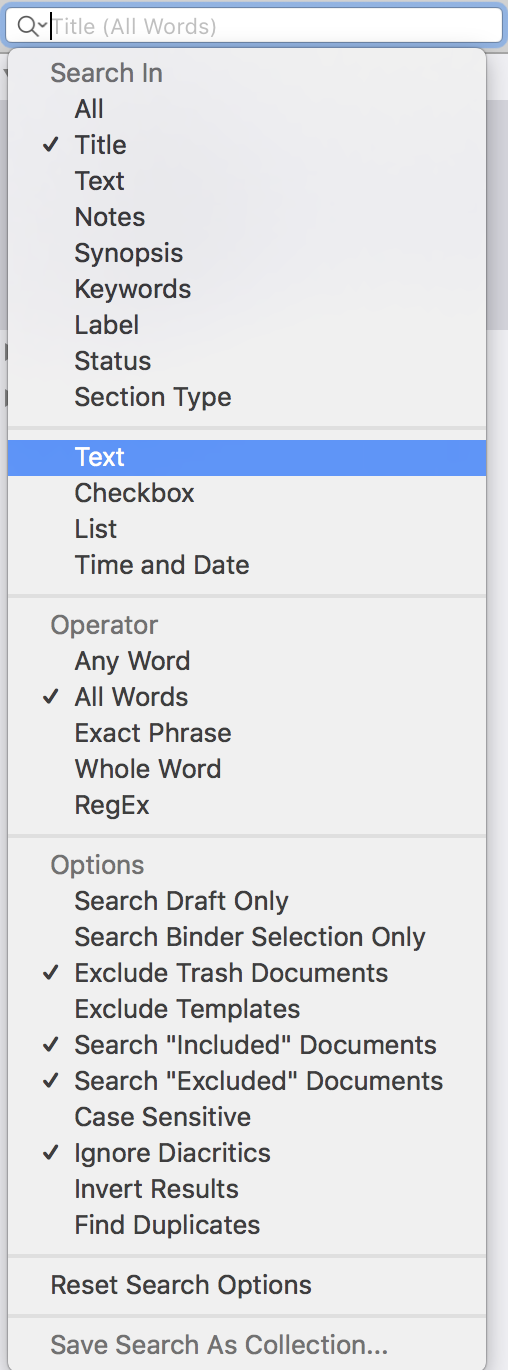 Then, Scrivener will search this specific custom metadata field and list all the documents that contain that information in this field.
Setting up Custom Metadata
So far so good. Now let’s go back to the project settings to see what kinds of settings we have there for our different metadata fields.
The “Text” fields let you choose the alignment, if you want to wrap the text, and the text color.
With the “Checkbox” there isn’t much to setup, obviously, but you can define if you want that to be checked by default if you create a new document, so you don’t have to click that every time.
Because the metadata fields are global, they will be added to every document, so it would be a hassle having to go through them just to check or uncheck this for each one.
With “List” items you can set a title and custom defined list items that you can then choose from the dropdown the way we just saw before. So, just put all the list items in here.
The “Date” field let’s you store date and time information, and you have a dropdown to choose how you want that to be displayed.
If you don’t like any of the pre-defined formats you can also choose “custom” and that let’s you enter date and time in the format that you want. Scrivener helps you here with suggestions on how to put in the shortcodes to display the information the way you want, if that’s not enough just click on the question mark and you’ll be taken to a web page that has more detailed information on how to enter date and time formatting here.
Usually, if you change time zones, Scrivener adapts date and time settings. If you don’t want that, for example because you want to track abstract times in your project, maybe you’re using this field to track days in the future in a science-fiction novel, so you won’t need that.
In that case just check this “ignore time zone changes” option.
Okay, now you know how to use custom metadata in Scrivener. Once you get the hang of this you will come up with all kinds of ideas how you can set these up so they help you keep your projects organized. In my opinion they’re a really powerful tool and make working with Scrivener a lot more flexible.