How To Create And Assign Keywords In Scrivener
Scrivener Keywords
If you’ve been using Scrivener a bit, until now you might be familiar with the concept that in Scrivener you can add certain information to each of the documents that helps you structure your project, as in, keep everything that you have inside a project in order, or make it easier to find certain things.
Probably you already know about label and status information that you can attach to a document.
But the problem with information such as label and status is that you can only attach one to each document. For example, each document can only have one label assigned and one status assigned. And there are situations where you might wish to add several labels to one document, for example, if you’re writing a novel and you want to track certain things, such as which character appears in which scene.
This is possible in Scrivener with keywords.
So, just to keep the terminology clear here, because I just said, “add several labels to one document”. That in an of itself is not possible. Every document can only have one label assigned, but you can assign more than one keyword.
So, let’s look at keywords.
You can access the keyword setup via the third tab in the inspector. In case the inspector is not open, click the “i” icon in the toolbar and then go to the third tab, the one with the “tag” icon.
This tab has this tag icon because this is also where you set up your metadata. But we’ll look at metadata in another article, right now let’s focus on the keyword section a little further down.
If you have a new, or pretty new, project in front of you, this section will most probably be empty, but before we just start adding keywords here, which you could, let’s first go to the keyword manager to get a good overview of how they work.
Keyword Manager
“Keyword Manager” by the way is just the way I call it, I don’t think that an official term, so if you search for it on the internet it will probably not return any useful results.
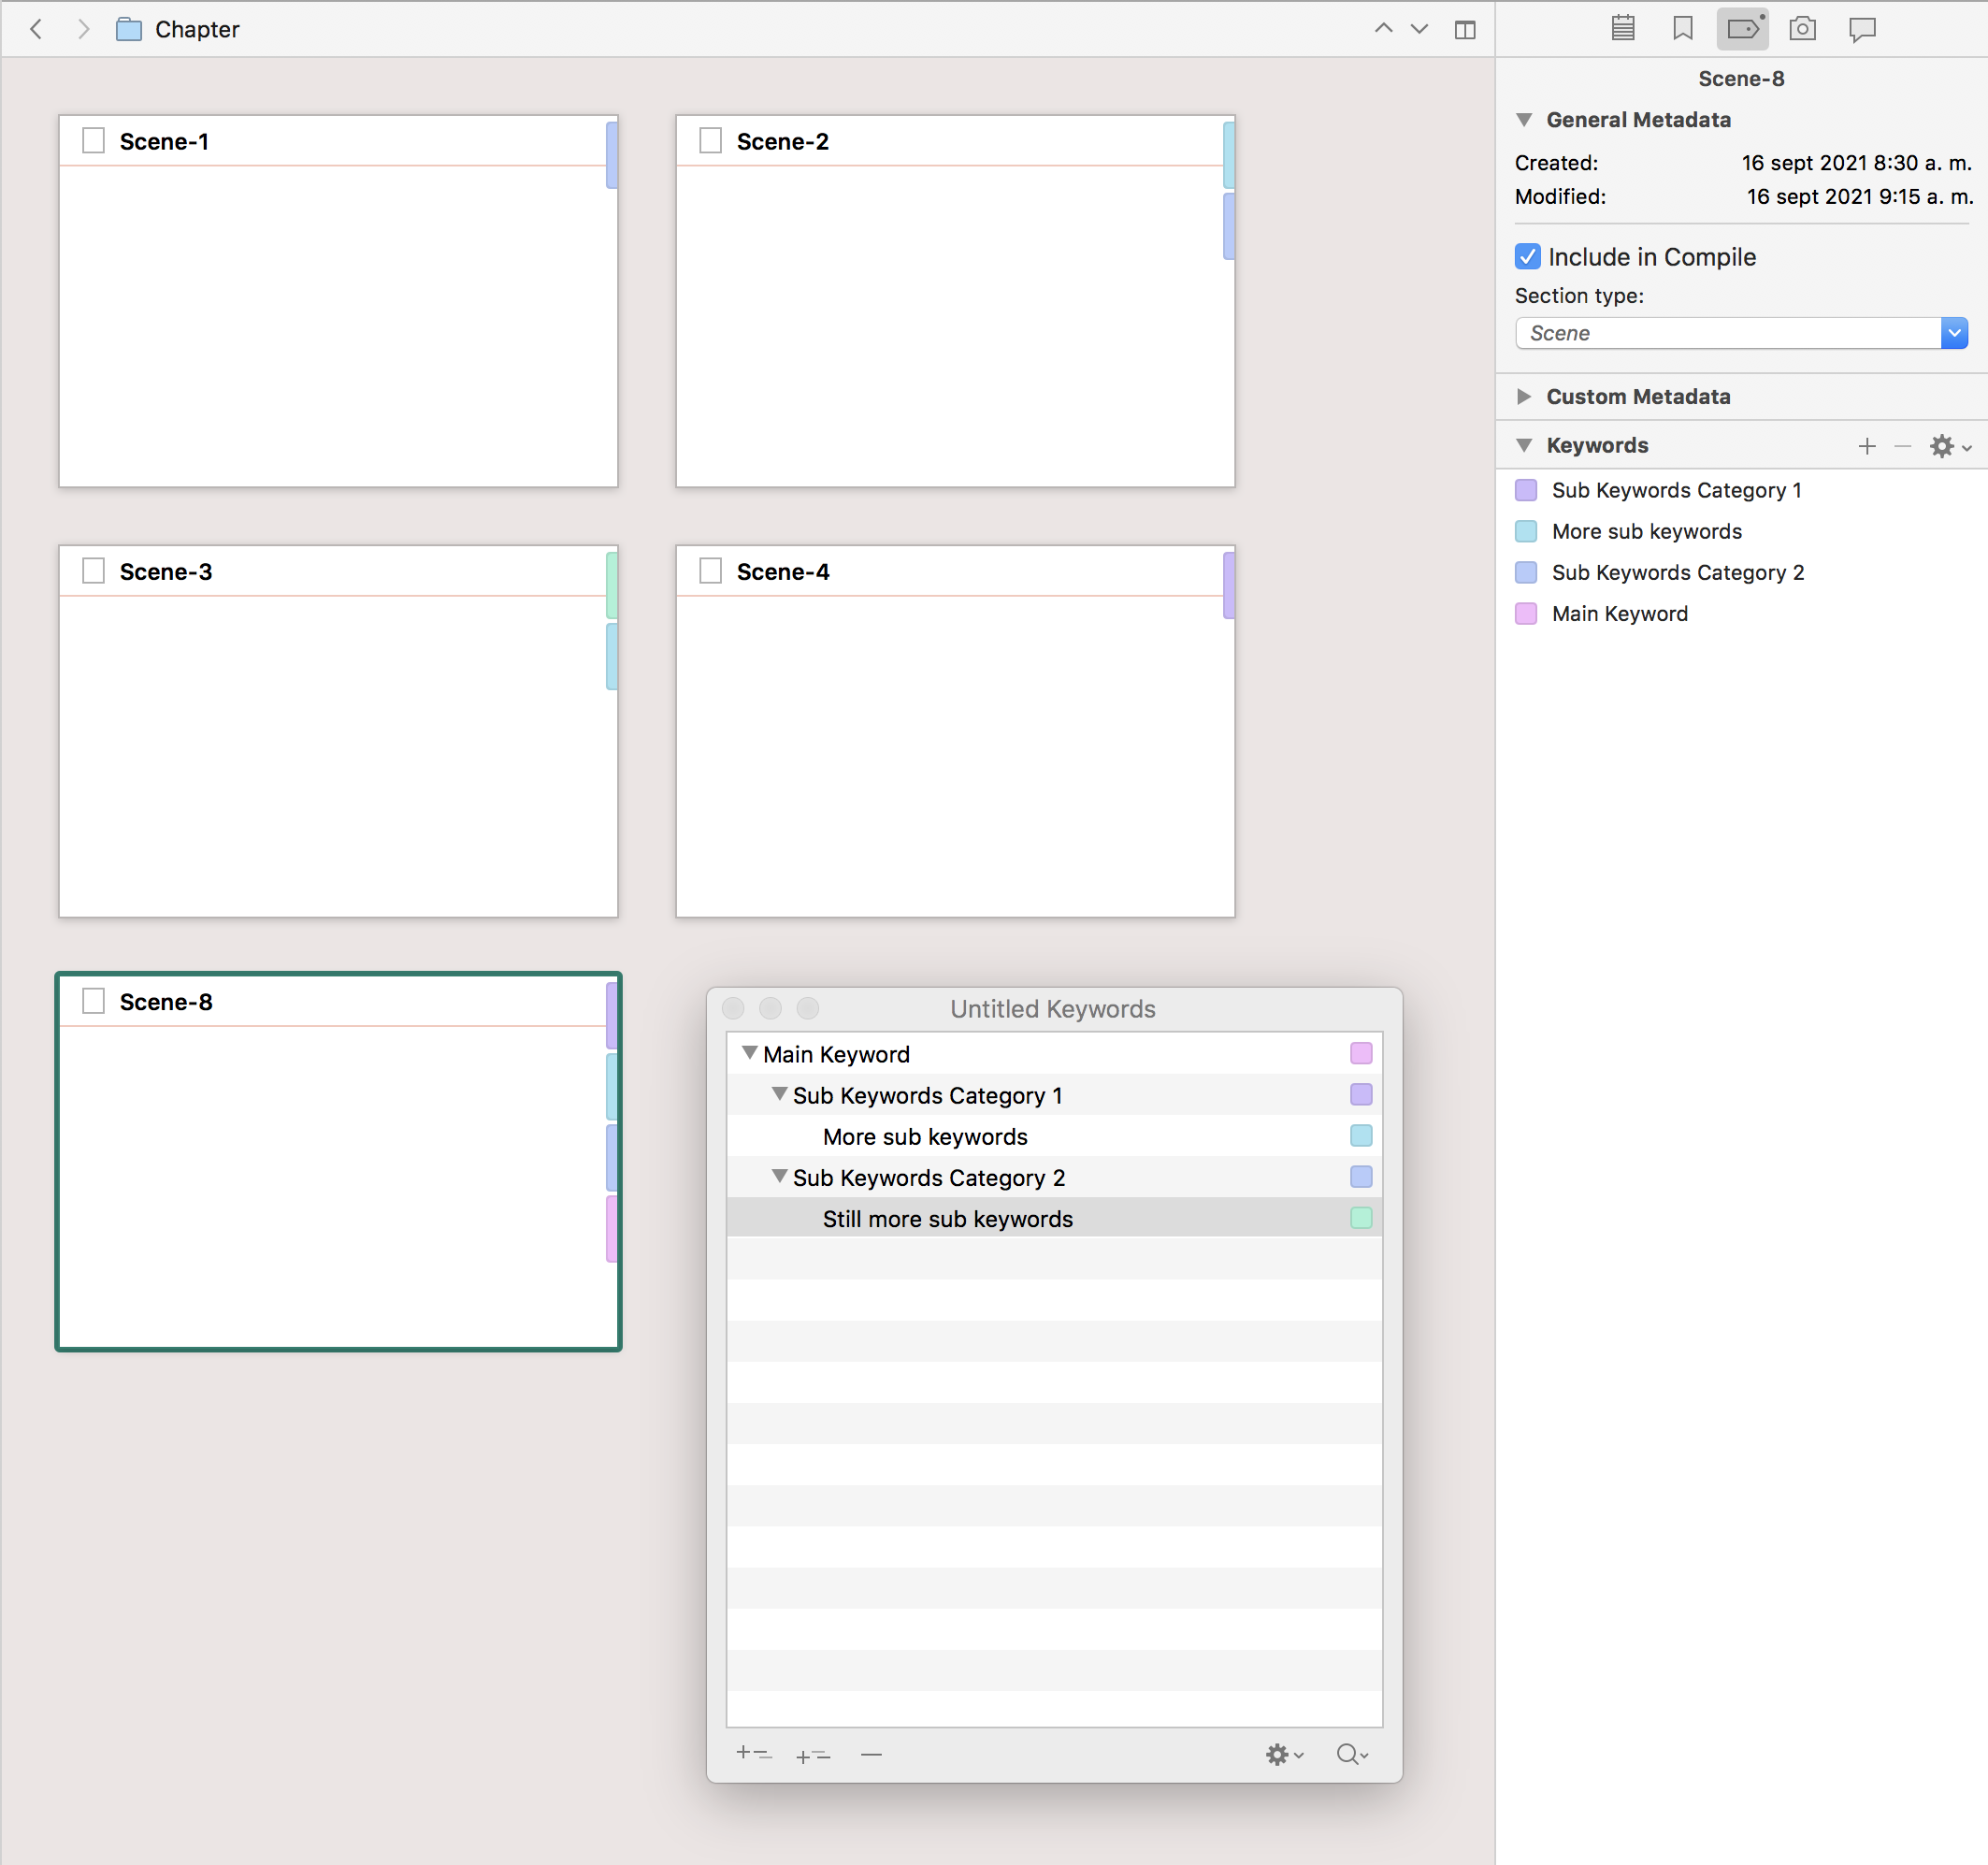
But anyway, click on the gear icon, and then choose “Show Project Keywords” to open that Keyword Manager window.
Here, Scrivener lists all the keywords you have in this project, so let’s create a few to see what we can do with them.
At the bottom you see a plus button, let’s click that and create a kewword.
Now, if the keyword we just created is selected, the other buttons here at the bottom activate and you see that there is a second “plus” button there. If we click that we create a sub keyword.
And if we click it a second time we create another sub keyword. So, you see we can create keyword hierarchies, which is nice for example if we want to use the keyword function for different purposes.
 To go back to the novel example, you could have one group of keywords that tracks the characters that appear in a scene, you have an entirely different group of keywords, or sub-keywords for that matter, to track other things in your story, maybe magical objects, or mark different story points that you want to focus on.
And, with the “minus” button, of course, you can delete keywords.
Assigning Keywords
Now, how do you assign keywords?
As usual, Scrivener gives you several ways to do it.
If we go out of the keyword manager window for a second, and back to the keyword inspector area, we could now just click the “plus” button there and add a keyword to that document, or click on the gear icon and via the “Add Keyword” menu choose one of the keywords we just created.
And that’s a perfectly viable way of doing it.
But if you want to assign a lot of keywords to a lot of documents that will take you a lot of time.
So, let’s look at other options.
If we go back to the keyword manager windows via “Show Project Keywords” we see that we have a menu at the bottom that lets us assign keywords to selected documents.
So, not only can we add more than one keyword at once to a document, we can also add more than keyword at once to several documents at once.
Just select the documents you want to add the keywords to – you don’t need to close the keyword window for that – then, select the keywords you want to assign, and then click on “Apply Keywords to Selected Documents” via the menu at the bottom.
You see the second option in the menu there, the same way you can also remove the applied keywords.
But there is still another option.
You can just click-drag the keywords onto the documents you want to assign them to.
You could do that in the binder, for example, just drag the keywords on the corresponding documents in the binder, but I think that’s not the best option because you have no way of verifying if it worked. Maybe you accidentally dragged it to the wrong document and don’t notice it because the binder has no way of showing you if and which keywords are applied.
So, let’s open the corkboard for this, and go to the corkboard options under “View – Corkboard Options” and there, make sure that “Show Keyword Colors” is checked.
Now, if you take one or more keywords and drag them on to one of the index cards you see these keyword chips appear at the side.
 Now you can go ahead and just drag all the keywords to wherever you need them and you can also verify that you dragged them to the correct document.
A little caveat here: Depending on your corkboard display settings, you might only see a certain number of keyword chips. If you want to check that, or change it, with the corkboard active, click on the bottom right popup menu and set the “Keyword Chips” number.
Keyword Search
One last thing about keywords, you can also search by keywords.
If over time you have accumulated a lot of documents with a lof of keywords this might become very important. Assigning keywords only makes sense if you can then use them to find your stuff quickly, right?
So, the easiest way to find the documents that have a certain keyword attached is to go to the keyword manger window, select the keywords that you want to search for, and then click the magnifying glass icon in the bottom right corner.
This will open up the search for you and give you a list of all the documents that have this keyword attached.