How To Customize Your Workspace In WriterDuet
WriterDuet Customizing Workspace
WriterDuet comes with a variety of pre-configured workspaces that might just suit your need as they are, or not, depending on how you like to set up your writing environment.
So, let’s have a look at what different workspaces are available and how you can customize them.
Default Workspaces
To access the different pre-defined workspaces, go to “View – Customize Layout” and a selection box opens up in the lower right corner of the screen.
Here you see all the layouts you can choose from.
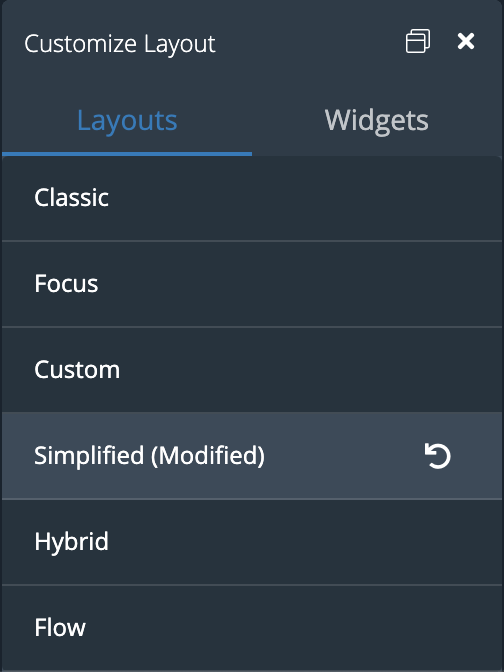 In my case, you can also see that the “Simpilified” layout, that I use often, has been modified.
Reset Workspace
If that happens and you want to return to the default settings of the workspace, just click the circled arrow next to where it says “modified” and the workspace will return to its default configuration.
Choosing a Layout
Let’s take a brief look at each one of these layouts before we go into how you can change them to adjust them to your liking.
To change to a different workspace, just click the workspace in this “Customize Layout” window and WriterDuet will rearrange the windows and settings accordingly.
You have the “Classic” layout, where you have access to a lot of different widgets as-is, the “Focus” layout, which is the exact opposite and is meant for distraction-free writing, a “Custom” layout, so in case you want to have your own layout style, you don’t necessarily need to change any of the other ones, a “Simplified” layout, which is a little bit cleaner as the “Classic” layout but still gives you access to the main functions directly, a “Hybrid” layout, which is kind of a hybrid between the “Classic” and the “Simplified” layout, and a “Flow” Layout, with an even more reduced interface than the “Simplified” layout.
On the phone, you always work with the “Mobile” Layout. There is no way to change it for obvious reasons.
Showing and Hiding Elements
Apart from changing the workspace itself, you can also show and hide workspace elements. So, in case you are working with the “Classic” workspace for example, but you don’t need to see all the interface elements all the time, you can just hide some of the menus.
Some of them have a simple show and hide arrow, and other ones have a menu toggle. That is the little pyramid that shows and hides extra menu functions.
Customizing the Workspace
So, how can you customize the workspace now to your own personal preferences?
That’s very easy to do.
In the sidebar, you can change the order of the icons by clicking and holding them, and then just dragging them to another place.
If you want to get rid of certain widgets, or have them in another place, just grab the widget by its title and hold, and as soon as you start dragging, you see that the program shows you the possible areas where you could drag this widget.
These areas are the widget sidebar on the left, a sub header bar at the top, and the widget bar on the right.
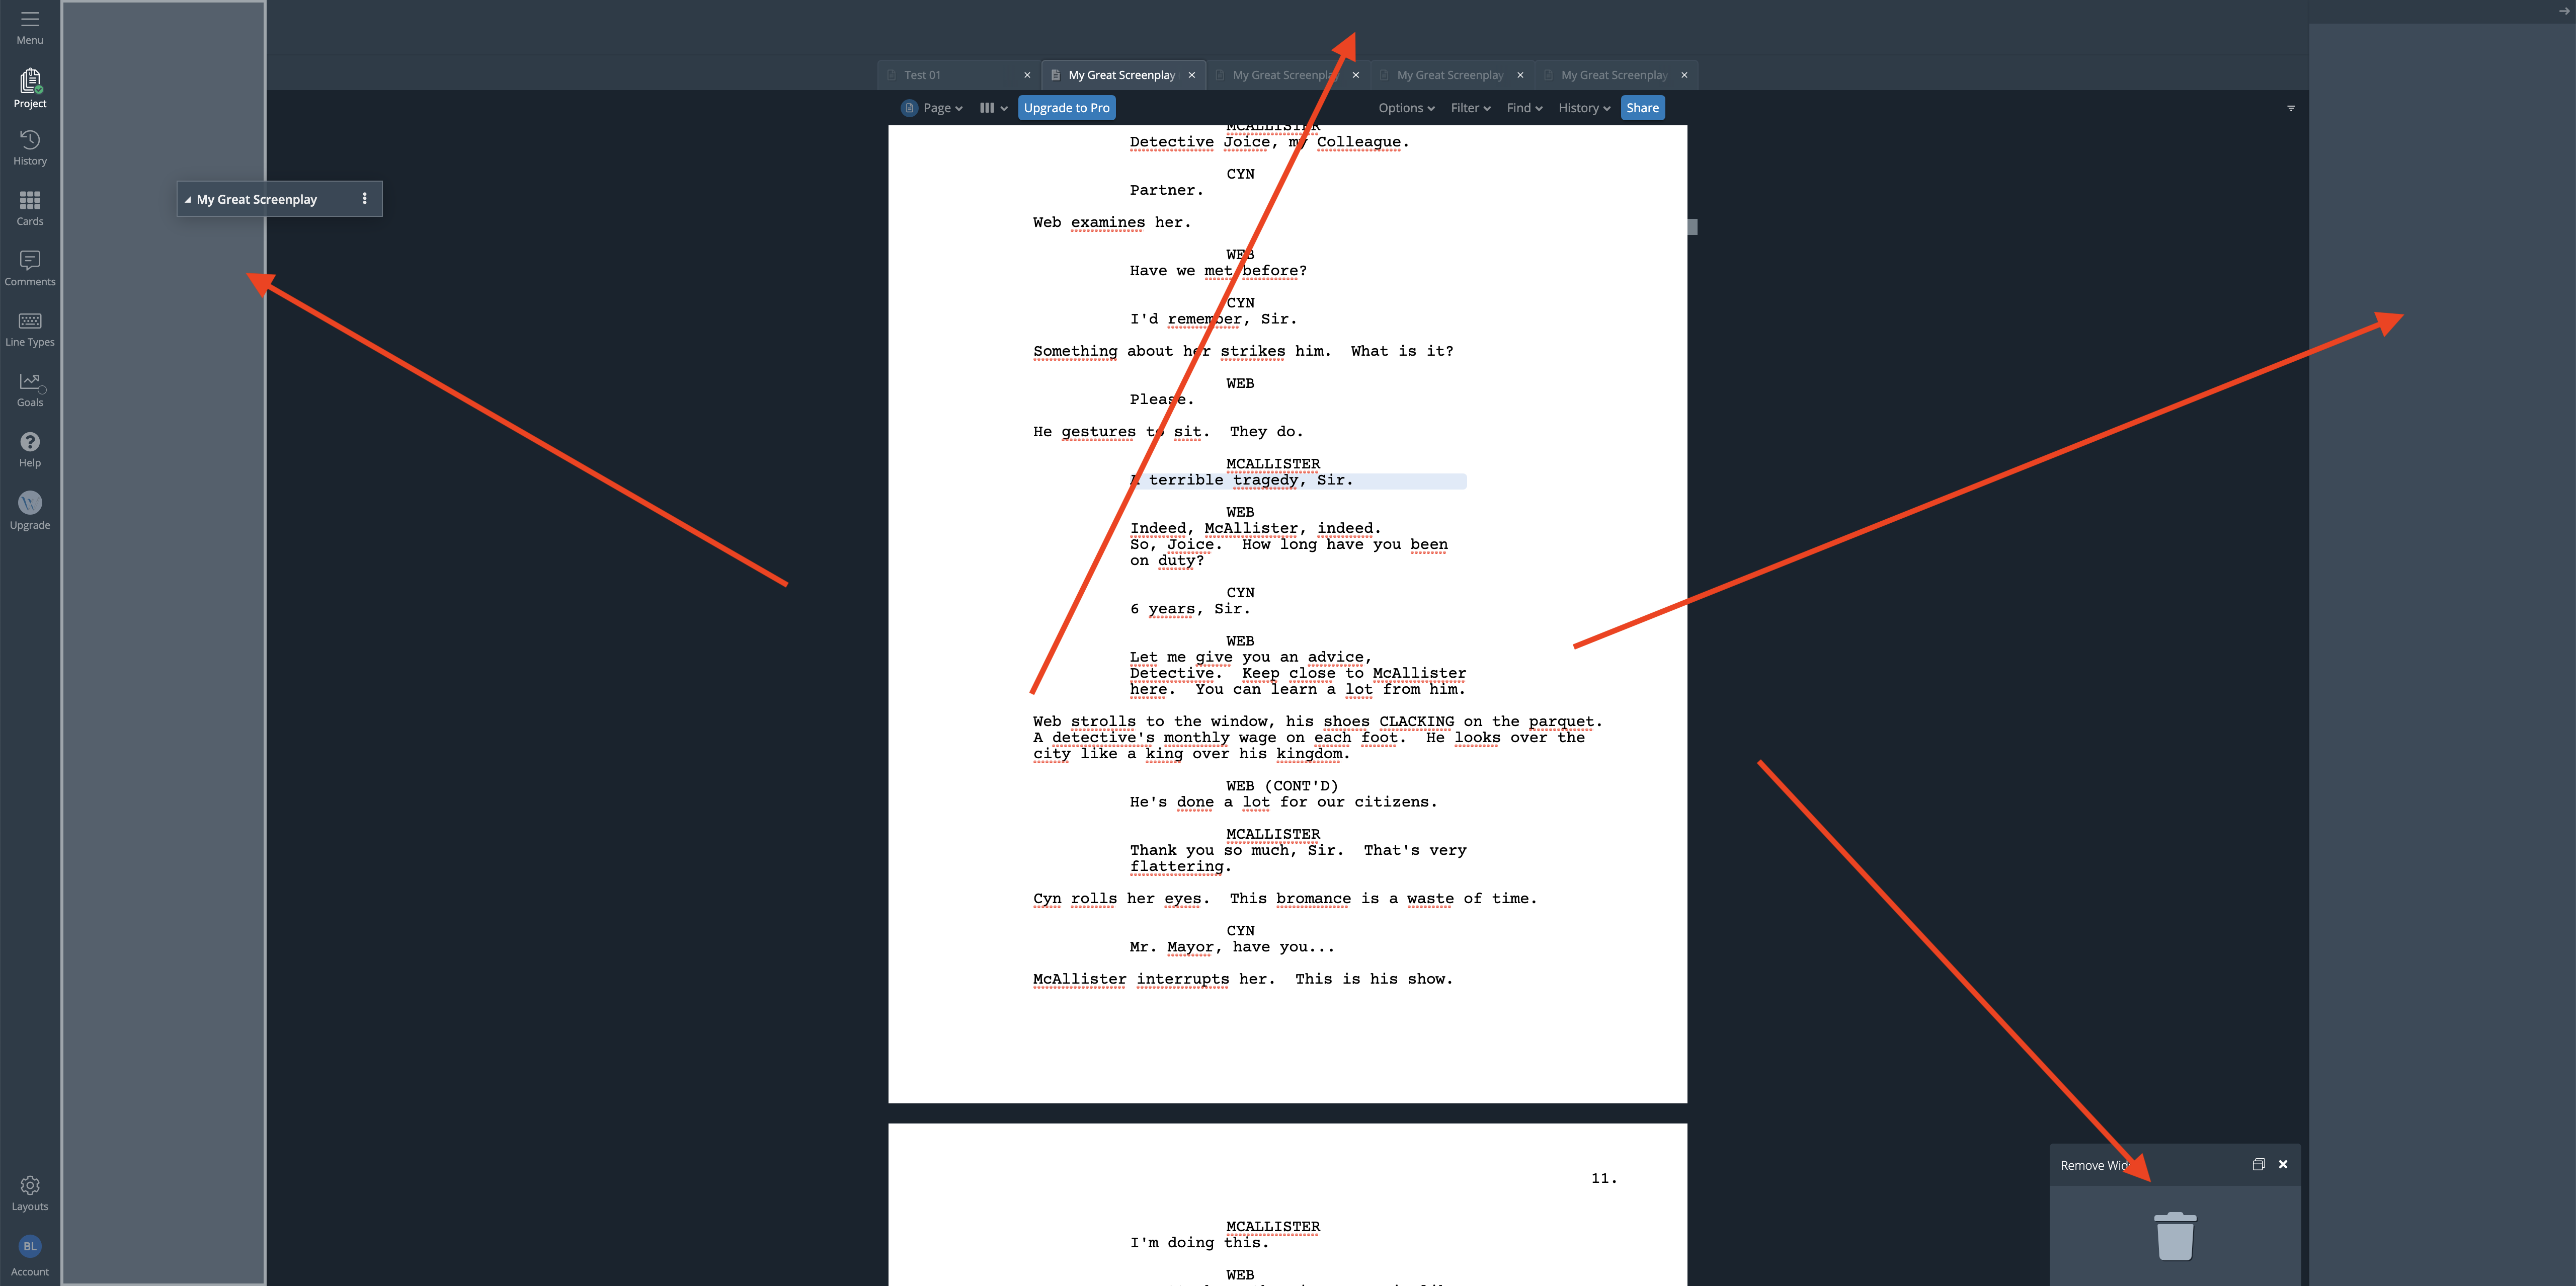 If you want to remove a widget from the workspace, drag it to the trash icon that appears at the bottom right of the screen as soon as you start dragging it.
And with this, you can practically design your workspace exactly the way you like it.
Adding Widgets
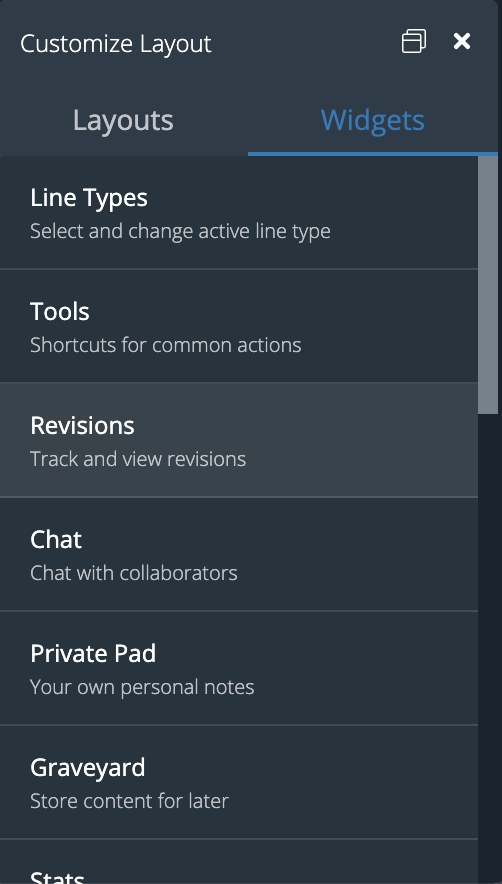
In case you want to add widgets that aren’t already there in the default workspace that you are using as a starting point for your own customization, when you go to the window that shows you the pre-defined workspaces, you see it has a second tab called “Widgets”.
If you click that you see a list with all the available widgets. Just select the one you want to use from that list and then, just like before, click-drag it to one of the designated widget areas.
 That’s it. That’s how you customize your workspace in WriterDuet.
I think it’s worth investing a little time in this, because setting up your writing environment the way it works best for you saves you a lot of writing time later, when you have all the tools that you need exactly where you want to have them.