How To Use Celtx’ Scene Navigator
Celtx Scene Navigator
In this video we will have a look at the scene navigator in celtx.
What happens when you are writing your script is that – of course – it gets longer and longer, and over time it can become quite difficult to find a certain point in the story where you might want to look up something, because it is related to the scene that you’re writing right now, or, you realize you have to change something that you’ve already written.
Whichever reason it might be, you need a possibility to jump to different places in your script quickly.
And that’s what the scene navigator in celtx is for.
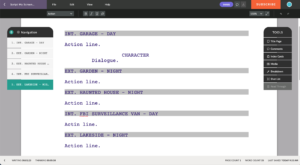
If you’re in the celtx script editor, you see this tool box at the right side of the screen, and usually right at the top, you see that it says, “Navigation”.
In case you don’t see that, you can define,which of the tools you want celtx to display here.
If you go to “View – Tools” you can check and uncheck, which of the tools you want displayed. So, just make sure that “Navigation” is checked here.
Using Scene Navigator
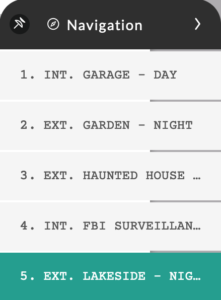
When you click on “Navigation”, the scene navigator will open, and what it does is, every time you write a scene heading in your script, this scene navigator will auto populate and list one heading after the other here in the “Navigation” window.
 If you click on one of the scene headings, the script editor view will jump to that scene. This makes it very easy for you to get to certain parts of the script directly, without having to go through the whole script in order to find a specific place.
If you don’t need the scene navigator anymore or you just want to hide it for a moment, just click on the “right arrow” in the top area, right next to where it says, “Navigation”, and you will go back to the tool box.
What you can also do, when “Navigation” is displayed, in the upper left corner of the navigator you have this little pin. If you click it, the navigator window will switch over to the left side of the screen and stay open, so you can keep using it, while still having access to the other tools in the tool box on the right side of the screen.
 One thing to keep in mind about the scene navigator, it lists everything that is defined as a scene heading via the formatting element dropdown. So, if you just write a scene heading in all caps, but it’s set to action line formatting, this may look like a scene heading in your script if you print it out or export it – although the line spacing won’t be exactly correct, but you will not see this scene heading in the navigator because the formatting is not set to scene heading.
When you set the scene heading formatting element correctly you see it has a grey background here in the script editor, which helps you distinguish it a little bit from all the other formatting elements.