How To Add Images To The Script In Celtx
Celtx Add Images
Celtx has a function that not only lets you assign commentaries to certain places in your script, but also pictures.
Let’s have a look at that.
When you are in the screenplay editor, make sure that the “Quick Access Toolbox” is open at the right side of the screen and that you can see the “Media” button.
You can toggle the display of the toolbox itself and the different tool buttons via the “View – Tools” menu.
Now, let’s say that you want to add a certain picture to a location.
This doesn’t have to be a location, this could also be a character picture, or the picture of everything that you want at any place in your script.
Just move the cursor to the place where you want to add the image, and then click on the “Media” buton in the toolbox.
There is not much you can do here apart from clicking the “plus” to add a new image, and that brings you to the “Add Images” dialog box, where you can upload an image from your local computer storage, pick one that you already have in your celtx library, or do a web search to look for a new image.
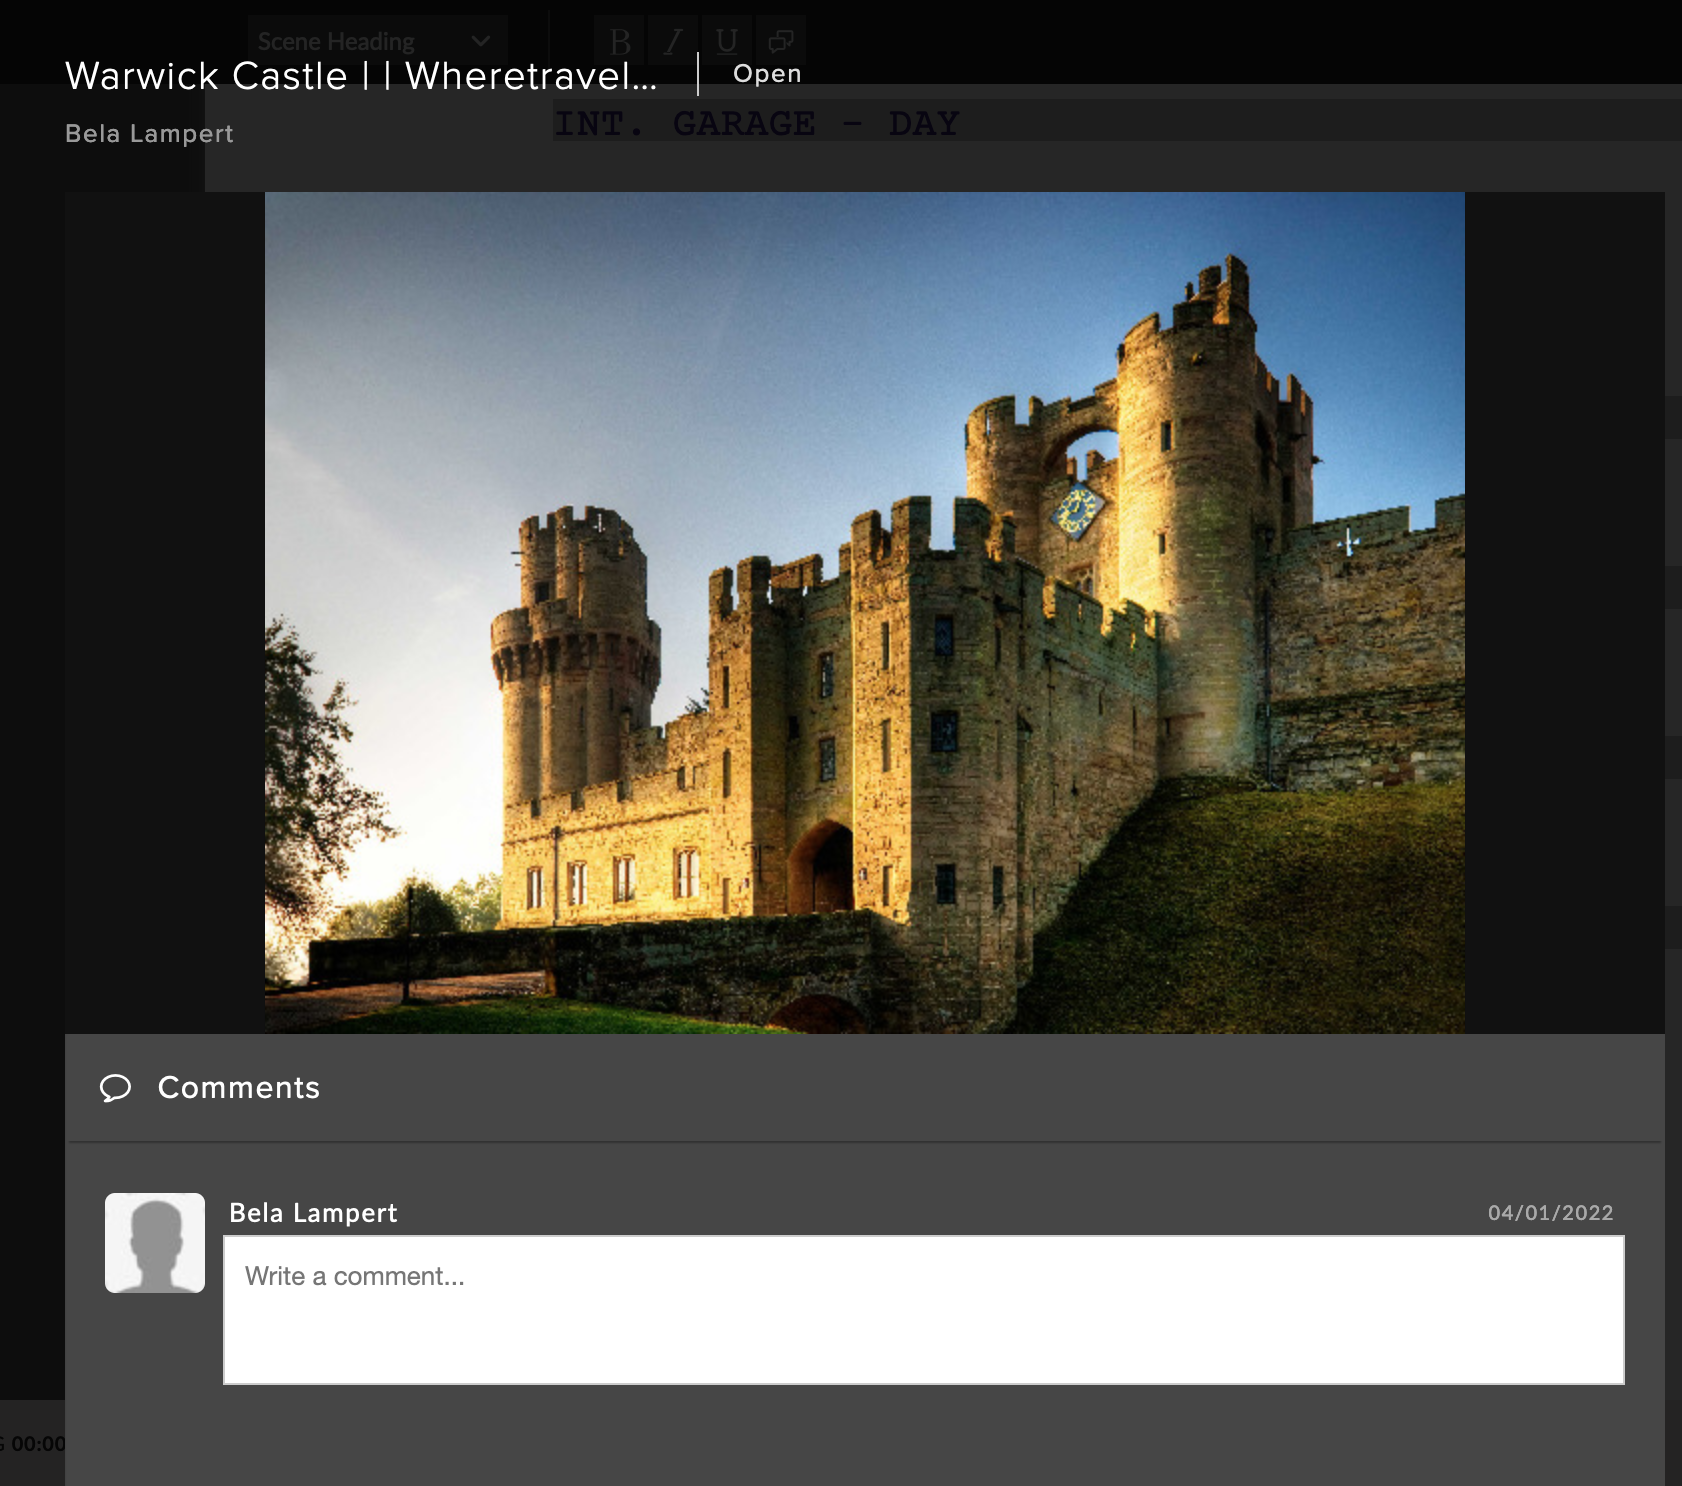
Then, when you’ve found the image that you want to add, just select it, and click “OK”.
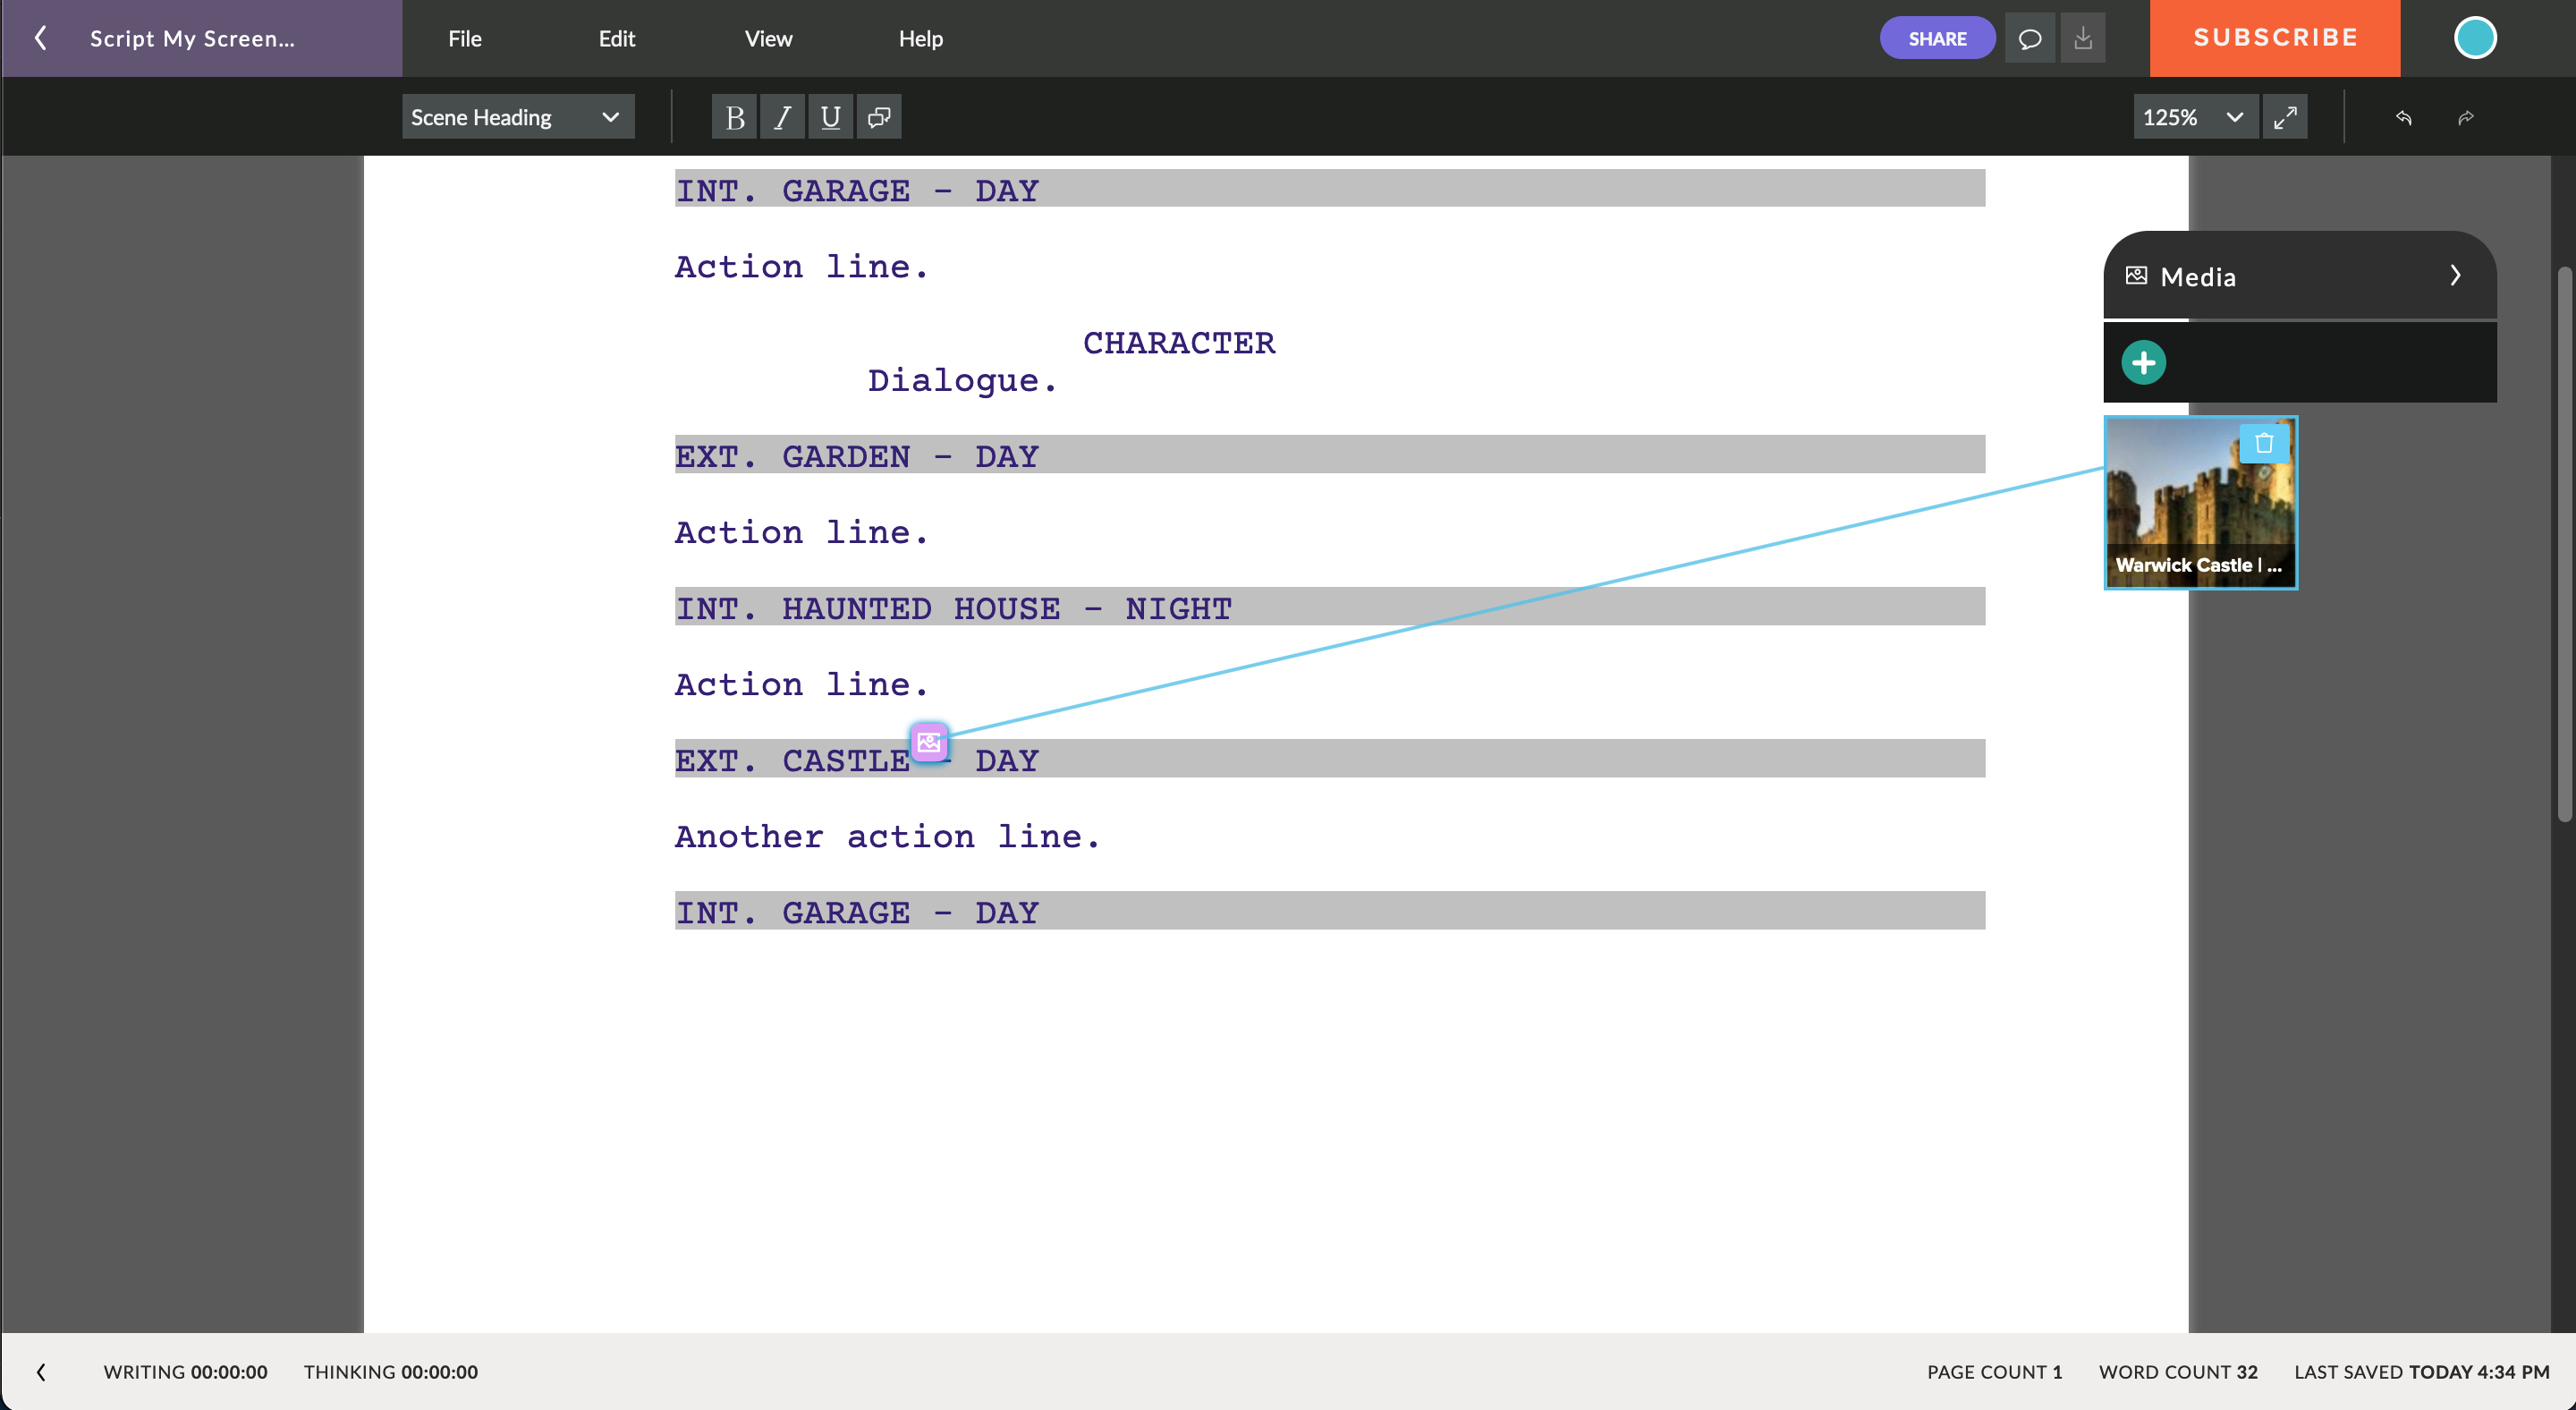 This doesn’t add the image itself to the script because that would influence the page count, but you see a little image icon, and when you click on it, even when the toolbox is closed, it will open up the image preview on the right side of the screen and when you click the image itself you get a larger view of the image and you could also add a comment to the image if you like.