How To Use Highland 2’s Navigator
Highland 2 Navigator
In this article we’re going to have a look at the Highland 2 navigator.
The navigator is in the sidebar on the left of the screen, and to get to it you just click on the left-most icon at the top of the sidebar.
You can also hide or show it by pressing the keys “Cmd + 1” on the keyboard or by going to “View – Show/Hide Navigator”.
What the navigator does is it shows you basic information about the scenes, sections, or other kinds of elements that you have in your script, so that you have an overview over what is going on, but also, to let you jump to certain element quickly.
Scene Headings
For example:
What we have here is a pretty standard screenplay in terms of the structuring elements that are used. The navigator shows us the scene headings, and that’s it.
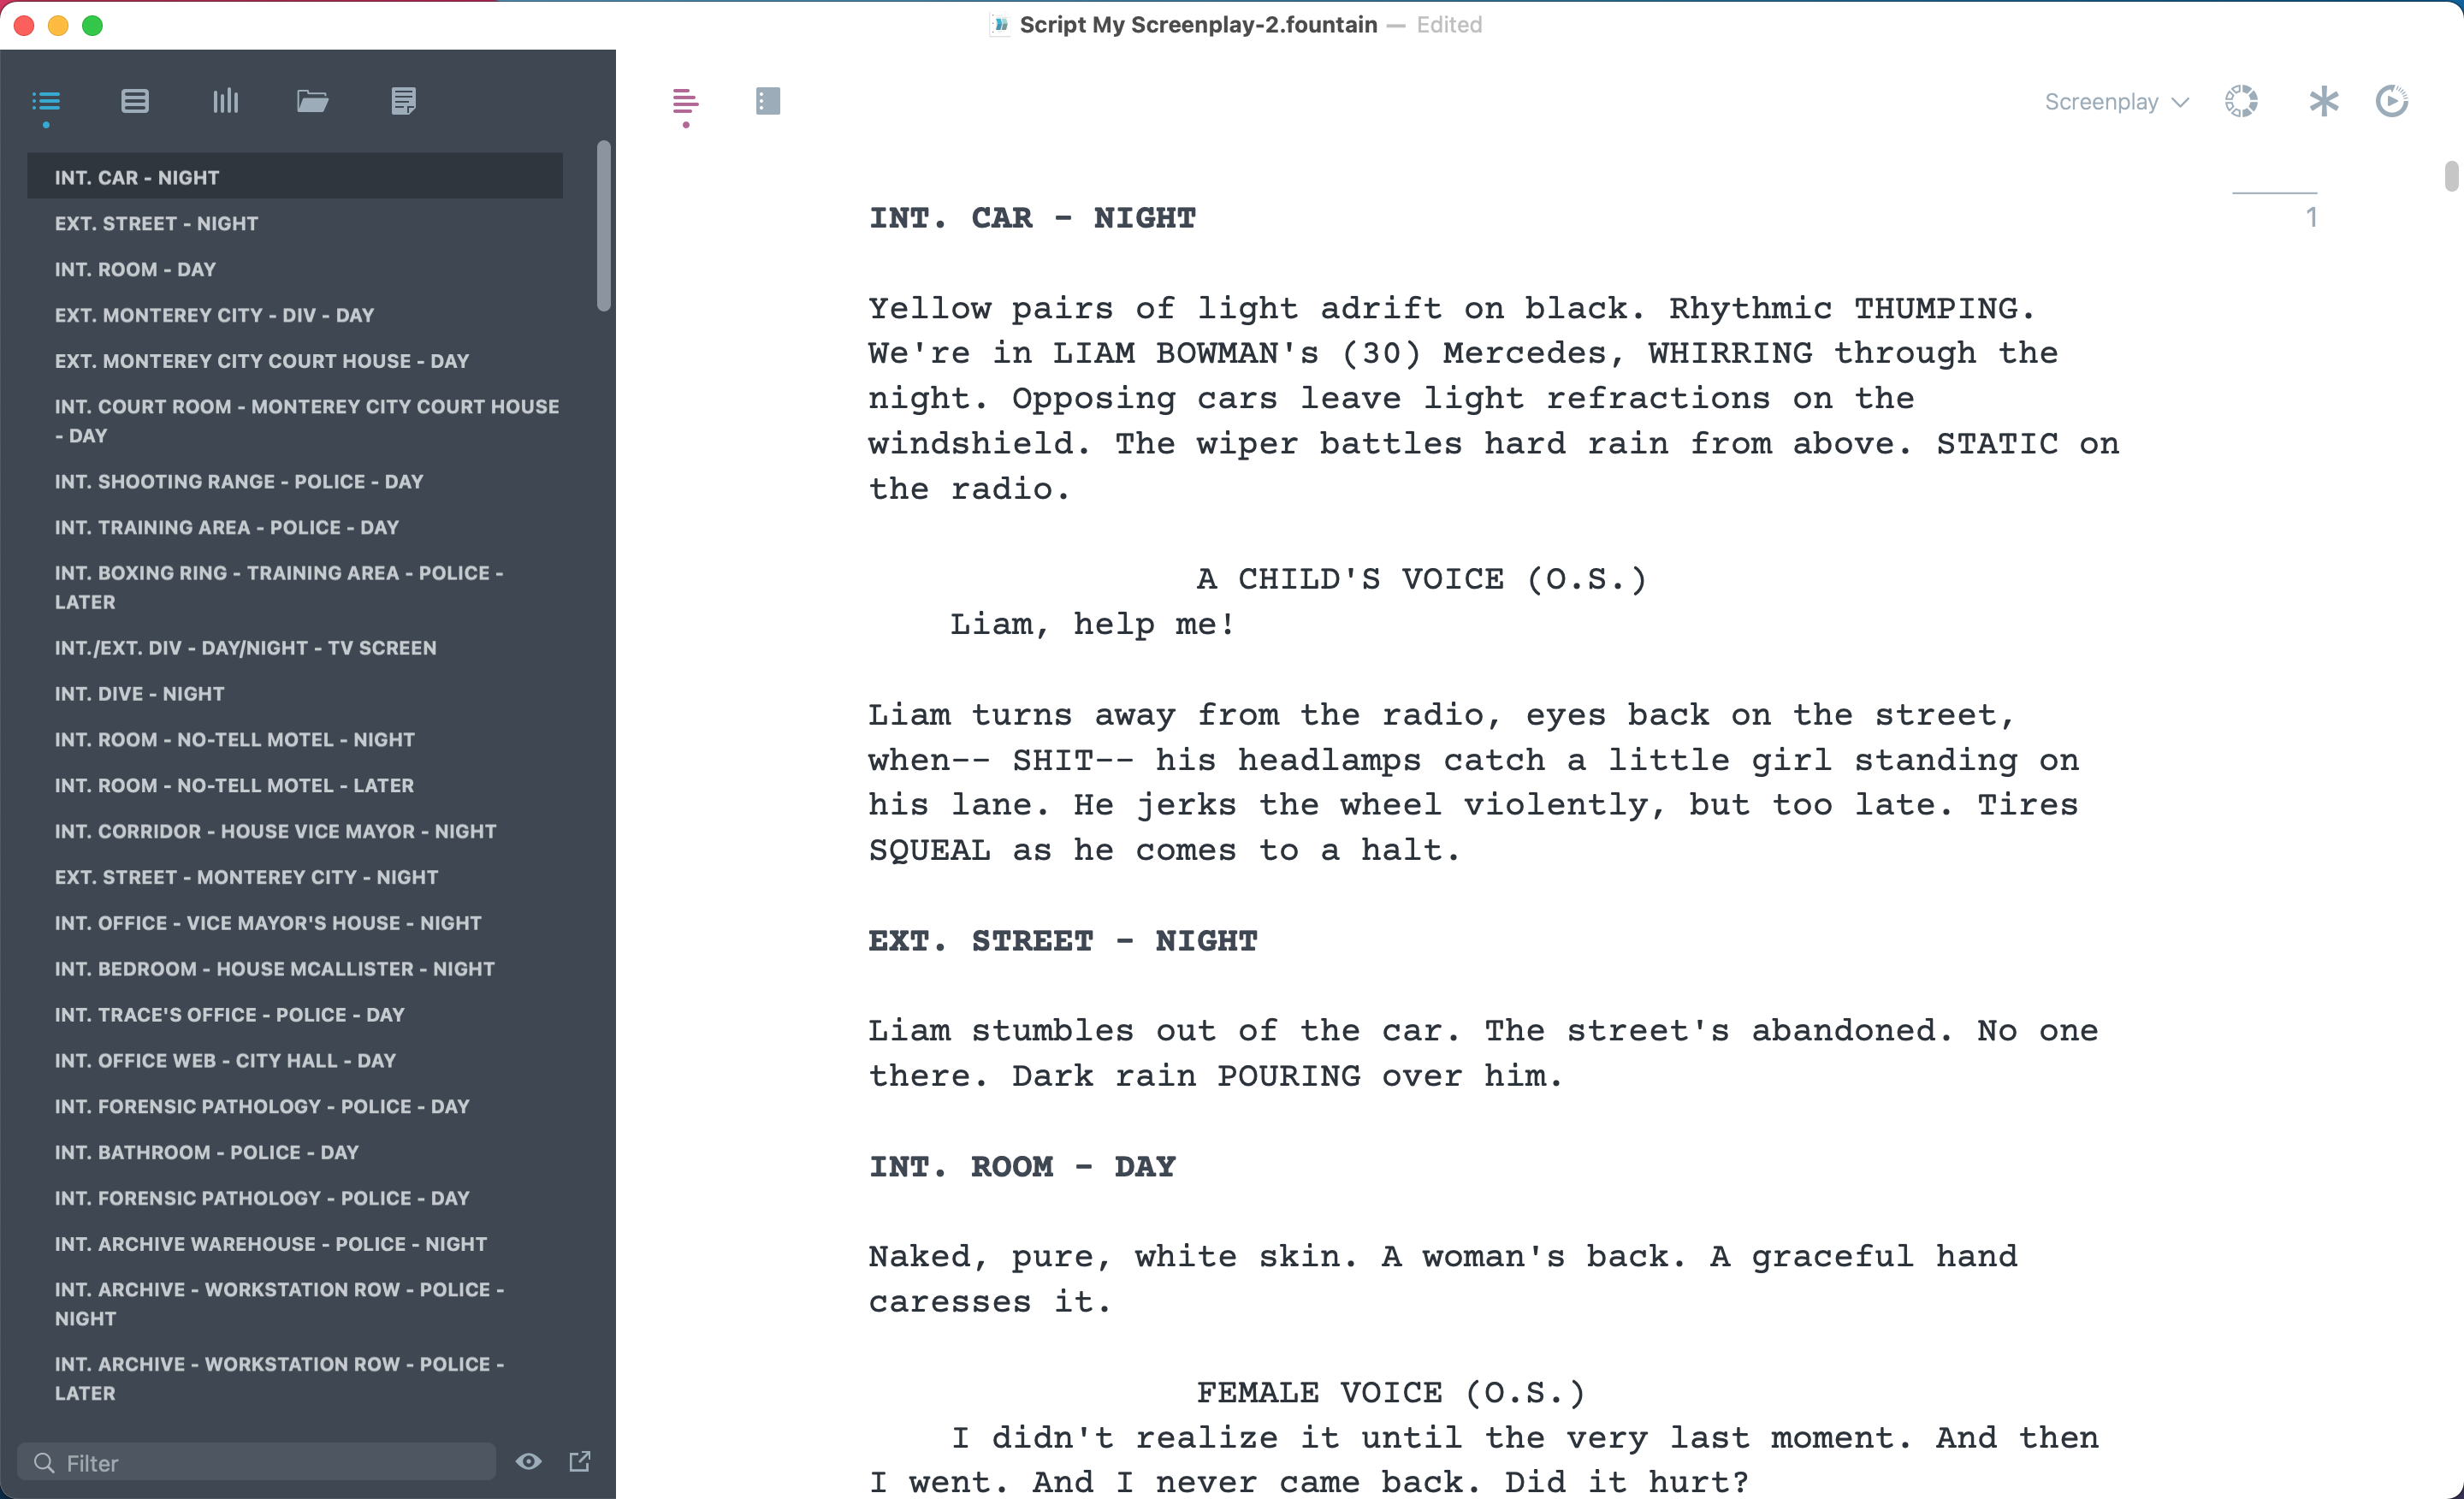 So, when we want to jump to a different scene, we just select it in the navigator and Highland will take us there.
So far, so good.
But the navigator can do much more than show us scene headings.
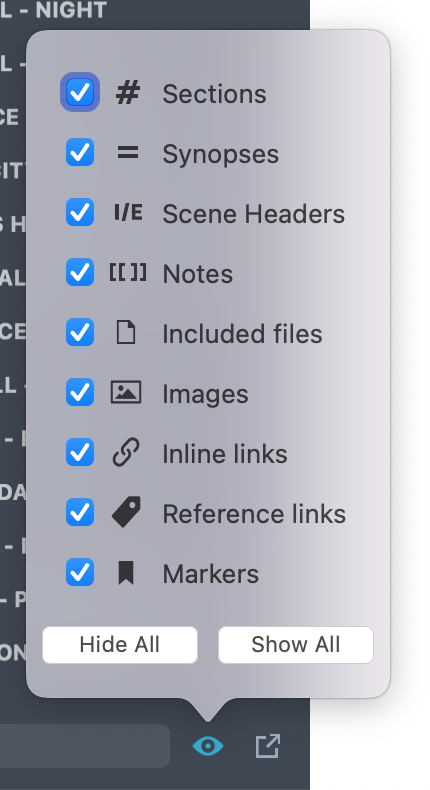
If we go way down to the bottom of the navigator and click on this “eye” icon, we see all the elements that we can have shown or hidden here in the navigator sidebar.
 In this article, we won’t go into the details about how each of them is used, although their usage is pretty simple in general.
But what we’ll do is we’ll just have a look at how to deal with these elements, or at least with the important ones in the navigator.
So, let’s create some of these and then see what they look like in the navigator.
Sections
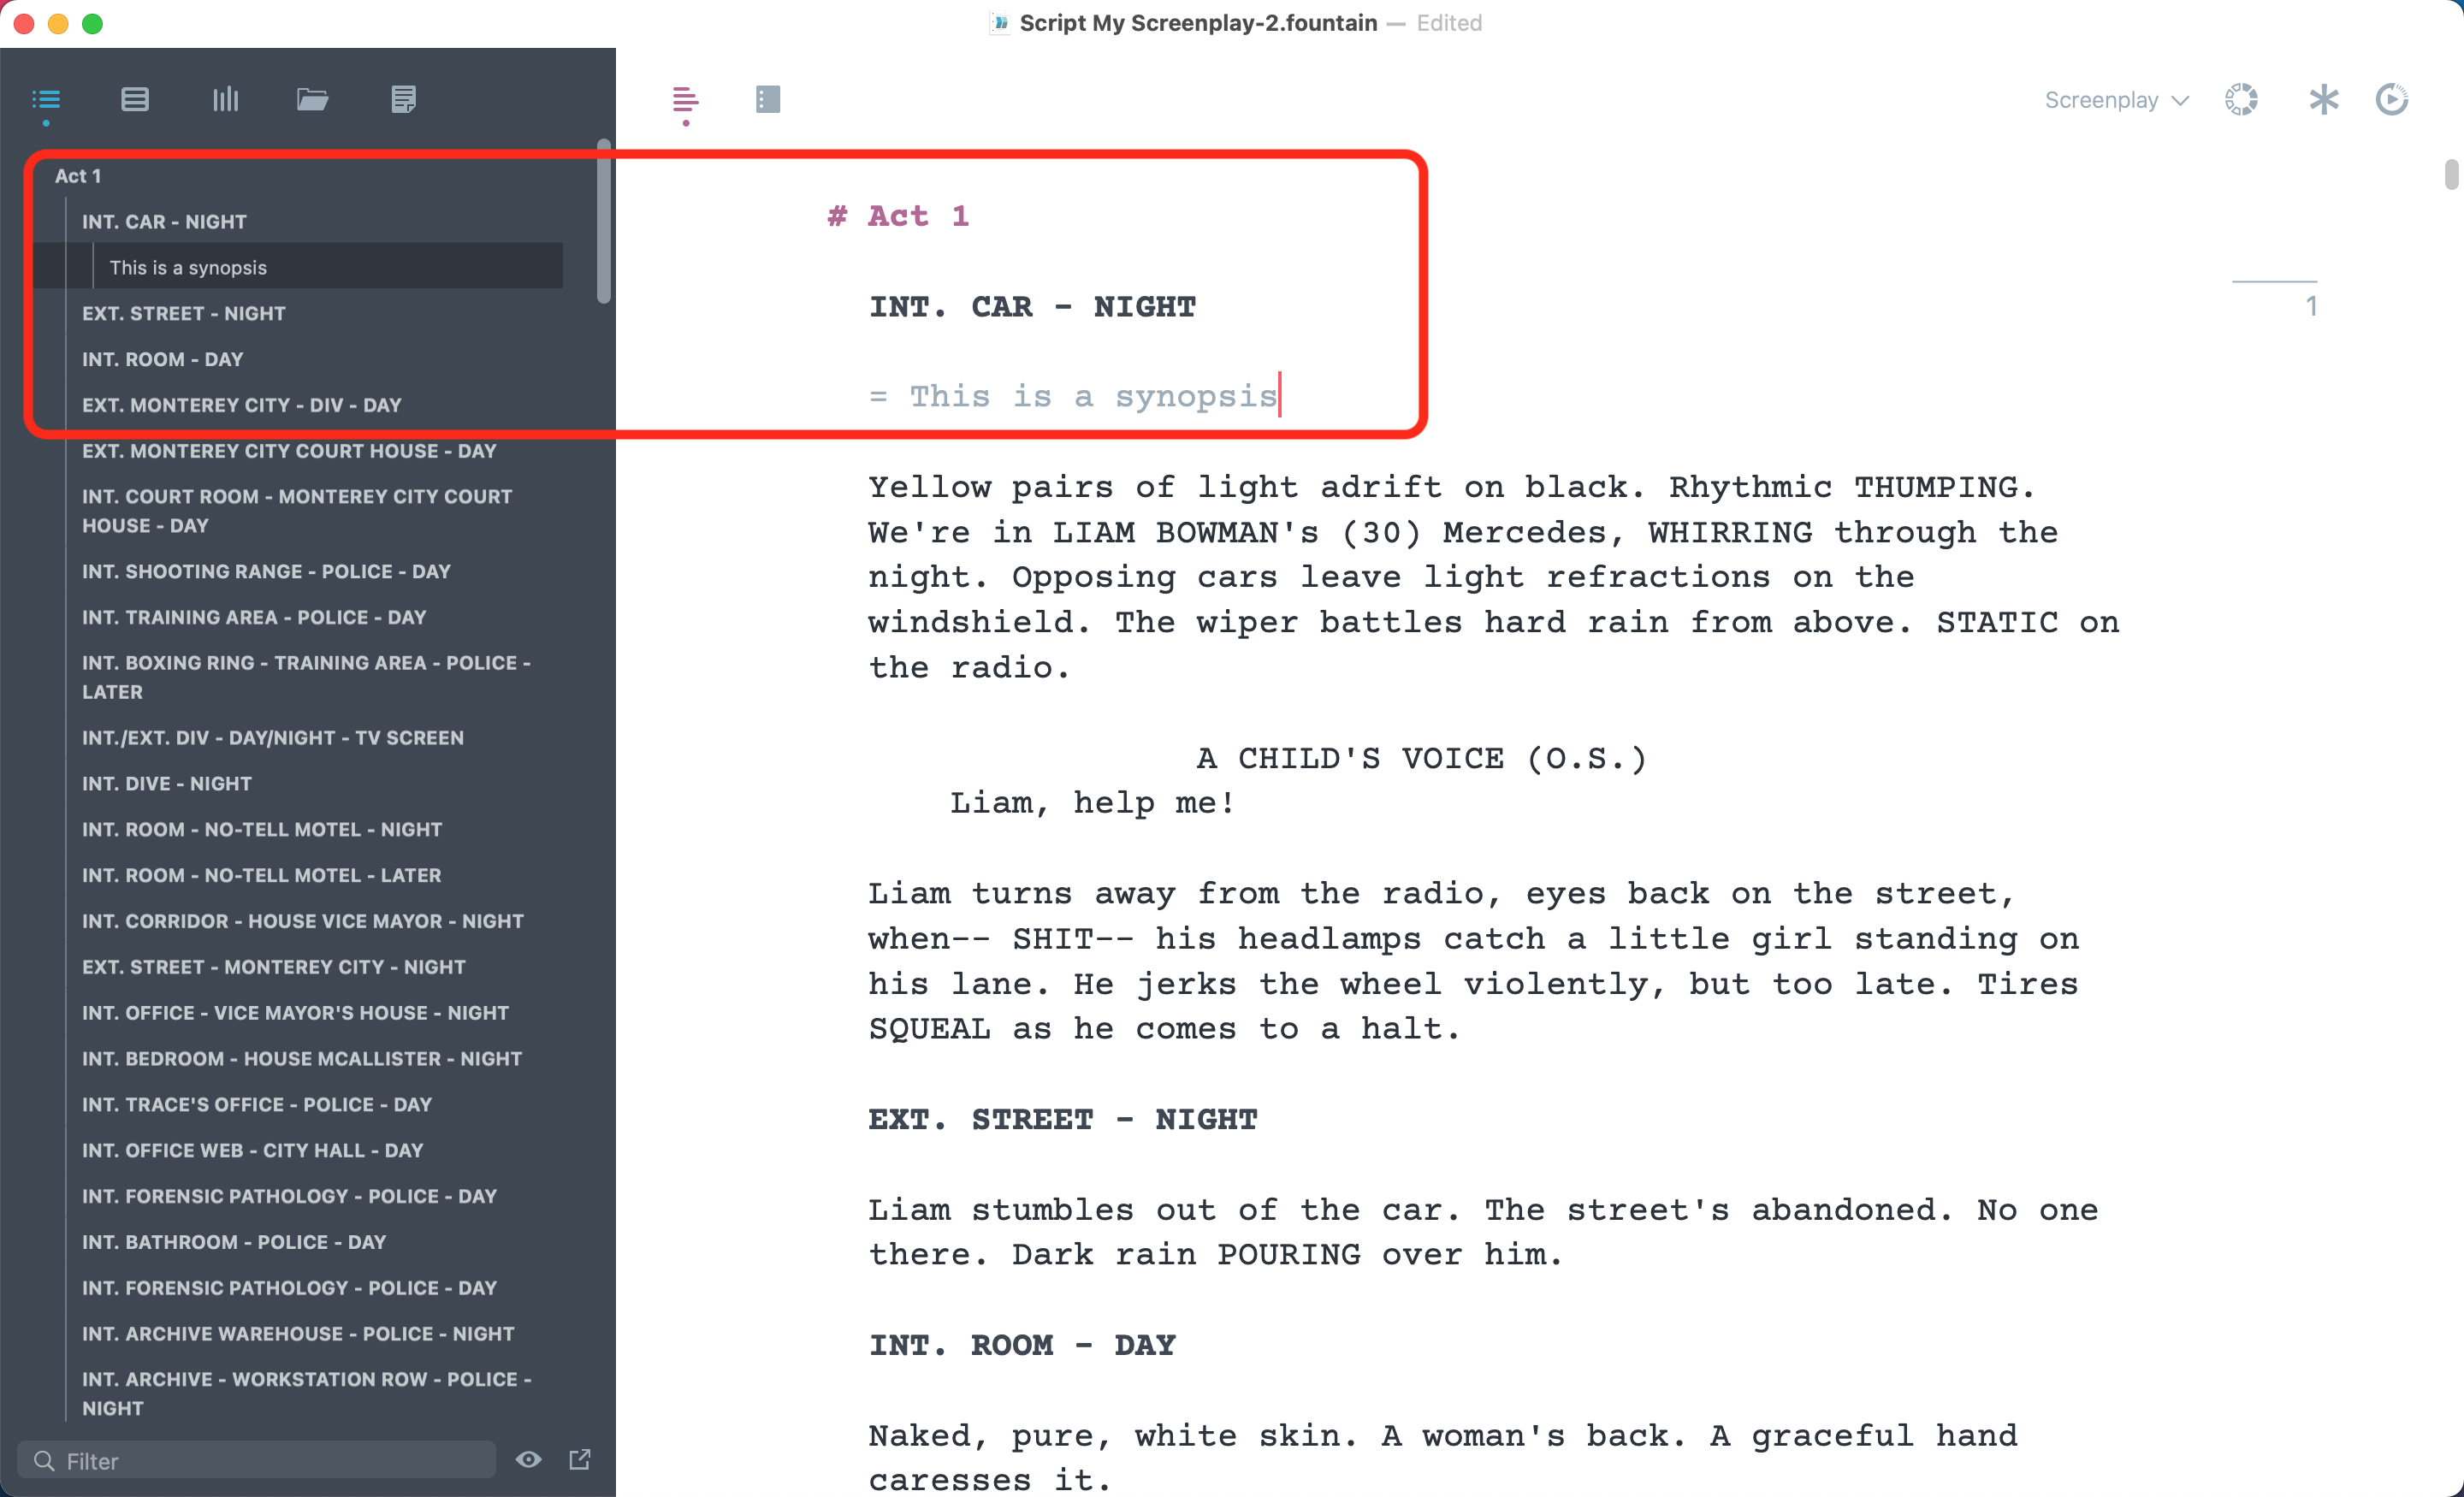
When I create a section by simple typing a “#” symbol, better known as hashtag these days, the navigator shows this section, and it also gives me a vertical line to indicate which elements are inside this section.
 If I create a sub-section now by putting two “#” symbols, the navigator reflects this by showing me a second vertical line to make it clear which elements are on which section level.
Again, we will have a look at how to use sections in anotehr article, for now, just know what they look like in the navigator.
And as with any other element, if I don’t want sections displayed in the navigator, I just go to the “eye” icon at the bottom and uncheck “sections” from the menu.
Synopses
The other elements work the same way. For example, if we put a synopsis in one of the scenes by typing the “=” sign at the beginning of an empty line, we see that the synopsis text is shown in the navigator.
 Depending on how many of these synopses you have, how extensive they are and how much other elements you already have displayed in the navigator you might want to have them turned on or off.
When you are using these different elements quite extensively and they all show up in the navigator, it might become a little bit overwhelming, so if you want to focus on one, or a couple of them, you just go to the filter menu at the bottom and turn off the ones you don’t need.
By the way, you can make the navigator sidebar bigger if you need, just hover over the border between the sidebar and the editor, and pull it a little bit to the right.
Filtering
You can also filter by text, if you enter a search word or phrase in the filter search bar, and then it will only show you the items in the navigator that match the search term.
What you can also do is, you can export this entire content of the navigator to its own document, so you have a complete export of this navigator view.
Just click on the “Export outline to a new document” button at the lower right of the navigator window, and Highland will open up a new file with the navigator items as text, which you can then change or use further for whatever type of document you might want to create with just certain elements but not with others.