Using Arc Studio’s Stash To Cut And Save Parts From Your Script

Buy Arc Studio now:
Let’s say you want to cut a certain part from your screenplay and you’re pretty sure you’re going to need that at another place at a later point in time.
You just want to keep that part in a safe place so that you can access it any time you want.
That’s exactly what Arc Studio’s Stash is for.
In case you’re familiar with video editing, it’s a little bit like that. Only that in the case of video editing it’s called a bin.
The Stash is just like a container that can hold parts of your script, so you have them stored away safely, and when you need them later you just pull them out and add it to wherever you want.
Let’s see how it works.
To open the stash, click on this window symbol on the left side with the arrow in it.
Add to Stash
There are several ways to add something to the stash.
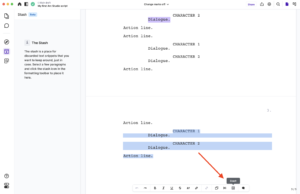
If you want to do it with your mouse, you just select the part that you want to cut from your screenplay, then you click on the stash symbol in the formatting palette at the bottom of your screen. The stash symbol is the square on with the arrow in it.
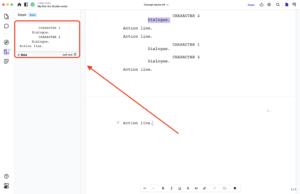
 The selected part is then moved to the stash.
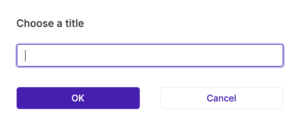
 Another way to do it, with the keyboard, is either by pressing OPTION-BACKSPACE on the MAC or ALT-BACKSPACE on the PC, or, if you want a title prompt to pop open so that you can name the stashed part immediately, you hold the SHIFT key and then press OPTION-BACKSPACE or ALT-BACKSPACE.
 But you can still name the stashed part directly in the stash window. Just below the stashed text, where it shows your name, when you click on it you can give it a title.
Insert into Script
If you want to add the stashed part to another part of your script, just drag it directly to where you want to use it, and it will automatically be inserted at that place.
Delete stashed Part
If you want to delete a stashed item, there is a trash can symbol directly below each one, you just click that and then it’s gone.

Buy Arc Studio now: