Writing And Formatting With WriterDuet (incl. Dual Dialogue)
WriterDuet Writing and Formatting
I have already written several articles about different functions in WriterDuet, but this time I want to focus on the most important part of all, which is the actual writing.
So, let’s look at how you can use WriterDuet’s Editor and formatting features to write your draft.
Creating Documents within your Project
One thing that you might already be aware of is that you can create several documents inside one WriterDuet project. A while back that was restricted to the standard three documents, namely Main Document, Title Page, and Private Pad for free accounts.
They seem to have opened that up a bit, because now you can create more documents even with a free account. I’m working on a free account here in this case, so at the time of this recording it works. But I don’t know if they will change that in the future.
Anyway, the way the formatting features work in the program is always the same. I will show it to you with the example of a screenplay, but when you’re using WriterDuet to write a book it’s even easier because you don’t have so many different formatting elements.
Let’s take a look at the book template for a second, if you create a new document with the book template, and then in the sidebar you click on the “Line Types” icon, you see that you have different formatting presets there, like headings, chapters, and so on. So, all the rules that apply to using the screenplay formatting elements that we will look at in a second, also apply here, it’s just that the names might be a bit differnt, and of course the formatting itself will be adapted to book formatting, not to screenplay formatting.
 But having gone through this article you’ll easily be able to use all of these.
OK, so let’s get back to the screenplay document.
I’m assuming that you have basic knowledge of what the different screenplay formatting elements are and what their purpose is.
If you don’t, no problem, there is an article that explains it, if you’re not sure what all these different script elements to you can go and read that first.
So, let’s see how you can actually do some writing in WriterDuet.
When you create a new document, you see this empty page and it has one colored line. That’s the current line of your cursor. Since there’s nothing on the page yet, by logic, it’s going to be the first line that is colored.
Also, at the left side of the page you see this little speech bubble. If you click this, you get options for comments, revision history and tagging.
Don’t worry about what all of that is right now, we’ll look into that another time, but for now, just know that it’s there. Because that speech bubble is going to be there with every element on the page that you create, so you know from the start what it does.
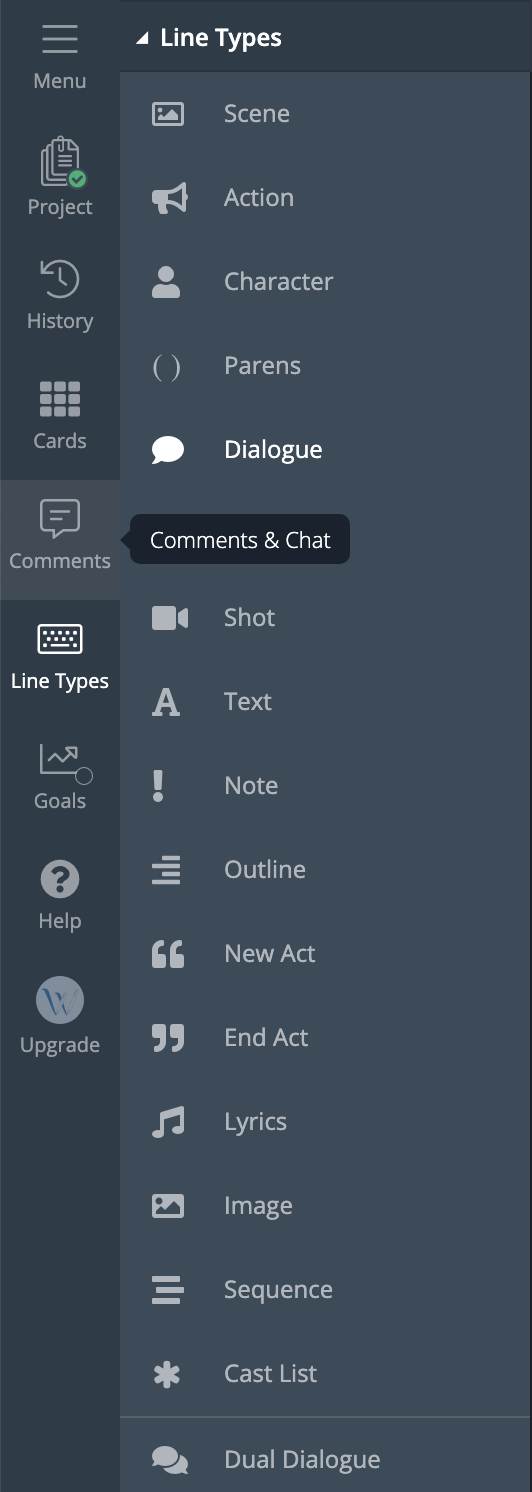
If you now take a look at the left side at the line types that we have available, you see that at the top it says “Scene” and that “Scene” element is highlighted. That’s because screenplays usually start with a scene heading element, so this is what WriterDuet gives you right from the start.
If you now type in a scene heading, and you hit “Enter”, you jump to the next paragraph, and this is automatically an action element. You see, the “Action” element is highlighted in the line types on the left.
Many screenplay writing applications use the “Enter” and “Tab” keys to jump between the different formatting elements, and this also works here. If you write an action line for example, and then hit enter, the program jumps to the next action element. If you want to write a character name instead, just hit “Tab” and the element changes to a “Character” element.
So, that’s one way to go through it. You just write, and use “Enter” and “Tab” to jump from element to element.
Another way to do it would be to select these elements with your mouse. Just put your cursor inside the element you want to change and then choose another one from the list.
But this might be a bit annoying, having to use your mouse every time when you want to change the element formatting, so what you can also do is use keyboard shortcuts.
When you press the “Cmd” key on the Mac, “Ctrl” key on the PC, you see that keyboard combinations appear next to the formatting elements.
So, instead of using the mouse to change them you can easily just press the corresponding key combination to change one element to another.
Special Structure Elements
Now you’re familiar with the standard formatting elements in a screenplay: scene, action, character, parenthetical, dialogue, and so on.
Let’s look at special elements now for notes and structure.
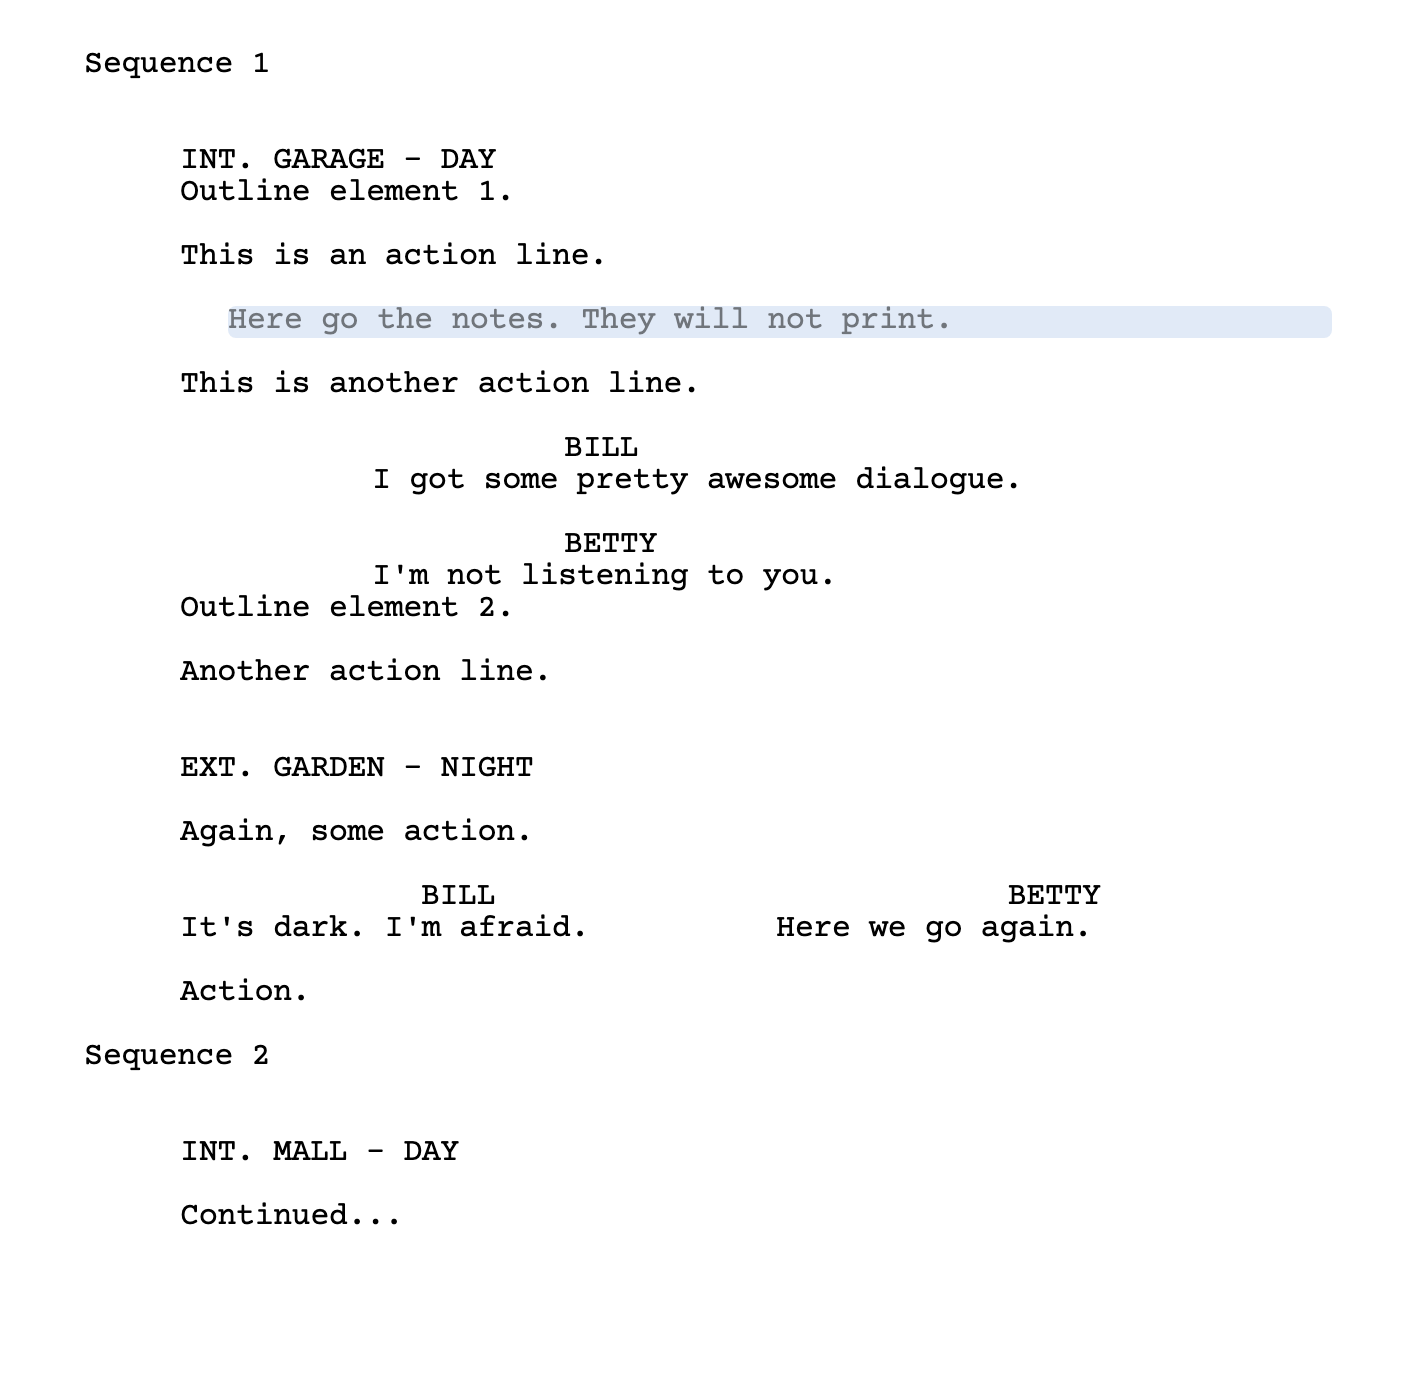 You have a note element here that you can put directly on the page as its own line type. If you choose “Note” from the line types, this will create a note element that is not printed. So you can just add comments right here in your document that maybe give more explanation to something, or you can use them as placeholders to indicate where something still is missing, or other things.
There are other note functions in WriterDuet, like via the speech bubble that we took a brief look at for example, but this “Note” line item is just another way of putting notes in your draft.
Then, we have elements that can help you structure your draft, namely “Outline” and “Sequence”.
What they do is, they let you group elements together, so you can get a better overview of what is going on on the page.
And the big difference is that “Outline” is hierarchy-wise below scene headings, and “Sequence” is above scene headings.
Let’s use “Outline” first.
If you create an “Outline” element within the scene, you can collapse the content that follows this outline element until the next outline element.
You see this little arrow at the left side of the “Outline” line? If you click that you can hide and show all the elements that are under this outline element.
So, you could, for example hide all the elements that you don’t want to see below these outline elements and just see the beats of your scene, if that’s what you want to call it.
The same goes for “Sequence”, just that “Sequence” is above scene headings. “Outline” elements are bound to a scene in the same way as scenes are bound to sequences, if you’re using them.
So, if you put in a “Sequence” element, you see it also has this arrow at the side to swivel it open or close, but it is way up in the hierarchy, so, it will hide entire scenes under it, until the next sequence element.
So, these two, “Outline” and “Sequence” let you structure your draft pretty easily and it’s a way to get a way from the details of your scenes and just see the overview of your story, the broad strokes so to speak.
Alright, we’re almost done.
Additional Elements
Just a quick look at the rest of the line types you see there, but they’re all pretty self-explanatory for the writers who need them.
“Text” ist just normal text for everything that you might need that hasn’t a designated line type.
“New Act” and “End Act” puts the centered line at the beginning or at the end of an act in TV scripts that just says, “Act 1” and “End of Act 1” and so on.
Then you have “lyrics” and “images” in case you need that. If you select Image it will let you select a media type and you just upload it. Very straightforward.
“Cast List” is for sitcom writers. If you’re a sitcom writer you probably know how and where to put that.
Dual Dialogue
And then, there is one final one, that isn’t used much, but when you need it, you need to know that it’s here and how to use it: Dual Dialogue.
What it does is it puts two characters with their respective blocks of dialogue right next to each other to indicate that they’re speaking at the same time.
It’s very simple to use, if you choose the “Dual Dialogue” line type, you get two fields for character names and two fields for dialogue right next to each other on the page and you practically just fill them out. That’s it.
Custom Formatting
And, at the bottom, you see some standard additional formatting options: bold, italics, underline, and strikethrough. They work just like in any other writing applications, just select the text that you want to apply these to and then select them.
Alright, that’s basically how you write your script, book, short story, whatever it might be, in WriterDuet.
And of course, you can change the formatting settings for your line types, but that would be too much to cover in this article. We’ve already looked at a lot of stuff.
But just so you know where to find that, go to “Customize – Format” and there under “Line Types” you can choose the different line types from the dropdown and then adjust the settings.