Managing Scenes In Final Draft 12
Click the button below to subscribe to my monthly, paid "Inspiration Now!" Newsletter:
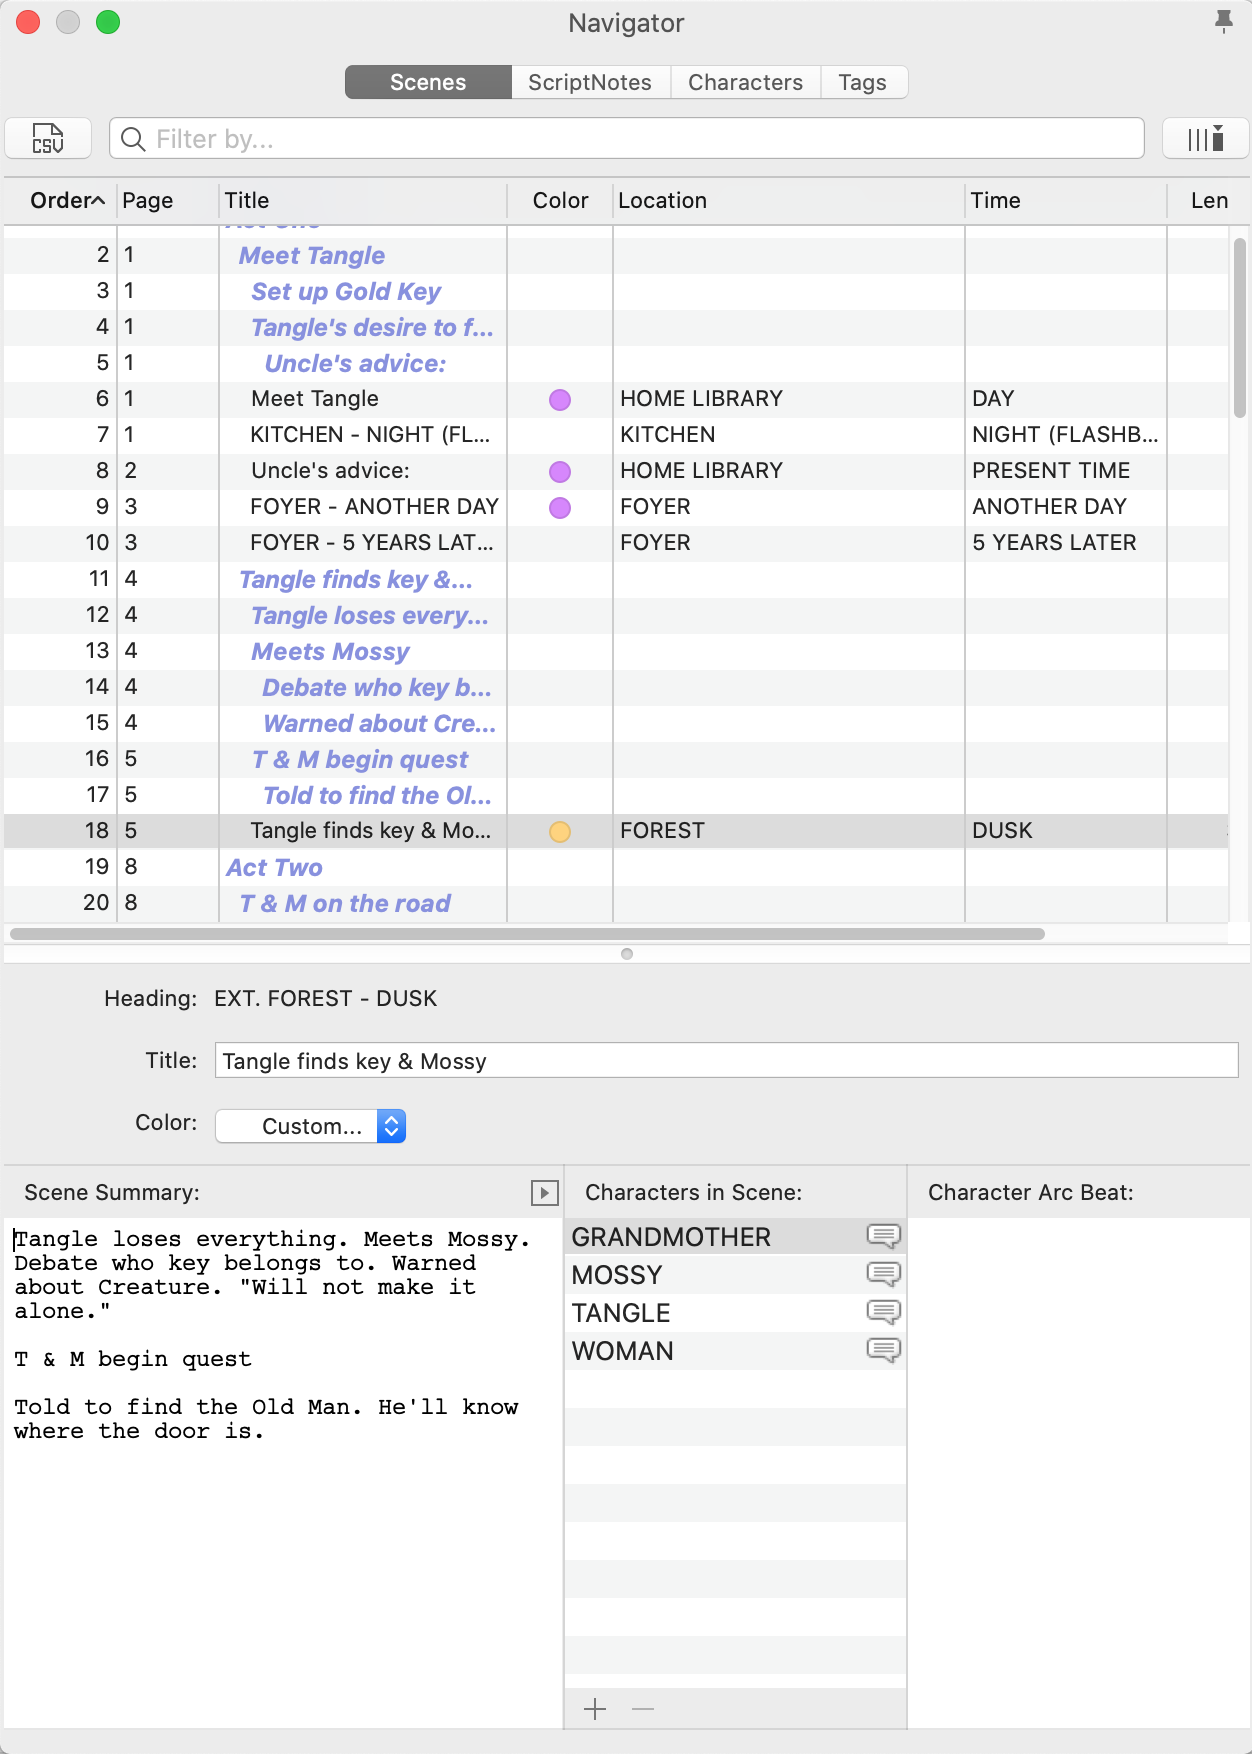
Final Draft 12’s Scene Navigator
In order to get a good overview of what is happening in each of your scenes and which characters show up, speaking or non-speaking, Final Draft offers you a tool called the “Scene Navigator”.
What the scene navigator does is it gives you several options to view your scenes in a different order or filter them by certain criteria so that you can concentrate on specific ones and not be distracted by all the others.
If the navigator is not already open, go to “Tools – Show Navigator”. Or you can also use the button in the toolbar up top, depending on how you configured your toolbar.
 If you want to hide the navigator again to have more screen space just go to “Tools” again and choose “Hide Navigator”
The navigator is a floating window and you can adjust its size and position to your liking.
Let’s have a closer look at the “Scenes” tab now.
The spreadsheet section gives you several information about your scenes and you can use the information to order or filter your scenes the way you want. It also shows you your outline elements.
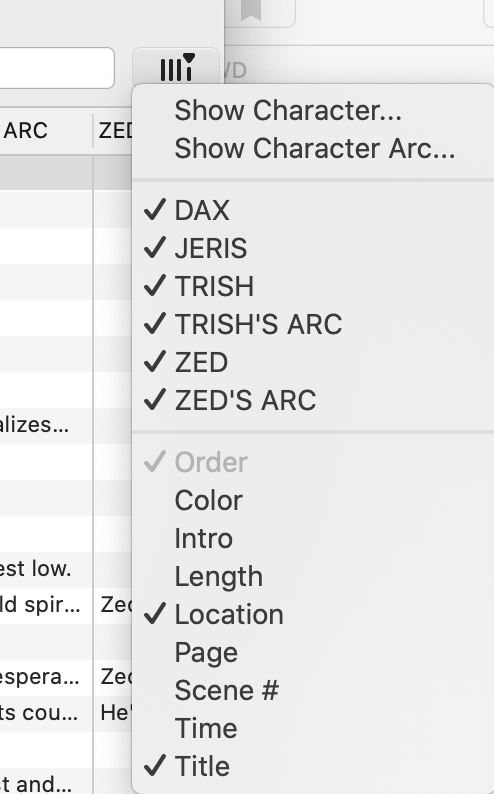
You can choose to display or hide certain columns to your liking if you click the button next to the search area and choose to activate or deactivate them here.
 The information you see here in the scenes navigator is in part the same information that we already saw in the index cards view.
So, if you change the scene information in the fields below, they will also change in the index cards view and vice versa.
That means if you have already assigned colours to certain scenes in the index cards view, those colours will also show up here in the scene navigator.
In case the information shown in the columns is cut off you can make the columns wider with your mouse. Just click-drag between the columns and adjust the width to your liking.
You can also sort your scenes by certain columns by clicking in the header of the column. Click once to sort in ascending order or click a second time to sort in descending order.
If you double click on one of the scenes Final Draft 10 will automatically jump to the corresponding scene in your script if you’re in one of the script views, or to the corresponding index card if you’re in one of the index cards views.
You can also filter your scenes in the scene navigator by entering a search term up top in the search bar.
Alright, in this lesson we’ve learned how to keep track of all your scenes and their additional information by using sorting and filtering methods in the scene navigator.