How To Use The Binder In Scrivener
Using The Binder In Scrivener
In this article were going to have a closer look at Scrivener’s binder.
The binder is this narrow window on the left side of the interface that holds all your content files.
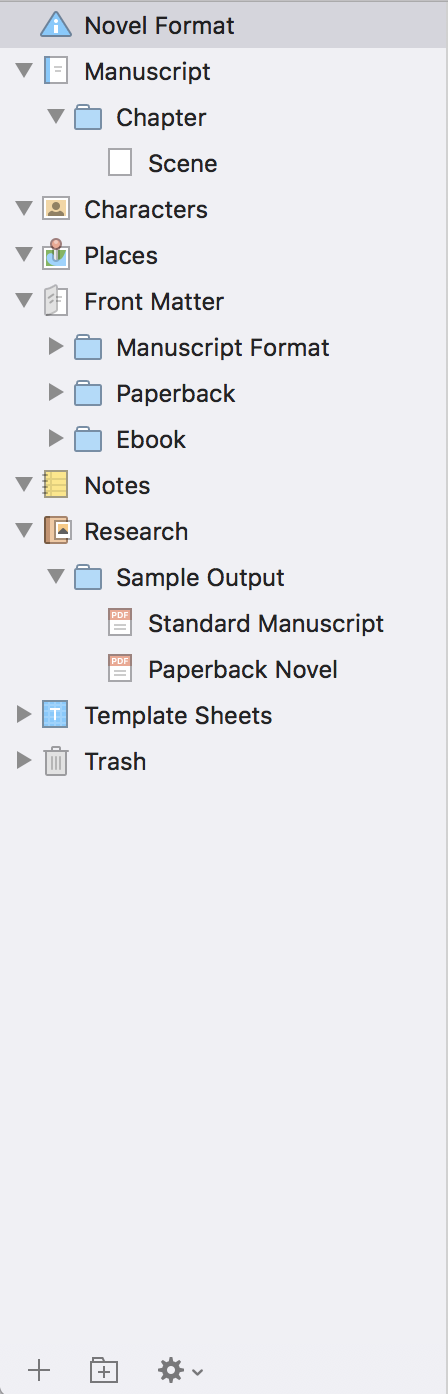 In case you can’t see the binder you might be using a custom layout template. In order to see the binder, just go to “Window – Layouts – Default” and you should see the binder on the left side now.
The binder is the place where Scrivener stores all the content that you have in your project. As you might already know, Scrivener is a so called nonlinear writing application.
That means, you can have several documents in one project and depending on how you set them up, you can export, or rather “compile” them differently in order to get different outputs.
There are a couple of important things that you need to know in order to use the binder effectively.
The Draft Folder
Every Scrivener project has one draft folder and this is where you put all the documents that you (maybe) want to have in your output file. I say “maybe” because depending on how you set up the compiler later you still can output files from outside the draft folder.
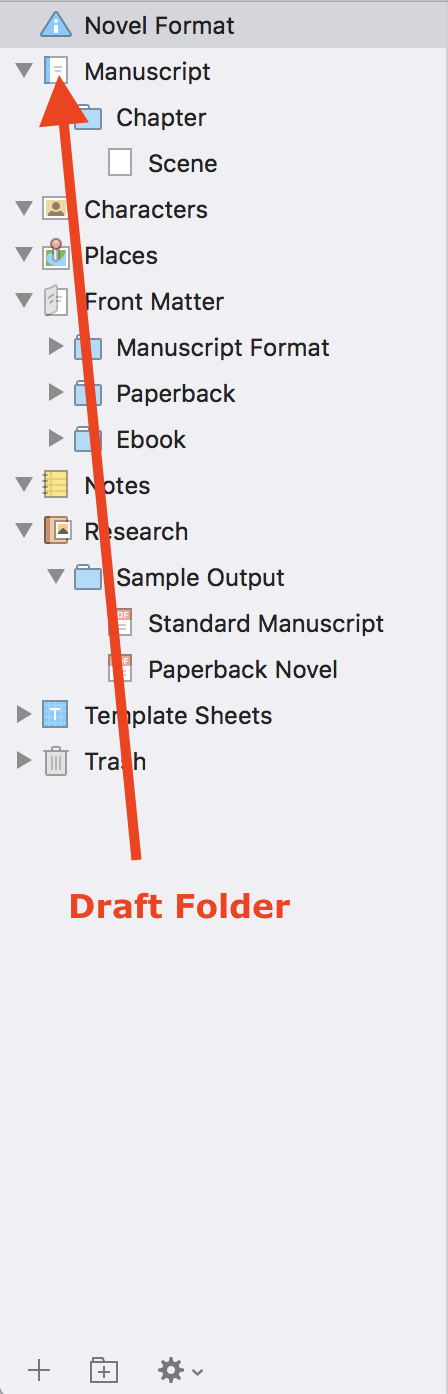 But for now let’s just say the way you think of the draft folder is, it is what will become your output document.
For that reason you can only import text documents into the draft folder.
Files and Folders
Scrivener doesn’t really distinguish between files and folders in the sense that you need to create a file in order to create content. Files can hold content as well as folders can.
You also can convert a file into a folder and vice versa at any time without losing any of your content.
So, why do you have the two? Why not only have documents that can hold other sub documents?
The difference lies, again, in the compiler. Without knowing what the compiler does at this moment, just know that once you compile your work in order to create your final output you can have different settings for files and folders.
For example, if you are writing a novel, all your folders could be chapters and they would automatically stick to a certain kind of formatting, while other documents are handled (“compiled”) differently.
This is also why built-in Scrivener templates have an information page that tell you how you should set up your binder structure in order to use the built in compiler setups.
If you’re new to Scrivener and right now this sounds complicated, don’t worry, it will become much clearer to you once you start using the program and creating documents.
The Trash Folder
The trash folder basically does what it says. If you delete documents in Scrivener, they are moved to the trash folder, from where you can retrieve them anytime, unless you empty the trash folder.
If you empty the trash folder, all your deleted documents will be gone and un-retrievable. So be careful with that!
The Research Folder
The research folder is an additional folder that Scrivener places into the binder in every project that it creates.
You can of course use the research folder for research, but it is basically just a folder outside of the draft folder that you can use whichever way you want.
You can rename it, and you can put all kinds of files in their that you like. You’re not restricted to text files only, like in the draft folder.
There are some file types that Scrivener will be able to show you inside the program, like picture files, as well as audio and video. But theoretically you can import all kinds of files into the research folder. If Scrivener is unable to show you the file inside the program, you can open it in an external viewer if you click on the button in the lower right corner of the editor.
You can also change the icon of the research folder, or of any folder for that matter, if you right-click in the binder and then choose “Change Icon”. You’re presented with a whole list of possible icons that you can choose.
Creating new Files and Folders
You’re not restricted to the folders that Scrivener gives you with whichever template you choose to work with.
You can create as many folders as you like outside of the draft folder, so you can structure and sort your work, research, whatever it is that you want to store in different places in whichever hierarchy you want.
 If you want to put files or folders inside or outside of other files or folders, that’s very easy to do, just grab whatever it is that you want to move to some other place and drag it over. Scrivener will then place it wherever you release the mouse button.
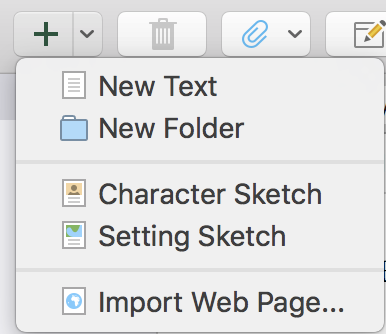
At the bottom of the binder window you will see two buttons with plus to create new files or folders and you also have a gear icon that lets you access the right click menu.
If you access the right-click menu you see all kinds of things that you can do with your files and folders in the binder and we are going to have a look at many of them in other articles.
For now, you have a basic understanding of how the binder works, so take time and play around with it a little in order to get a feel for how this system of handling your document files is different from any other writing applications.