How To Compile Your Draft In Scrivener (Compiler Walkthrough)
Scrivener Compiler Walkthrough
In this video we will go through the basic necessary steps to setup the compiler to create custom compiles in Scrivener.
I will not explain every step in detail, because there are other videos here that do that. This one is meant to give you a guide for which steps do you have to go through in order to get to a custom compile and how they hang together.
For the sake of this demonstration I am using Scrivener’s “Blank” project, which is completely empty. Because I want to show you the steps you need to go through from scratch.
Because if you understand what the compiler is doing, it will be way easier for you to understand how pre-built templates are set up and how you can change their compile settings.
Binder Structure
What is quite important in your project is your binder structure. You should make sure that you use a clearly structured hierarchy where the same type of documents are always on the same hierarchy level.
Here, my project is pretty simple, I have set this up as if it were a novel for example, where I have a folder for each of my chapters, and a file in the folder that represents a scene. Of course you can have more complex setups, but for the sake of this compiler walkthrough I want to keep things simple and this will do the job.
 In the scene files, I’ve pasted some sample text so that we have something that could be our book, or novel.
Also, I created a “Front Matter” folder that holds a very simple title page. Again, this is just for demonstration, of course you would make your title page more sophisticated than that.
Section Types
Now, what we need to do is we need to set up our section types. The section types are names for which kinds of documents we have here in the binder, or to put it another way, in terms of compiling, how do we want to call them.
To set up the section types go to the project settings under “Project – Project Settings”. If the project settings window doesn’t show you the section types by default, you just select the first entry here at the top, where it says, “Section Types”.
Now you see some standard section types that are crated when we create the blank project.
We have heading, sub-heading, and section.
In this example, let’s say that “Section” will be for our scenes, so let’s call that “Scene”, then, we can use the heading for our chapter titles, so let’s call that “Chapter”, and we don’t need the sub-heading, but what we do need is a title page, so let’s rename this “Title Page”.
 Default Section Type Structure

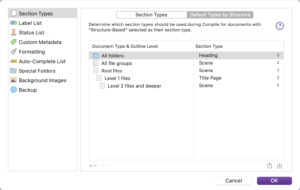
Then, as for the default section types by structure, let’s click on this second tab here if you will in this window and let’s define that folders get assigned the “Heading” section. We don’t have folders on different hierarchy levels, so in this case we can leave it that way and we don’t need to create sub-folder levels.
And we don’t have file groups, so it doesn’t matter what is set up here, but we do have files. If you click on the file, you see that all our scenes and also the title page are highlighted in the background.
But we don’t want that. We want scenes and the title page do use different section types. So, one way to do that is we could just leave the setting here which would apply the “Scene” section to all the files and then later in the compiler we would have to manually set the title page document to the “Title Page” section.
Or, and that’s what I will do here, we create the necessary sub-levels for files and define the section types right here in the project settings.
So, I will create two sub levels of files, the first is for the title page, because the title page is one level below the root level, and then a second one for the scenes, because they are on the second level below root level.
And now we can assign the “Title Page” section to the title page, and the “Scene” section to our scene files.
 Compile Format Designer

Alright, next we go to the compile format designer. For this, go to “File – Compile” and then create a new compile format with the “plus” button in the lower left corner of the compile window.
You see we also have a bunch of ready-made section layouts, so we don’t have to start from scratch completely.
So let’s see what we can use here.
What we need for my novel is a layout that only compiles the title, that will be for the chapter titles, and another one that only compiles the text, which will be for our scenes.
And, we need another one that only compiles the text, and this is going to be for the title page.
The difference between the title page and the scene format will be that I want a page break after the title page, whereas after the scenes I don’t necessarily want that. Because maybe I will decide to put several scene files in my chapter and not just one. And in that case I wouldn’t want to have a page break between them.
So, I will use the “New Page Heading” layout for my chapter titles, because from the title I’m guessing it will give me a page break before each chapter, and we will check that in a second, and then it will compile just the title of my chapter folders.
So for easier use I will rename this to “New Page Chapter Title”.
Then, I will use the “Text Section” for my scenes, because this only compiles the text, which is exactly what I want for my scenes. I’ll rename this, “Scene”.
Then, the only section that is missing is the “Title Page” section, and for this I will use this “New Page” layout here at the bottom. I’m just going to rename this to “Title Page”.
 Okay, now we’ve decided which layouts we’re going to use, the next step is to make sure they compile as we want.
Before we go and check the separators, let’s add one thing here for the chapter titles. I don’t want the chapter titles just to say “Chapter”, I want to add a number at the end of it, so that it will say “Chapter 1” for the first chapter, “Chapter 2” for the second, etc.
To do this we will use a so-called placeholder.
Below in the title suffix settings, I will add a space character and then 1. This will add an incrementing number every time this appears. And since the compiler adds this every time we have a chapter title, it will add an automatic numbering at the end of each chapter heading.
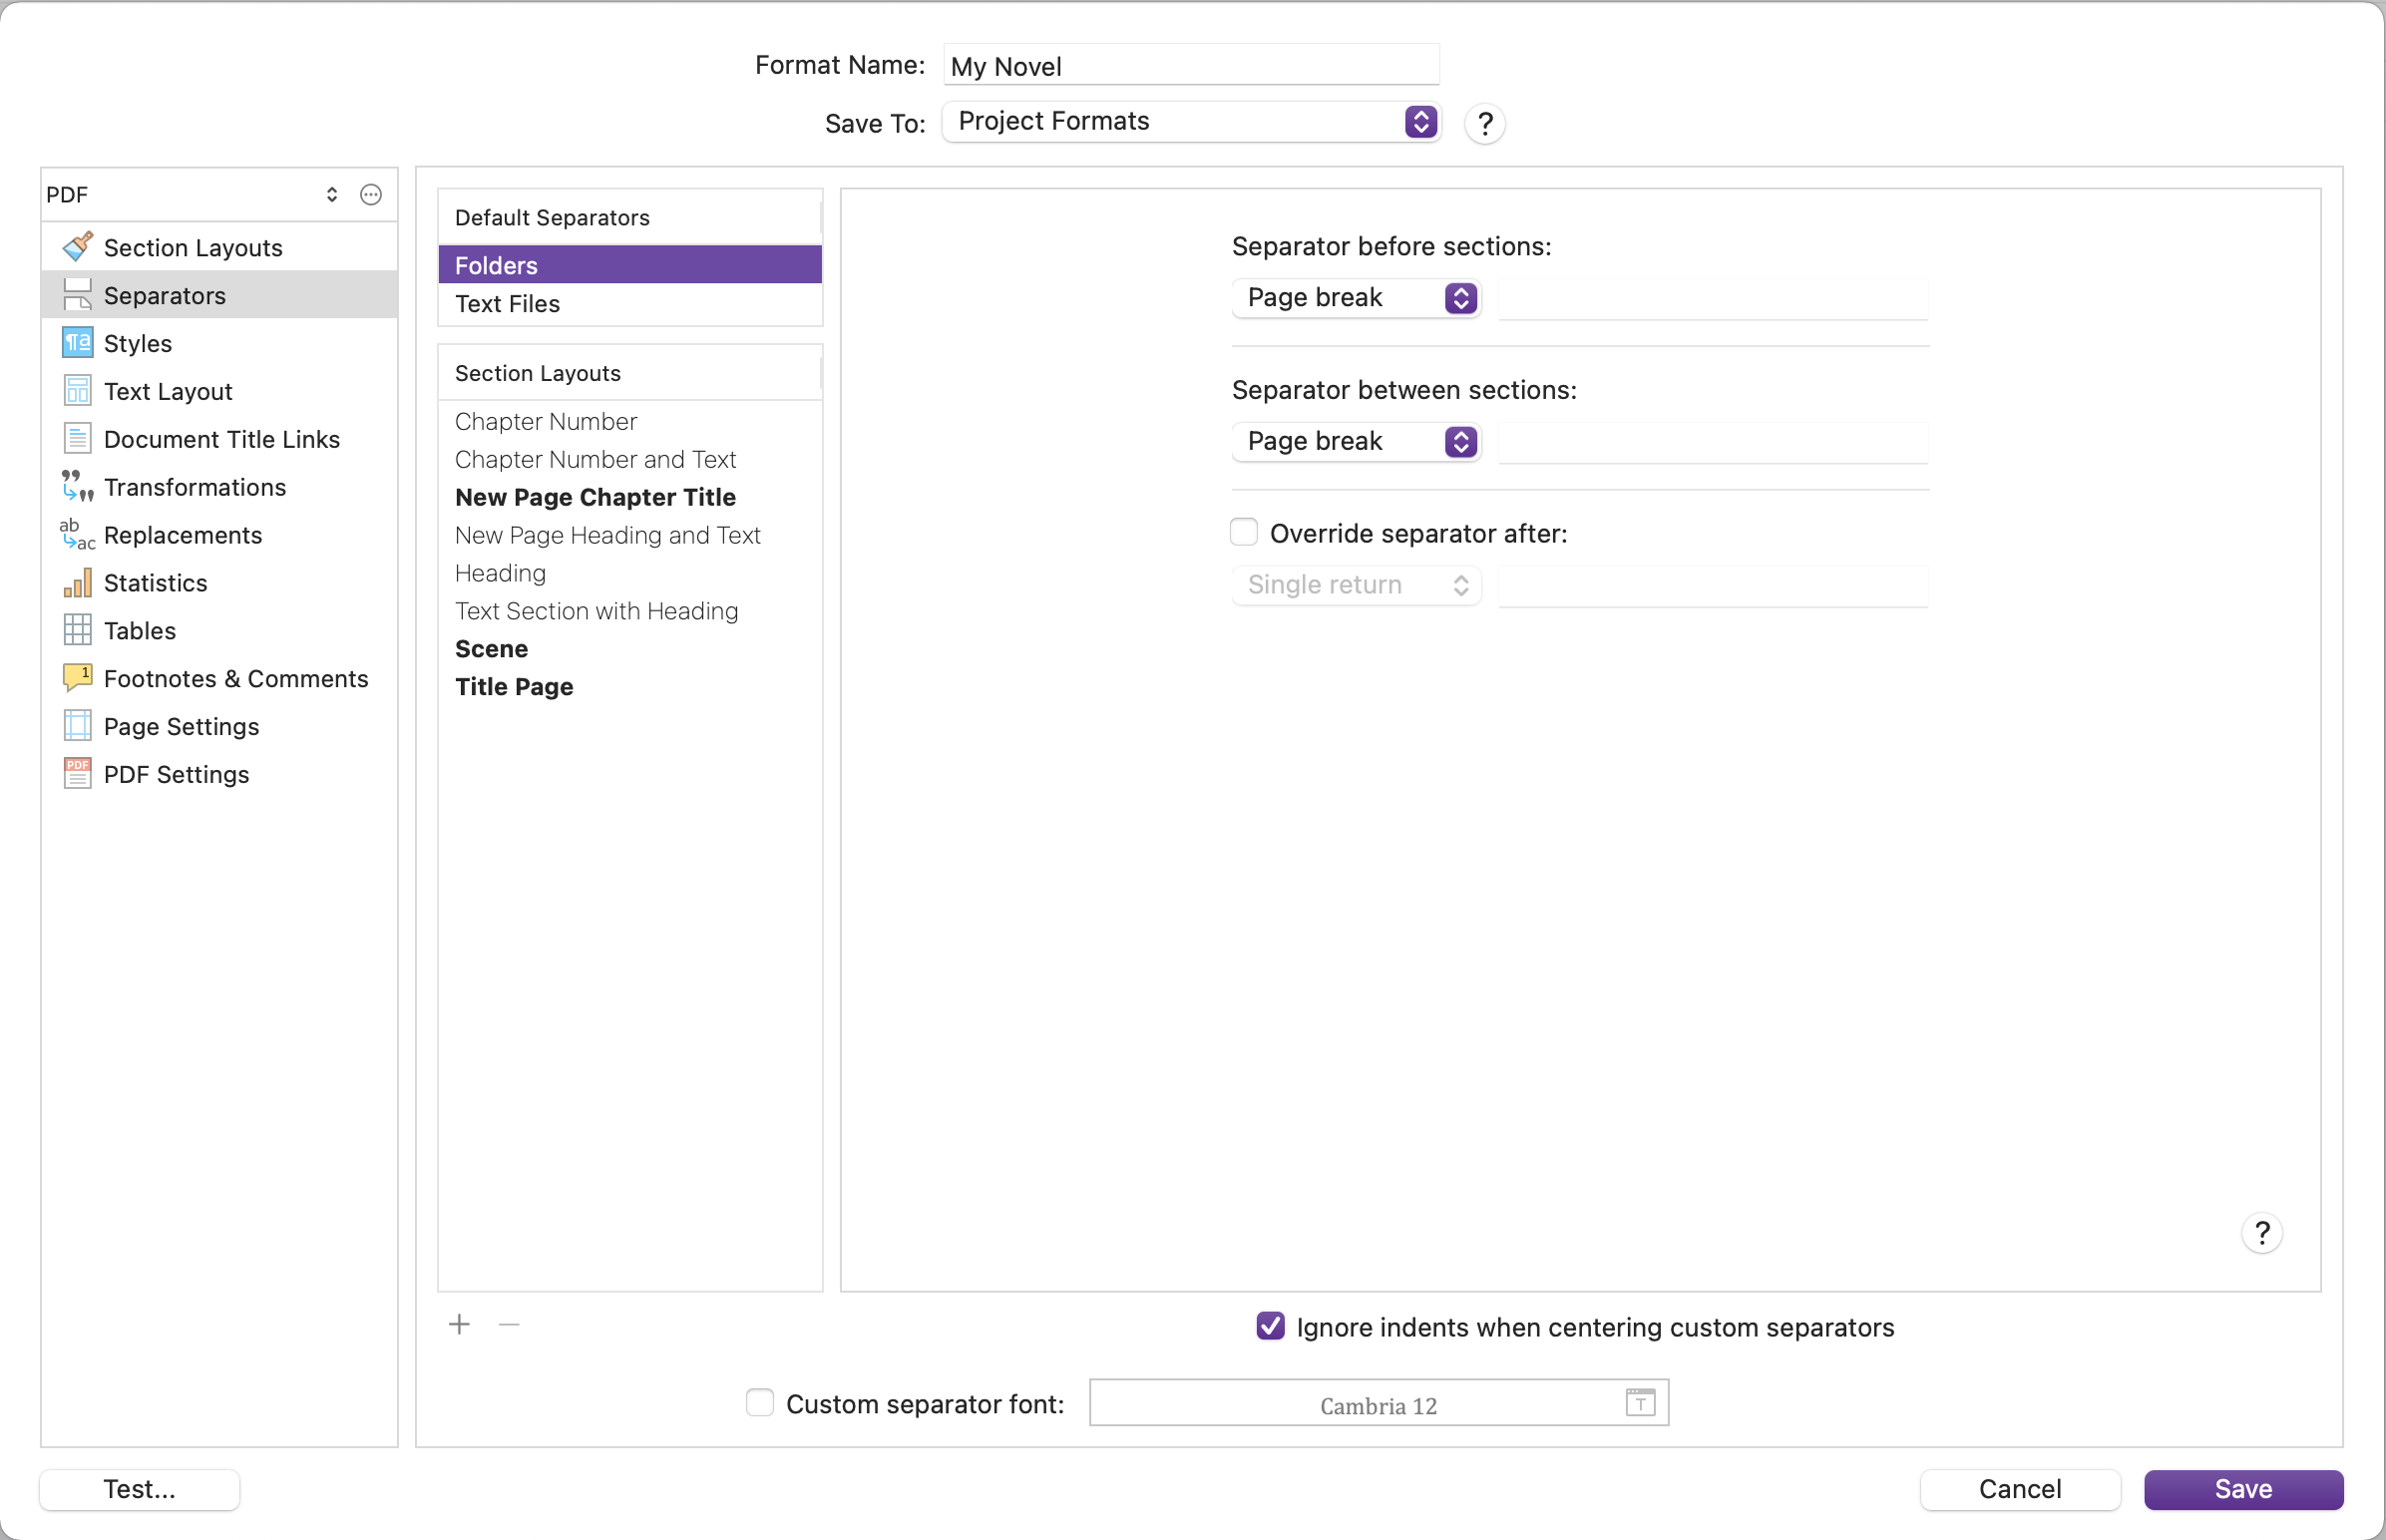
The other layouts should be fine, so we can now have a look at the separators.
On the left side of the compile layout designer, go to “Sections”.
Here you can define, which separations do you want to have between which of the documents.
Let’s just think for second about what we want.
We want a page break after the title page, and we want to have a page break before each chapter title, so that the next chapter will begin on a new page and the scene comes right after that. We do NOT want page breaks between scenes because we want to be able to have several scenes in one chapter.
So, let’s have a look how we can set this up.
Under the default separators up top we see that for folders there is a page break set to be before sections and between sections. This could be useful for our purposes, because our chapter headings are folders, so that is what we want, we just need to check that the “New Page Chapter Title” layout does not override these settings.
When we click on it we see, it doesn’t. It uses the default separators, so that’s good. Nothing to do here.
Then, let’s check the default separators for files.
They are now set to “Empty line”, which is also good, because if we were to have two files following each other we don’t want a page break. We also don’t want an extra page break before this section, which will be between the chapter folder and the scene file.
So, this also looks good.
Now let’s see the title page.
The title page is a file document, so theoretically, the file separators should apply.
But: separators only apply if there is something to separate, so, since the title page is the first thing that we compiled, and nothing comes before that, the “before” separator does not apply. Also, the “between” separator does not apply neither because we don’t have several title pages, it’s just one, and the next element that follows is the chapter title folder.
So, although we could set up separation settings for the title page, the only setting that would make a difference here is the “Override separator after” setting. We could set that to do a page break, but since the element that follows is the chapter title, and that is set to begin with a page break anyway, we don’t need that here.
So, the sparator settings should be good the way they are.
 This time we will not care about the rest of the settings in here, of course there is a lot more that you could do, but I just want to take you through the steps quickly, so that you see how they work together.
If you want to play around more with all the settings here, you’re more than welcome to do so, of course.
Alright, let’s save this, and now we see that newly created compile format at the left side under the preset formats.
But there are couple of things left to do.
Add Front Matter
If we take a look at the included files on the right side, we see that the sections are applied correctly, but the title page is missing.
In order to add the front matter, we need to check the box down below where it says, “Front Matter”, and then we choose the title page.
Now it is added to the top, and it also has the correct section type because we already set that up in the project settings.
Assign Section Layouts
Now, what we need to do is assign the correct section layouts, that we created in the compile format designer, to the sections.
To do that, in the middle area of the compile window, at the bottom, click “Assign Section Layouts”.
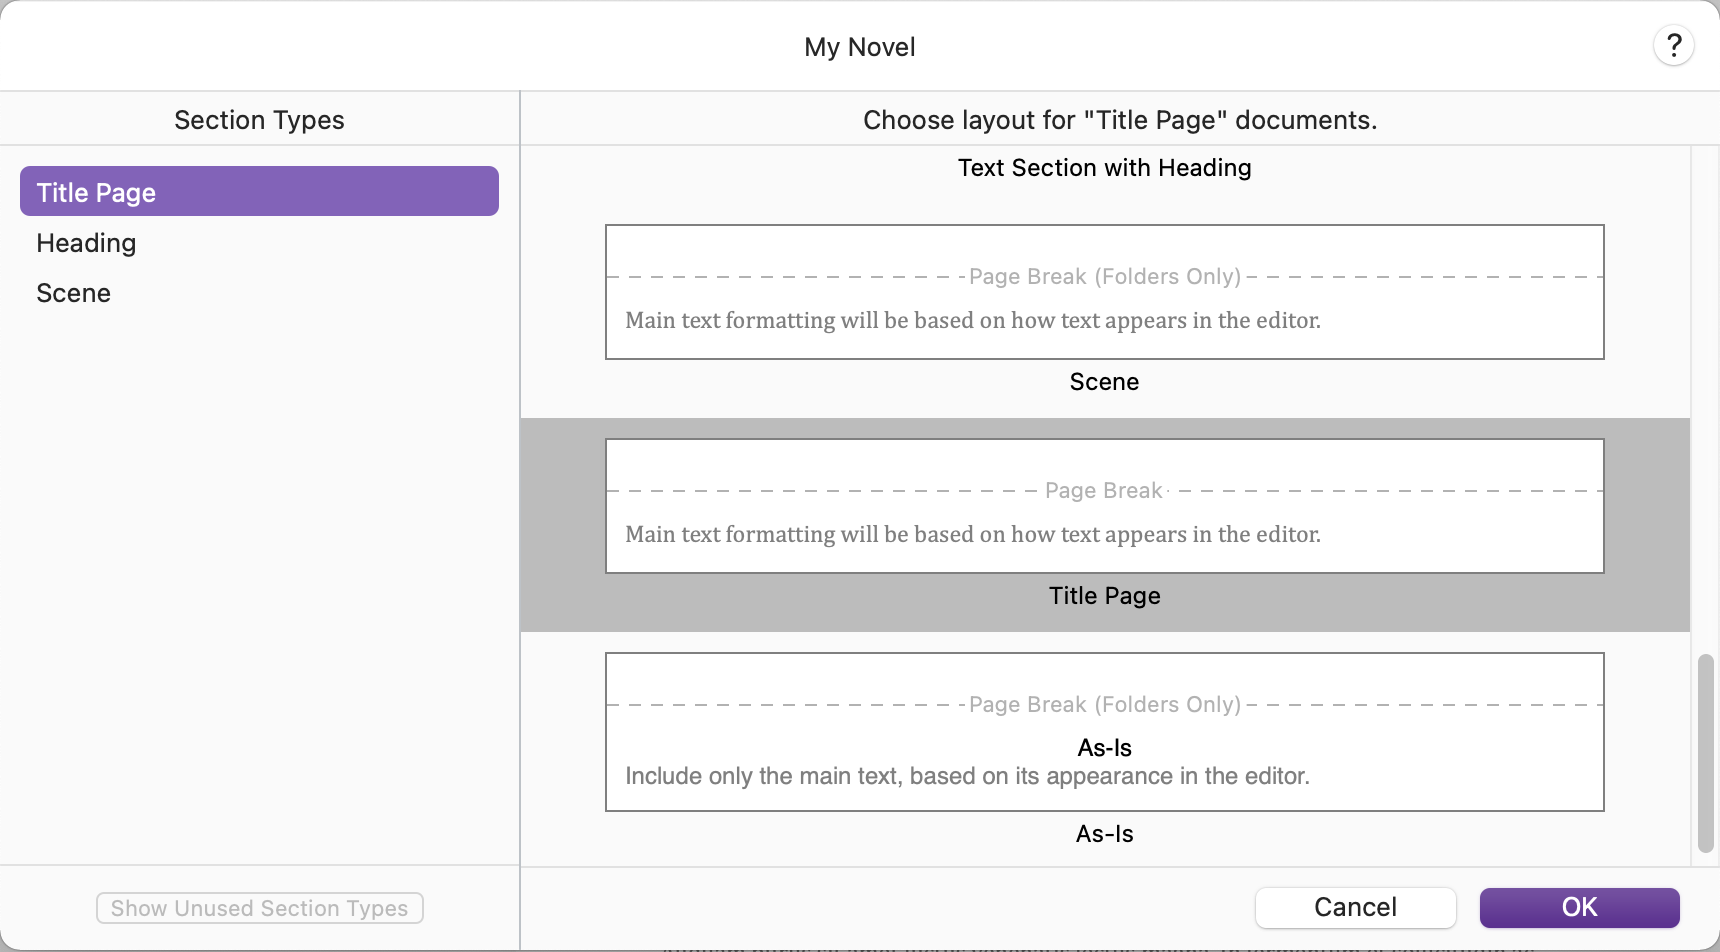 Now we simply connect the section names that we created in the project settings to the section layouts that we created in the compile format designer.
The title page section will be compiled with the “Title Page” layout, the heading sections with the “New Page Chapter Title” layout, and the scene sections with the “Scene” layout.
That’s it.
Output File Format
At the top, choose the file format that you want to compile to, in my case I will output this as a pdf, and then click “compile”.
And when that opens we see that this compiles exactly the way we wanted.
We have the title page, followed by a page break, then we have the chapter title with a number, followed by an empty space and the scene, then after this scene we have another page break where our new chapter begins, this time it gets assigned number “2”, again, followed by the scene text.
And this is basically how the compiler works. Of course you can make a lot more sophisticated things with it but I wanted to give you one walkthrough through all the necessary elements that you need so you can see how they work together and where you can roughly find which kinds of settings.
If you want to know more about certain detailed aspects of the compiler, check out other videos that go into more detail about certain functions.
Scrivener’s compiler is a very powerful tool that lets you take advantage of its versatility and once you have understood the broad strokes, you’ve made great advances towards really diving deeper into it and mastering the compiler to help you produce professional looking documents with ease.