How To Manage Default And Custom Compile Formats In Scrivener
Scrivener Compile Formats
In this article we will look at what compile formats are in Scrivener and how you can customize them.
For the sake of demonstration, I am working in the novel template here, so if you are following along with another template, no problem, you can do that, just be aware that the compiler settings and compile format names will most probably be different if you work with another template.
But the principles are always the same.
Alright, let’s look at compile formats.
Default compile Formats
If you open up the compiler by going to “File – Compile” you see the compile formats on the left side of the compiler window.
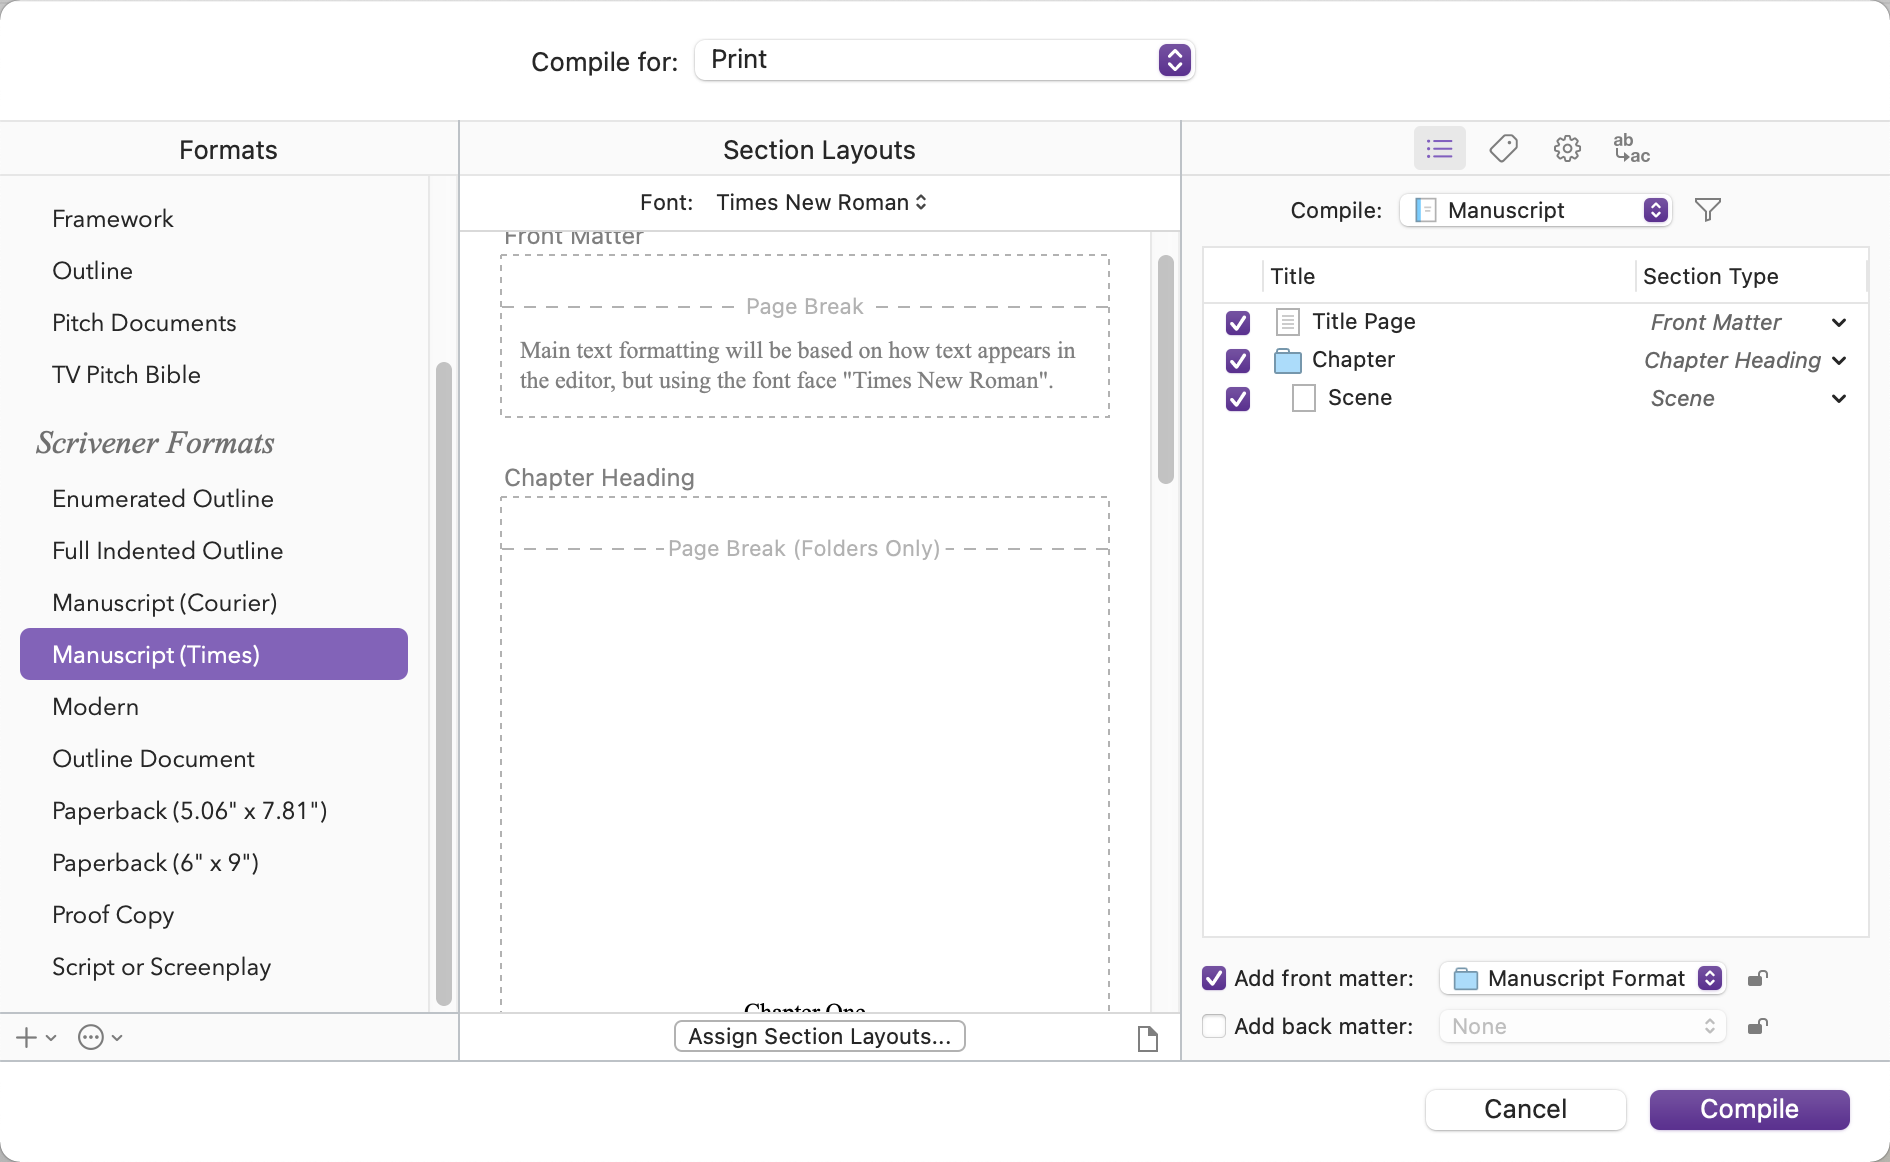 These are the saved compile formats that you can use to create an output of your work with the compiler.
These formats hold all the necessary settings to turn your draft, or another part of your Scrivener project into an output file the way it is defined in this compile format.
We will have a closer look at them in a second, so you will get a better understanding of what they do.
If you have read the article about Scrivener’s default compile formats, you might have already used some of these.
The default compile formats are the ones that are grouped together here under where it says “Scrivener Formats”.
These, and the “Default” format up top are the ready-made, built-in Scrivener compile formats that you can instantly use.
You see that there is a selection of compile formats that will probably be useful to you. You can compile outlines, articles, your novel, your screenplay, etc.
So, for many writers, there might be a useful default compile format already there.
But what if you want to change that a little bit, or, you have a different need and want to create your own compile format from scratch.
Well, you can do that.
Customize compile Formats
The easiest way to create your own compile format is to duplicate one of the existing ones and just change the necessary settings to get the result that you want.
To do that you select one of the built-in formats under “Scrivener Formats”, and now you can either double-click it, … double-clicking usually gets you to the settings of this compile format but since this is a default one Scrivener doesn’t let you overwrite it but instead asks you if you want to create a duplicate copy.
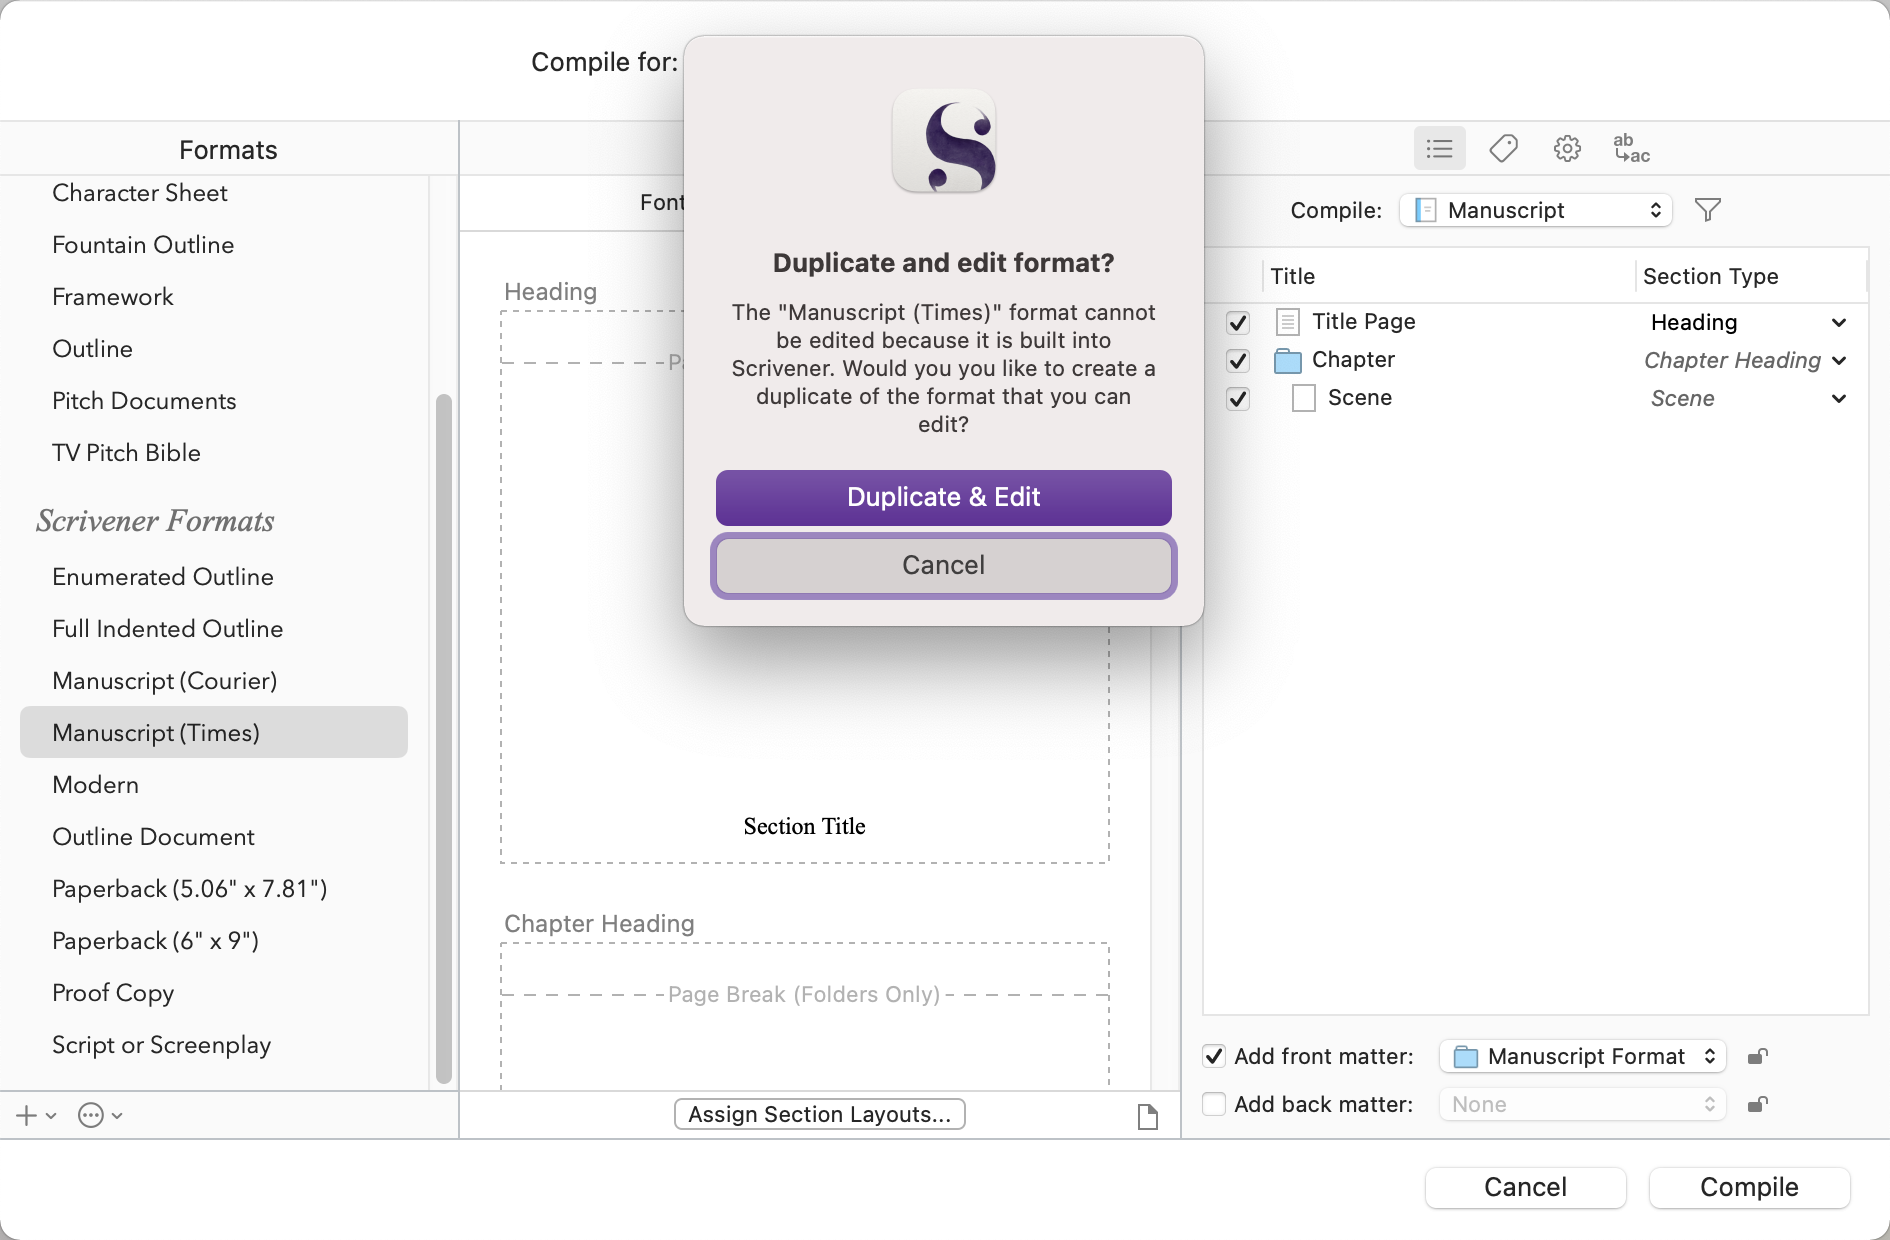 Another way to do it is, with the default format that you want to duplicate, selected, go to the bottom left of the window, click the “plus” button there and choose “Duplicate & Edit Format”. You see that you could also choose a completely new format here.
So, choose the option that you like most, and then the compile format designer opens up.
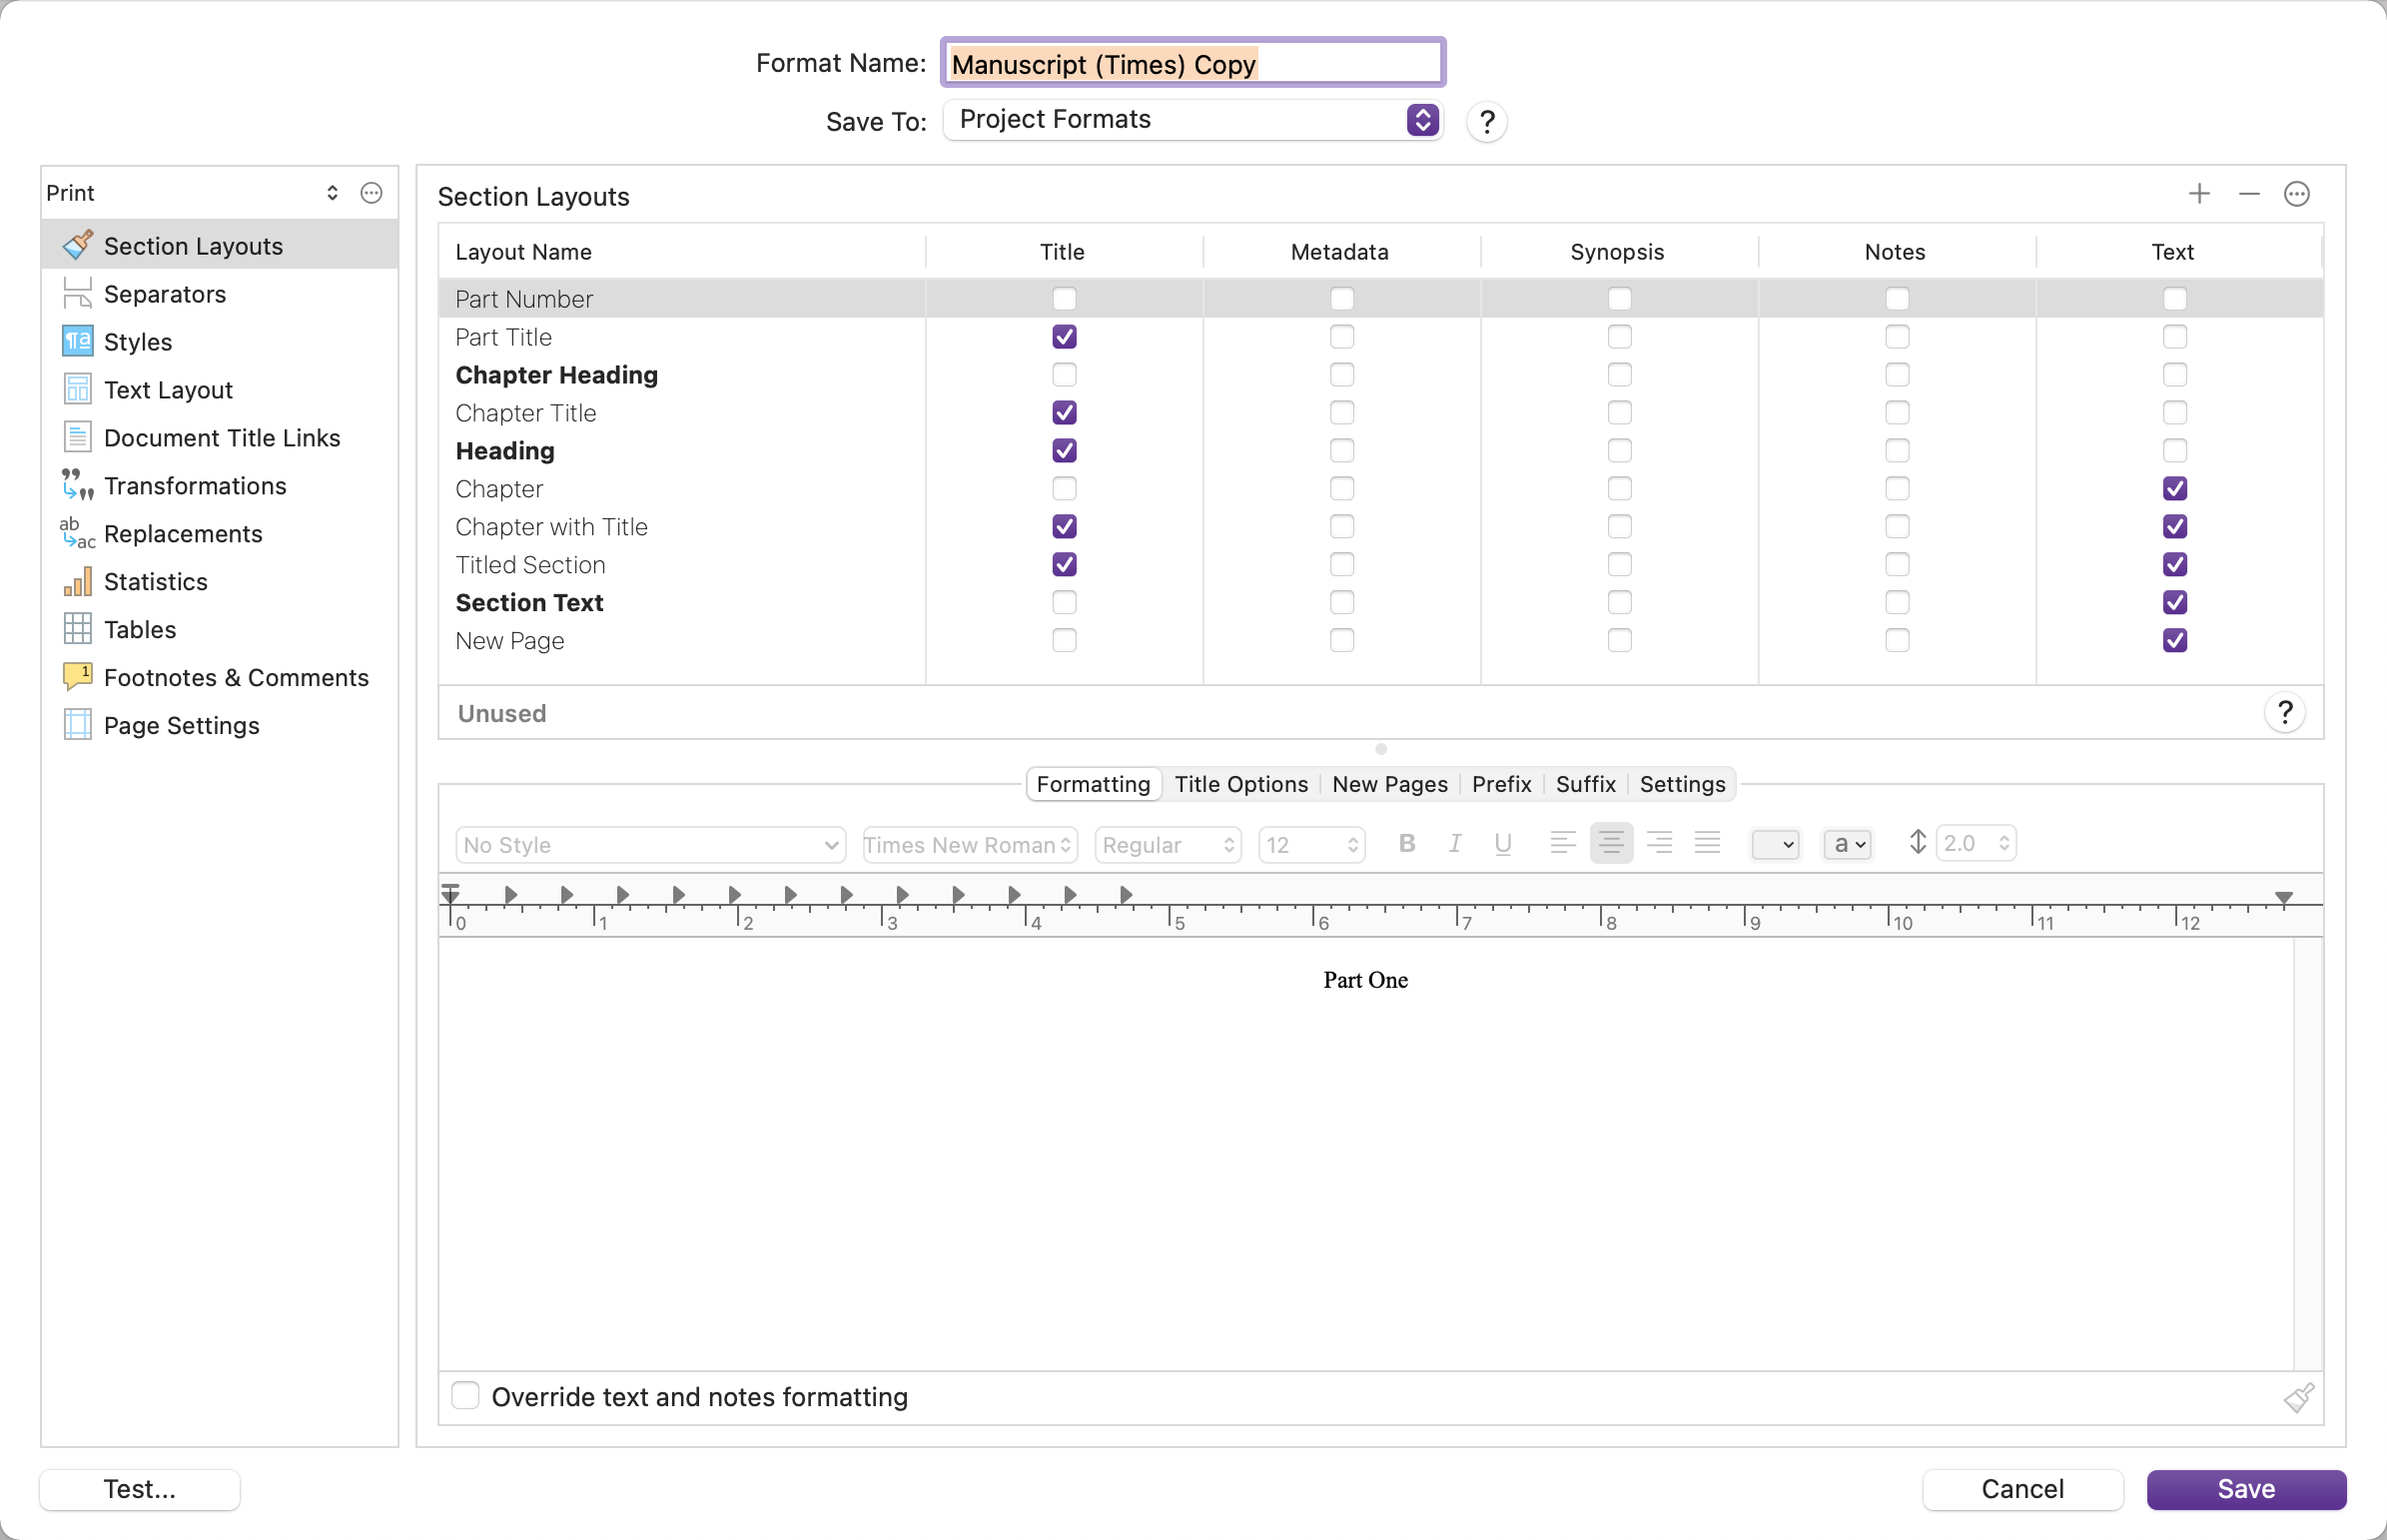 Now, this compile format designer might be a bit daunting at first. And that’s okay. Because in here, you can define all the settings that make up your compile format. So, there’s a lot you can do here.
But don’t worry, we’ll take this step by step. In this article we will only focus on how to manage your compile formats, and we will look at the detailed functions of this compile format designer bit by bit in other articles.
Okay, just to give you an overview…
Up top you can name your compile format. Give it a useful name, so if you don’t use it for a while you will still know what it does.
Then, below the name, you have two options, where it says “Save to”.
You can choose between “My Formats” and “Project Formats”.
This defines where this compile format that we have just created is going to be saved.
If we leave the compile format designer for a second and take a look at the compile formats that we have here, you see that there is a “My Format” section. All the formats in “My Formats” are the compile formats that you created, and that are accessible in all your Scrivener projects.
You also see that right now I have no “Project Formats” section. The “Project Formats” section is for custom crated compile formats that are only saved in this project and are not accessible in other project.
For example, I have another Scrivener project where I write my blog posts, and I need to export them to html to get them into my WordPress quickly. But that is a very special use case that I only need in that blog project, and not in every Scrivener project. So I have it in my blog project under “Project Formats”, and not under “My Formats”.
So, back to the compile format designer.
Under “Save to” choose the option that is best for your situation. “My Formats” are accessible in all projects, “Project Formats” are only accessible in this project.
Alright.
So, for now we just give it a name and save this under “Project Formats” and when we click “Save” you see that Scrivener now created this “Project Formats” section and we have our compile format here.
Now, let’s say, you have a compile format in a project under “Project Formats” but later on you realize that in fact you do need it in another project.
No problem.
If you go down to the 3-dot-menu, you see that you can export and import formats. You can even import presets from Scrivener 2 if you have an older version or if you are working with someone who does.
To export a format just select the format, go to the menu, or right-click on the format and choose “Export Format”. The format will then be saved in a file in the location you specify.
Then, to import that format into another project, just open that project, go to the same menu, choose “Import Formats” and point Scrivener to the file you saved before.
Alright, that is how you manage default and custom compile formats in Scrivener.