How To Set Up Separators In Scrivener’s Compiler
Scrivener Compile: Separators
In this article we will have a look at Separators in the Scrivener compiler.
Separators define what Scrivener will put between two documents that you have in your project in the compile process.
These are quite important because usually you have sections between which you want to have a page break while other documents should be stitched together continuously on the page.
Or, for example, if you’re writing a novel, you might want to have a certian symbol between chapters, things like that.
So, let’s have a look at how this works.
To get to the compiler, go to “File – Compile”. Then, I will duplicate the “Manuscript (Times)” compile format, but of course you can use any compile format that you wish. The working principle of separators in Scrivener is always the same.
When you’re in the compile format designer, go to the second entry on the left, where it says, “Separators”.
In this separators window you see all the section layouts that you have in this compile format. That means, you can set different separator settings for each of these section layouts.
At the top, you also see that you can define default separators for files and folders.
The difference between the default separators and the separators for the section types is just that in the default separator settings you define the separators for all the section layouts that have the “Use Default Separators” checkbox ticked, or, for all documents that don’t have a section layout applied.
We will look into how to apply section layouts in another video, and there you will see that you can apply certain section layouts to documents or, if you don’t want to do that, you can also compile them exactly as they are with no section layout applied.
If we click on one of the section layouts down below, we see that they have a checkbox up top that says, “Use default separators”. So, when this is checked, this section layout will use the default separator settings. If it is unchecked, you can set specific separators for this section layout.
Now, what does that mean what it says here? We have a setting for “Separator before sections”, “after sections”, and then an “override separator after” setting.
To demonstrate what these do, let me refer to the Scrivener Manual, because that shows a very good example of this.
 Let’s suppose we are setting the separator settings for the lavender section. As you can see, for the purpose of this demonstration, the “Separator before sections” is set to “custom” so that is displays the text in the box next to it, which is this “— Before Section —” text with the dashes.
In the picture above you can see that this custom text is inserted before the lavender section starts. The orange section is a different section, so, before the lavender section starts, Scrivener adds what will be defined in “Separator before sections” of the lavender section.
Then, we see that after the first lavender block, there is another lavender block, so, the lavender block is followed by another block of the same section layout. That’s why Scrivener adds this symbol with the three asterisks, or stars, between the first and the second lavender section. This is what is defined as “Separator between sections”. Since we have a lavender section followed by another lavender section, this is the separator for between sections of the same type.
Then, you also see this same symbol within the second lavender block on the blank line. This is because below, in the field where you can add a blank line separator this symbol is filled in.
Now, let’s look at another example to see what the third separator setting does, the “Override separator after” setting.
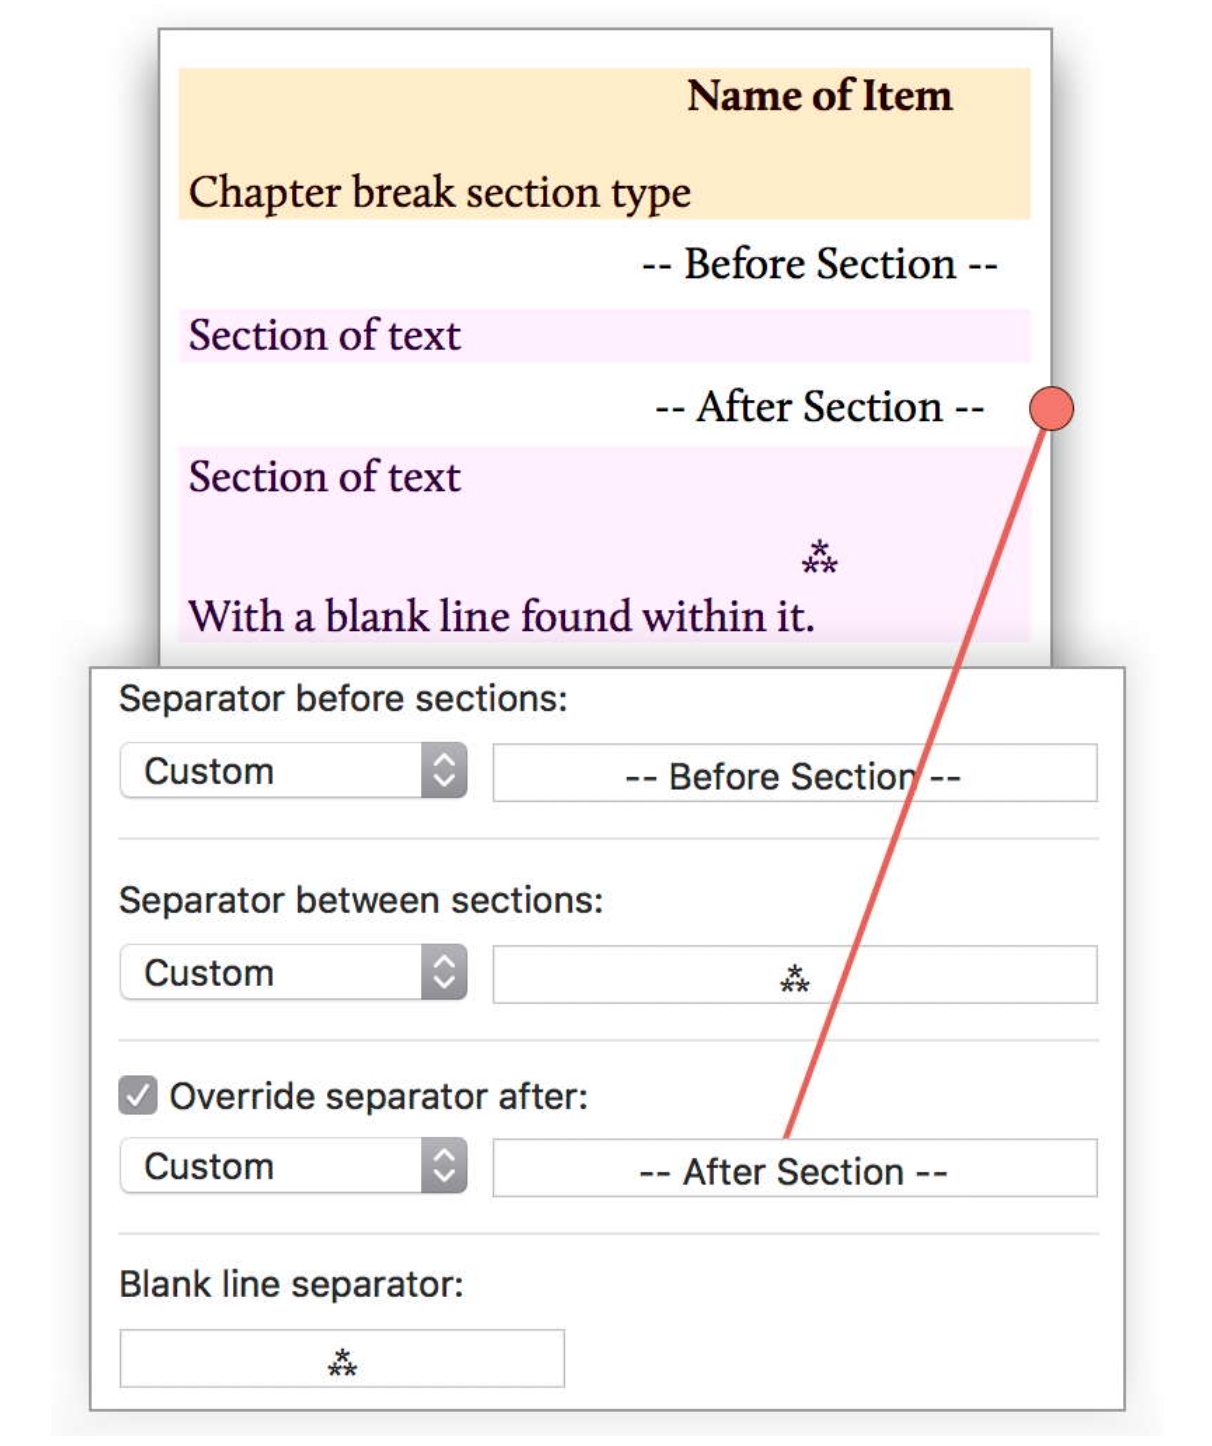 If you check this “Override separator after” box, whatever separator might come after this section layout will be overwritten. According to the “Separator between sections” we should see the three star symbol between the two lavender sections, but since it is overwritten by the “Override separator after” separator, we see this “—After Section—” text that is defined as separator here.
This is useful when you make sure that a certain section layout is followed by a certain separator, no matter what section type comes after it.
Setting Custom Separators
Now, let’s see what kinds of separators we can choose.
If you click on one of those drop-down selections, you see we can choose between “Single Return”, “Empty Line”, “Page Break” and “Custom”.
And if we choose “Custom” we can add whatever we want this separator to be in the field right next to the drop-down.
One more important thing about separators.
Separators settings are only applied in the compile when there is in fact something to separate. What that means is, if you have, for example, a section type separator set to start a new page before this section, and this is the first thing that will be compiled, this page break will not apply because if that section is the first thing that is compiled, there is nothing before that to separate it from. Because it is the beginning of the compile.
Just something to keep in mind.
And then, one last tip, because this can cause some trouble and avoid a lot of manual work.
Let’s say you have set the separators to “Single Return” or to “Blank Line”, but at the end of your text that you wrote in the editor, you sometimes have an additional carriage return, or even a couple of them, and maybe sometimes you don’t.
If you compile your documents that way you will have different separations between these documents, but not because of the separator settings, but because of the text content in your project files.
So, one way to get rid of that would be to go through all the documents and clean up the empty lines at the end, but when you have a lot of documents in your project that would be a bit annoying.
That’s why there is an extra setting that you can switch on that does the work for you.
If you leave the compile format designer and go to the settings in the compiler window (which are in the tab with the cog icon), there you have a “Remove trailing whitespace from documents” option. If you set this, Scrivener will automatically ignore empty space at the end of your documents during the compile so that you have nice and clean separation between them the way they are set up in the separator settings.