How To Use Revision Colors In Highland
Highland Revision Colors
Highland does not come with full-fledged production features as some other screenwriting applications do. It is mainly built for the writing, not so much for the production process.
It does, however, offer you some revision colors, which is quite handy if you are rewriting your script and you want to see immediately where the changes are.
If you want to see what the difference is to other screenwriting packages that have more production features, take a look at the article on how revision colors are used in a production environment.
I mention this just to let you know that Highland’s revision colors feature, although it works in the same way as other revision color features do, it’s not comparable to “real” revision features like they appear for example in Final Draft or Movie Magic Screenwriter.
Alright, let’s look at how you can use revision colors in Highland.
Using Revisions
The principle is very simple, you turn on revisions, and when you do that, the changes are marked up in a color so that you see immediately where they are.
To turn on revisions, go to “Revisions – Revision Mode”. Alternatively you can also click on the asterisk symbol at the right top of the page, and turn revision mode on there.
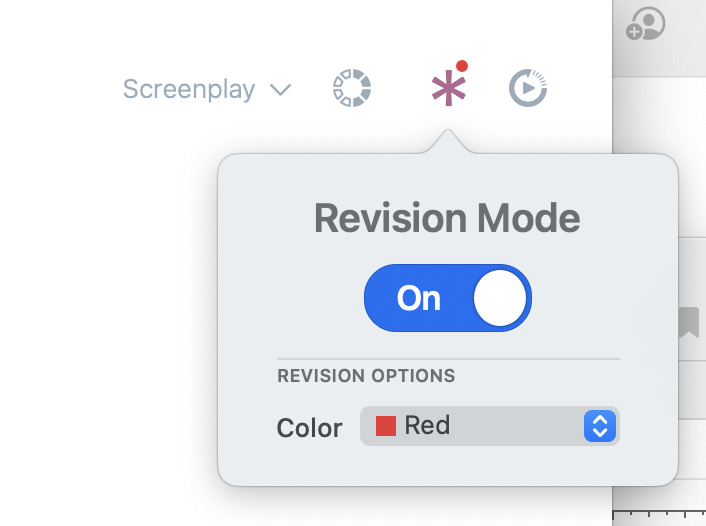 Right beneath the big revision mode switch, you also see the colors that you can choose from. At the time of this recording, they are red, blue, green, or none, in case you don’t want to have your revisions colored.
If you want to choose the color from the menu instead, you go to “Revisions – Revision Color” and choose it there.
If you now add something to your draft, these additions will be marked up in the color of the current revision. The program also marks up the changed line with an asterisk at the right side of the page.
 If you delete a line, you will only see the asterisk at the side, since the original line is gone.
You can also mark up revisions manually, for example, if you forgot to turn on revision mode for changes that you already made, or you just want to see certain parts in your script marked up as revisions for whatever reason.
To do that, just select the parts that you want to be marked, and then go to “Revisions – Mark Revision”.
Removing Revisions
The same goes for removing revisions manually.
Same process, mark up the parts that you want to remove the revision from, and go to “Revisions – Clear Revision”.
In case you want to remove all revisions, you can use “Revisions – Clear All Revisions” for that.
Jump to Revisions
If you have rewritten a whole draft you might have accumulated quite a lot of revisions. To make it easier for you to jump back and forth between them, you can also use the menu, go to “Revisions – Go to Next Revision”. If you need to do that a lot, you might want to remember the shortcut SHIFT – CMD – R.
One more thing about revisions:
If you are in revision mode and you’ve selected a color, you see that color indicated above the asterisk symbol in the upper right corner. So, if you’re not sure if you have selected a color for the current revision, just take a quick look there.